

Call me an entomophobe, but don’t we all hate a bug? And one pesky side-effect of Retool app bugs is the confusion that occurs when a query error message starts popping up around the top of your screen. Unfortunately, depending on the resource, these error messages give failure responses aimed at developers, and not at the technically-spooked, making it difficult for users to report exactly what went wrong.
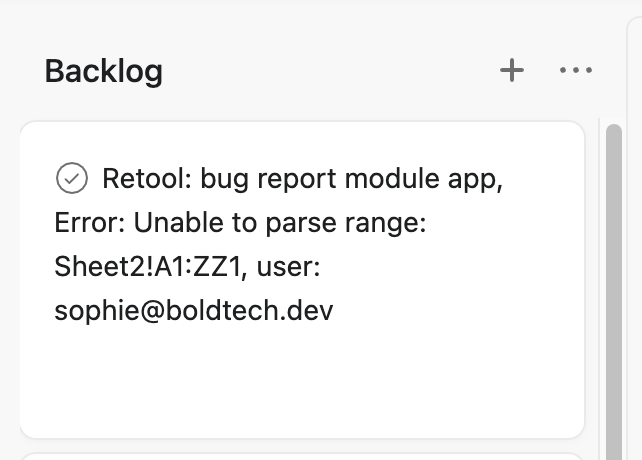
That’s why in this tutorial we will show you how to make a bug reporting modal for your internal tools, which automatically pulls in the payload of a failed query, allows users to augment the error report and provide a narrative of how it happened, and shoots a detailed summary task to your Bug Reporting Tool (such as Asana, or Zendesk), without leaving your Retool Application. This avoids users needing to understand and interpret the message that appears (and very quickly disappears), and helps to stop them from performing this buggy action twice - just to catch a screenshot of the message - and really screw something up.
Keep following for a tutorial on how to create this quick-and-easy integrated bug report modal, but also for some simple Asana integration in Retool.
Setting up your Bug Report
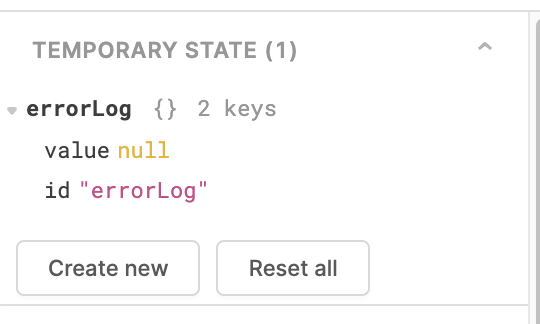
The first thing you’re going to do is create a temp state to house your error data, by clicking ‘Create new’ under ‘Temporary State’ in the left-hand column. This temporary state variable will be initialized by a failed query and house the error payload that is returned by the resource.
Name this something like ‘errorLog’ (you do this in the right-hand ‘Inspect’ column).
Next, we'll perform a single script inside of an event handler to initialize our errorLog and open our error Modal on failure:
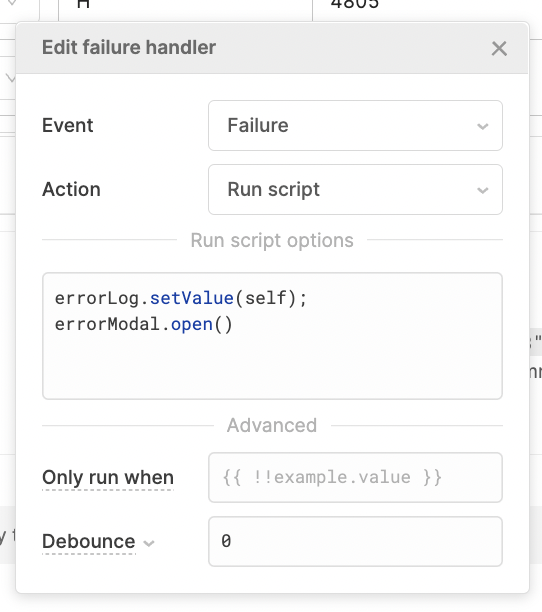
errorLog.setValue(self);errorModal.open()
As you can see here, on failure of this query the modal will open and the temporary state will be set to (self), in this case the resource’s response to the failed query. Test this is working by causing your query to fail on purpose (a quick way is linking to a Google Sheet that doesn’t exist).
You should see an object like this in the temp state:

You are now going to connect this modal to some of the error data in your temp state so that your user can submit a detailed report, and understand a little about what is going on. Insert a modal into your app and set its Hidden status to 'true', so that the modal is only triggered to open by a query failure.
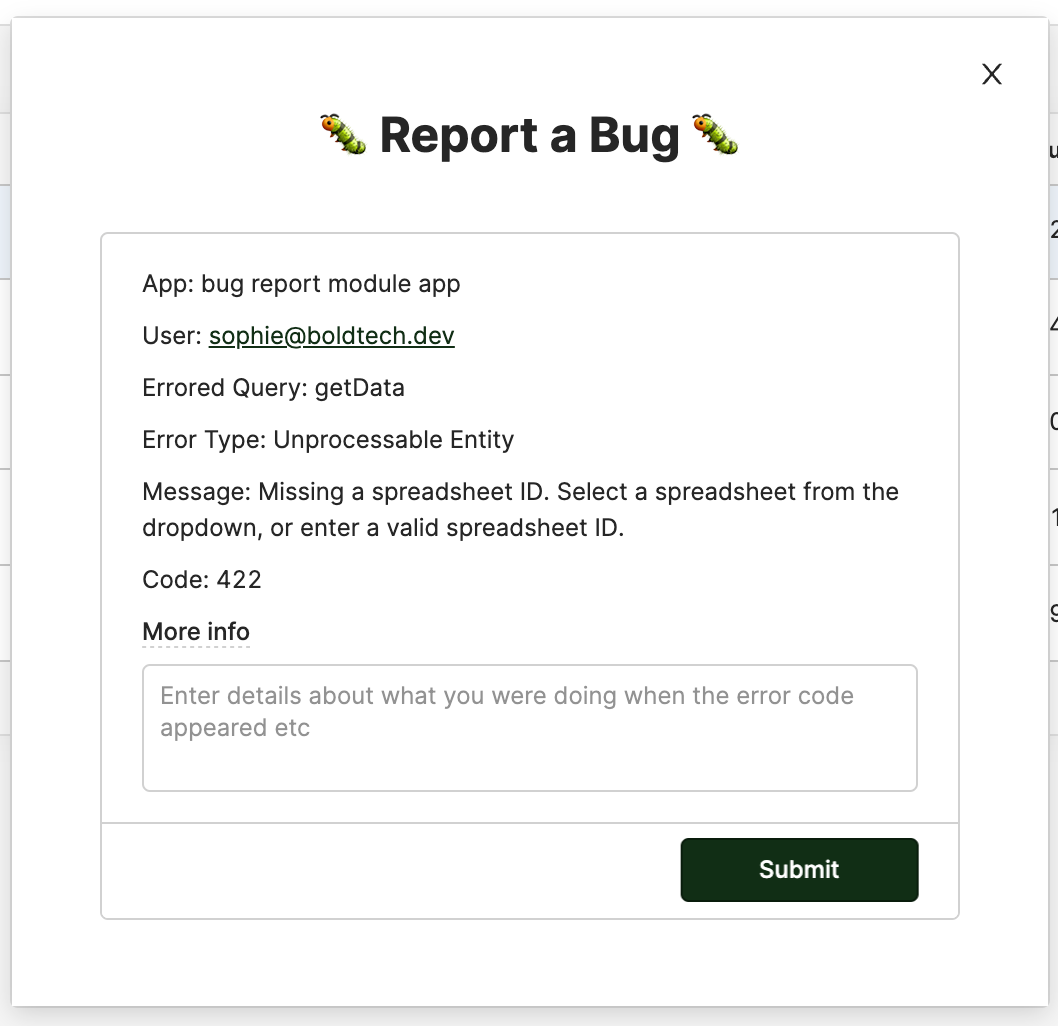
Inside your modal, pull in a text box for the title of the Bug Report, and then add a Form component with another text box for the error information. To include this data, your text component value will look a little like this:
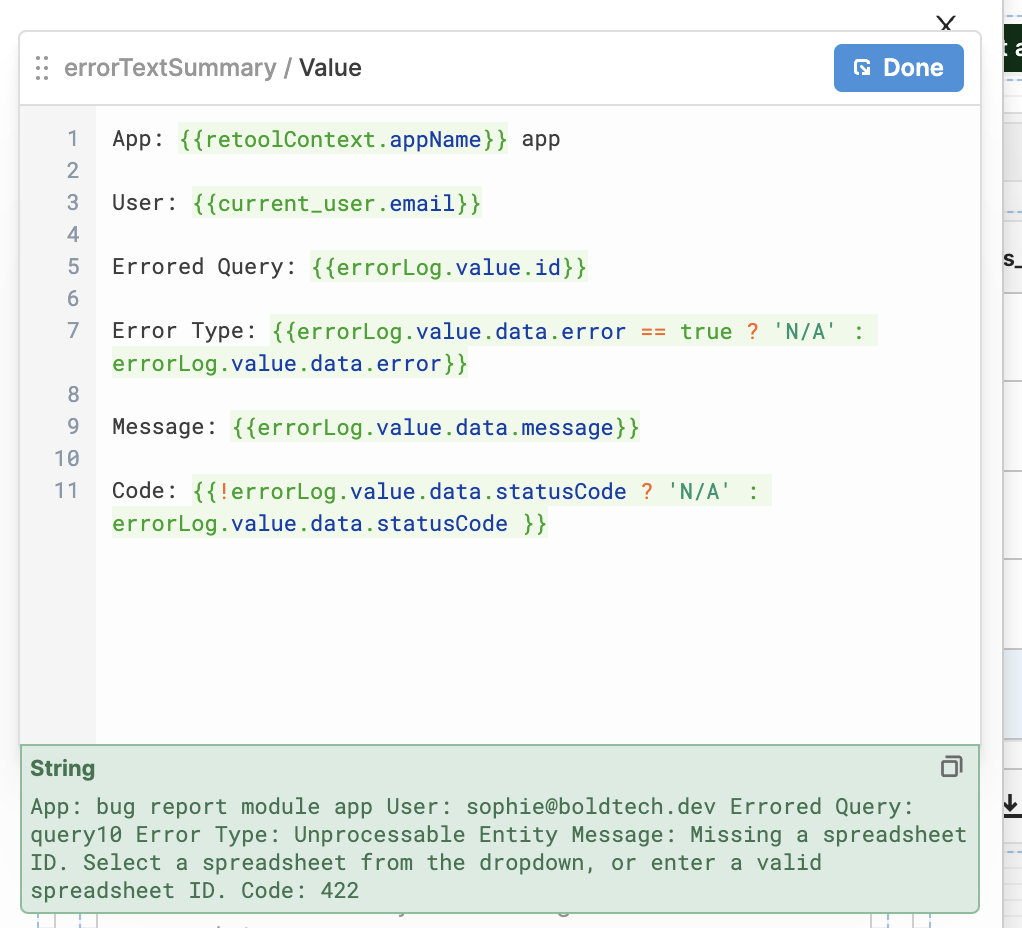
The first bit of code pulls in the name of the app from Retool’s 'Context' attribute. The second line pulls in the current user’s email, so a developer can contact them for more info. The errored query, error type, message and code are all pulling data in from the errorLog temp state, as generated by the query.
App: {{retoolContext.appName}} app
User: {{current_user.email}}
Errored Query: {{errorLog.value.id}}
Error Type: {{errorLog.value.data.error == true ? ‘N/A’ : errorLog.value.data.error}}
Message: {{errorLog.value.data.message}}
Code: {{!errorLog.value.data.statusCode ? 'N/A' : errorLog.value.data.statusCode }}
Below your error information, add a text input area so that users can type in some further details (you should set an explanatory placeholder to aid UX).
This is how it should look when done:
Note that there may be no error type (which sometimes returns the value ‘true’ rather than an explanation) nor error code for certain queries, so for these we used a ternary to return ‘N/A’ instead. It’s best to test these values with all the queries available in your app, as the results in the error log may vary.
Once again, make sure to test this is all working correctly by purposefully failing a (non-critical!) query.
Now, we need to set up the 'Submit' button to send this information to your ticketing system.
Connecting your Retool Bug Modal to your Bug Report Board in Asana
To set up the rest of the bug modal, you’ll need to connect your app to the project where your team reads Bug Reports. We will be using Asana for this tutorial, however a similar pattern will work with Linear, Jira, monday.com, or any other task management system with an API. Since Asana is an integrated resource in Retool, this is super easy.
You can follow along with the Asana side and find more API references in their documentation.
Retool provides extra documentation for Linear, as well as for Jira.
Connecting to Asana
If you don’t have Asana connected already, create a new query and head to ‘Create a new resource’:
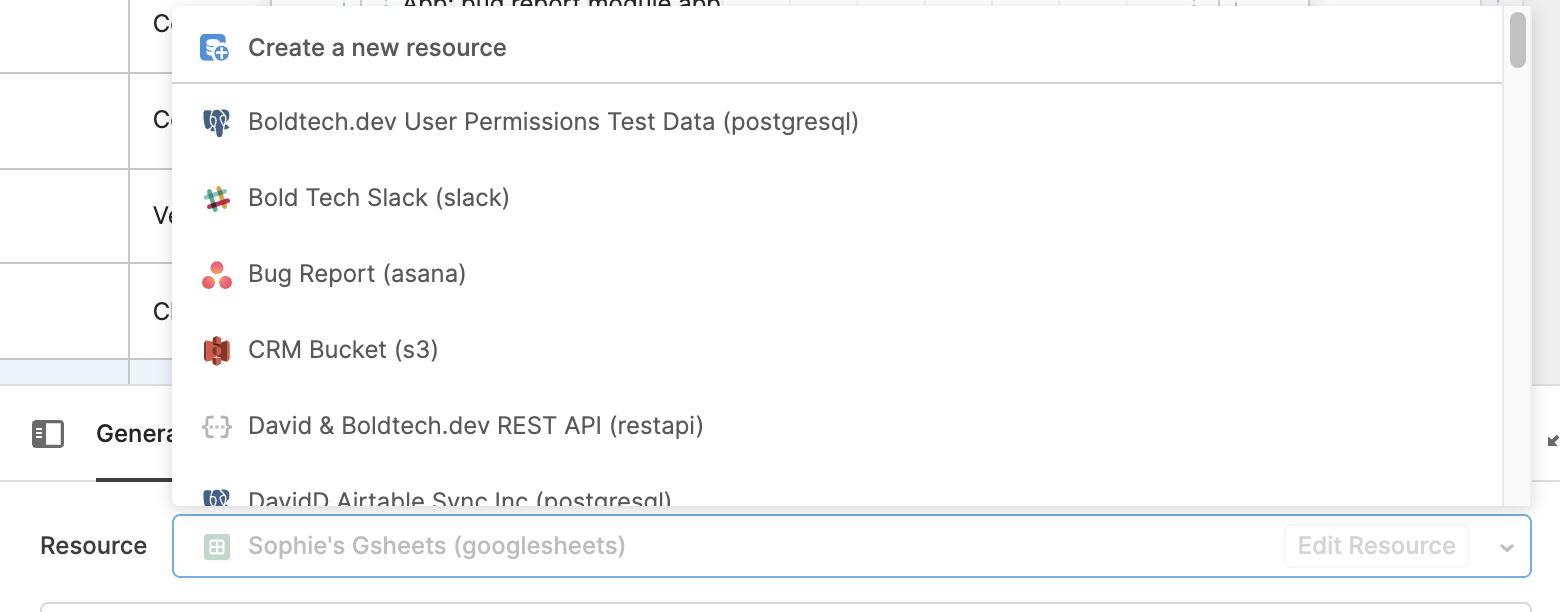
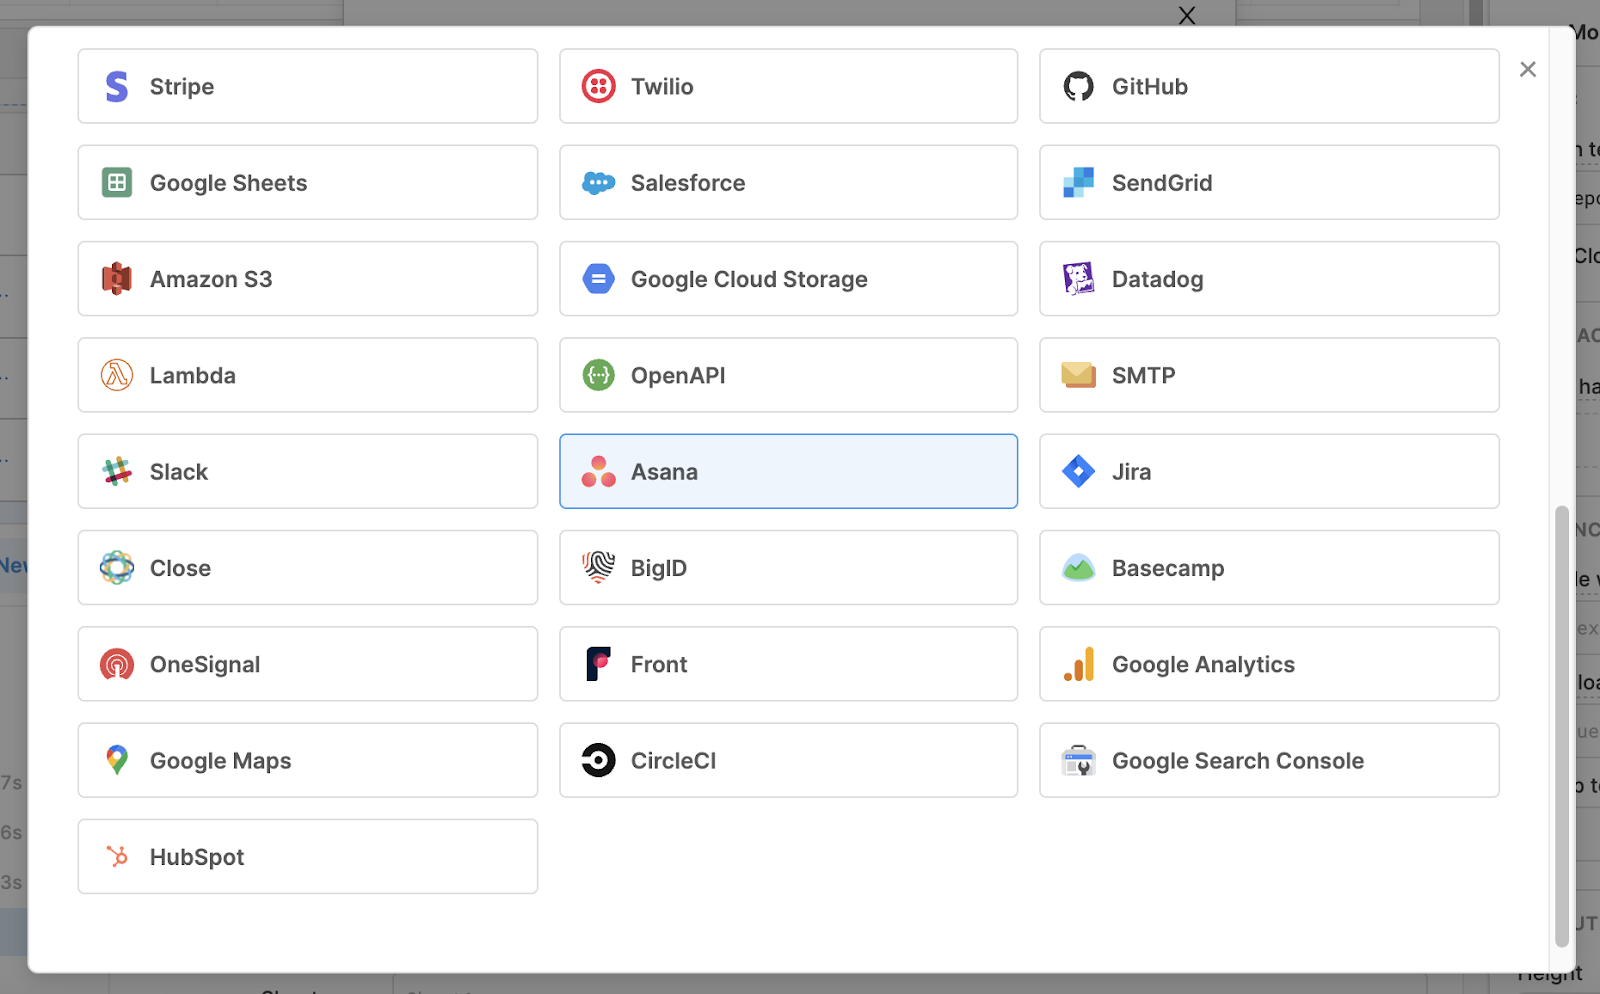
Select Asana from the list,
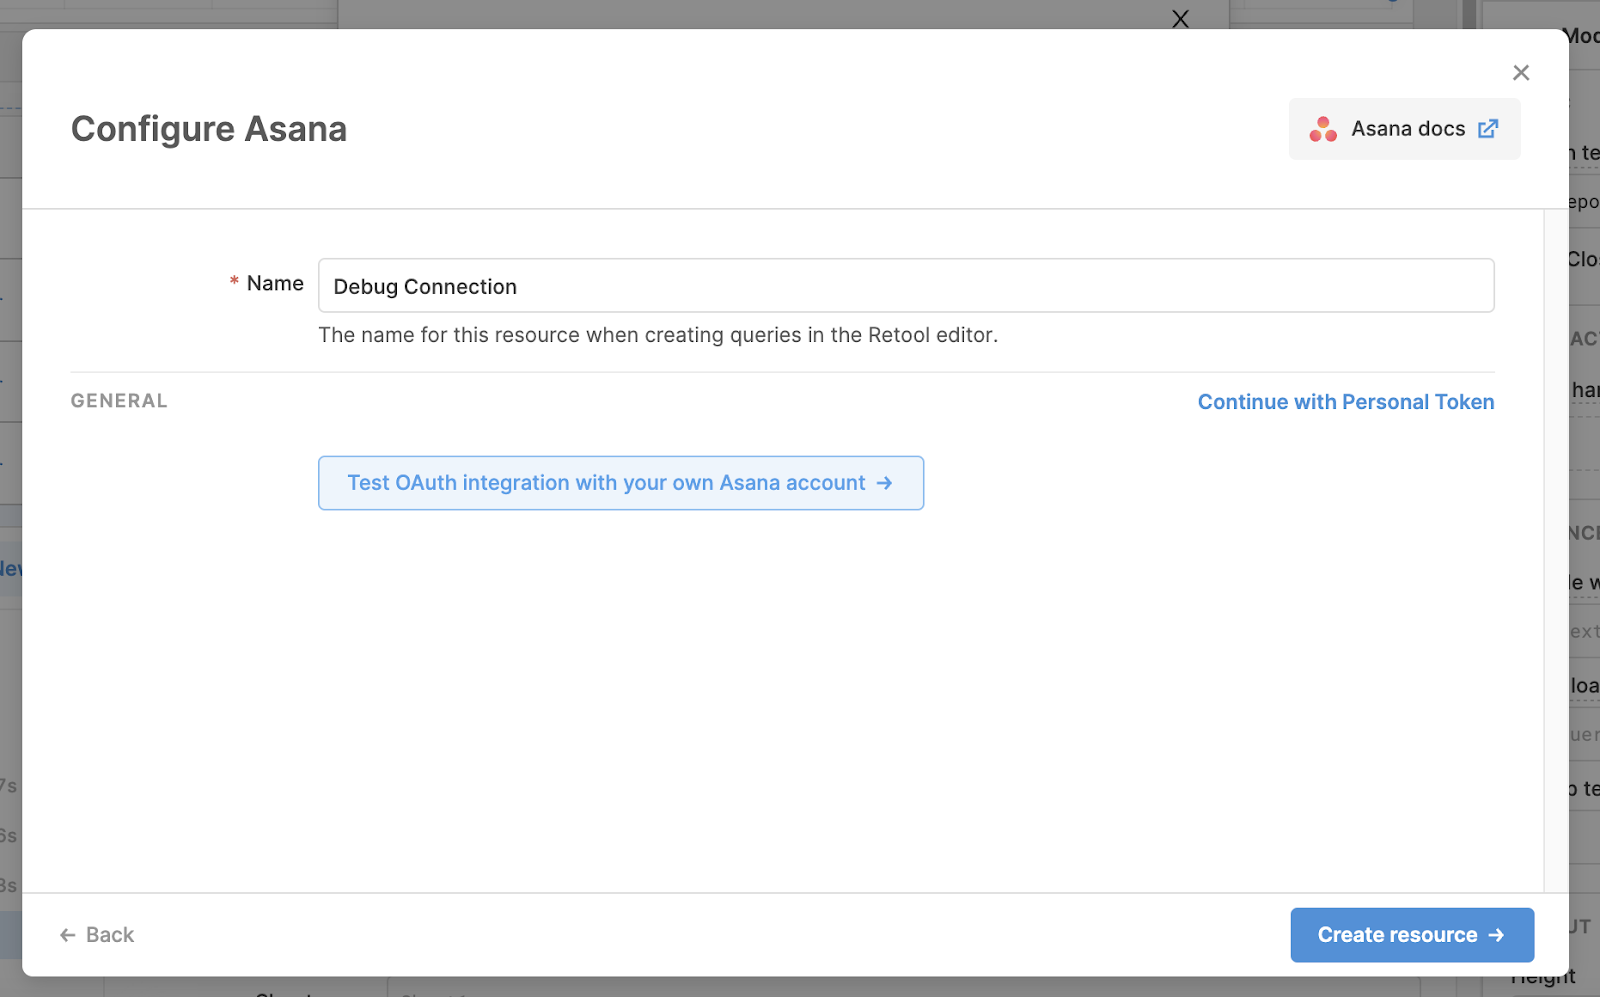
And then all you need to do is give it a name, test your OAuth connection and click Create Resource to log in through Asana.
Once you are logged in, you’ll have access to a list of preset API calls through the ‘operation’ drop-down in your query:

Collecting your Asana Workplace, Project and Section GIDs
To set up this post query, you will need:
- your workplace ID,
- the project ID of the Asana board you’d like to send the bug report to,
- and the ID of the section in this project (if it isn’t the first, left-hand task list).
You can find these in your Asana account, in the URLs of the workspace page/project etc, but another easy way to find them without leaving Retool is using a couple of GET queries to pull this info in, namely:
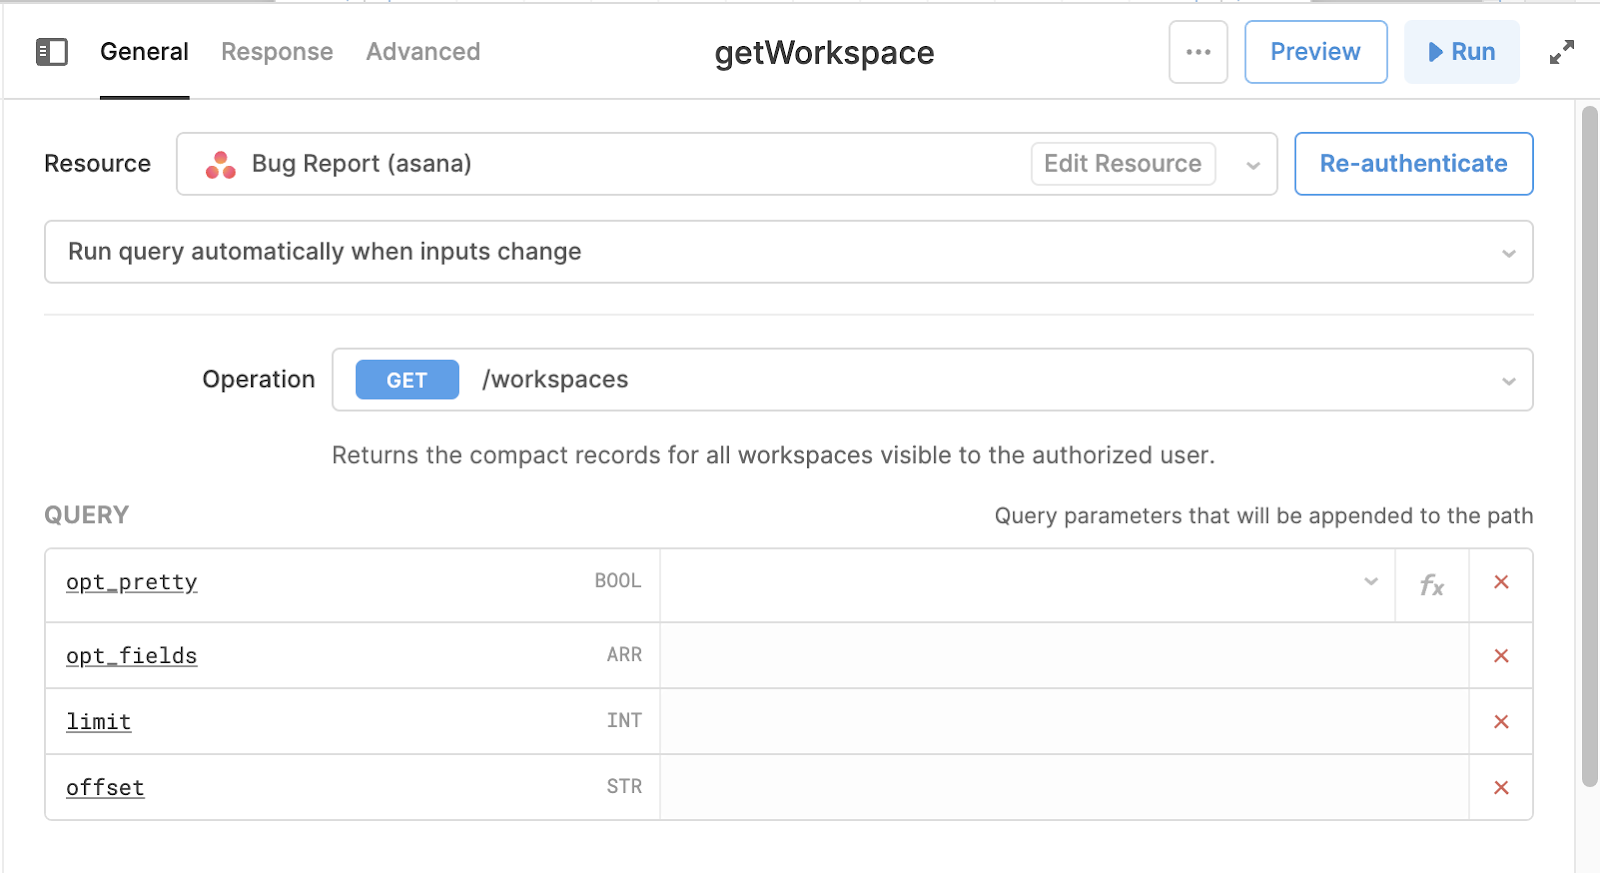
GET/workspaces, which will return your workspace name and gid:
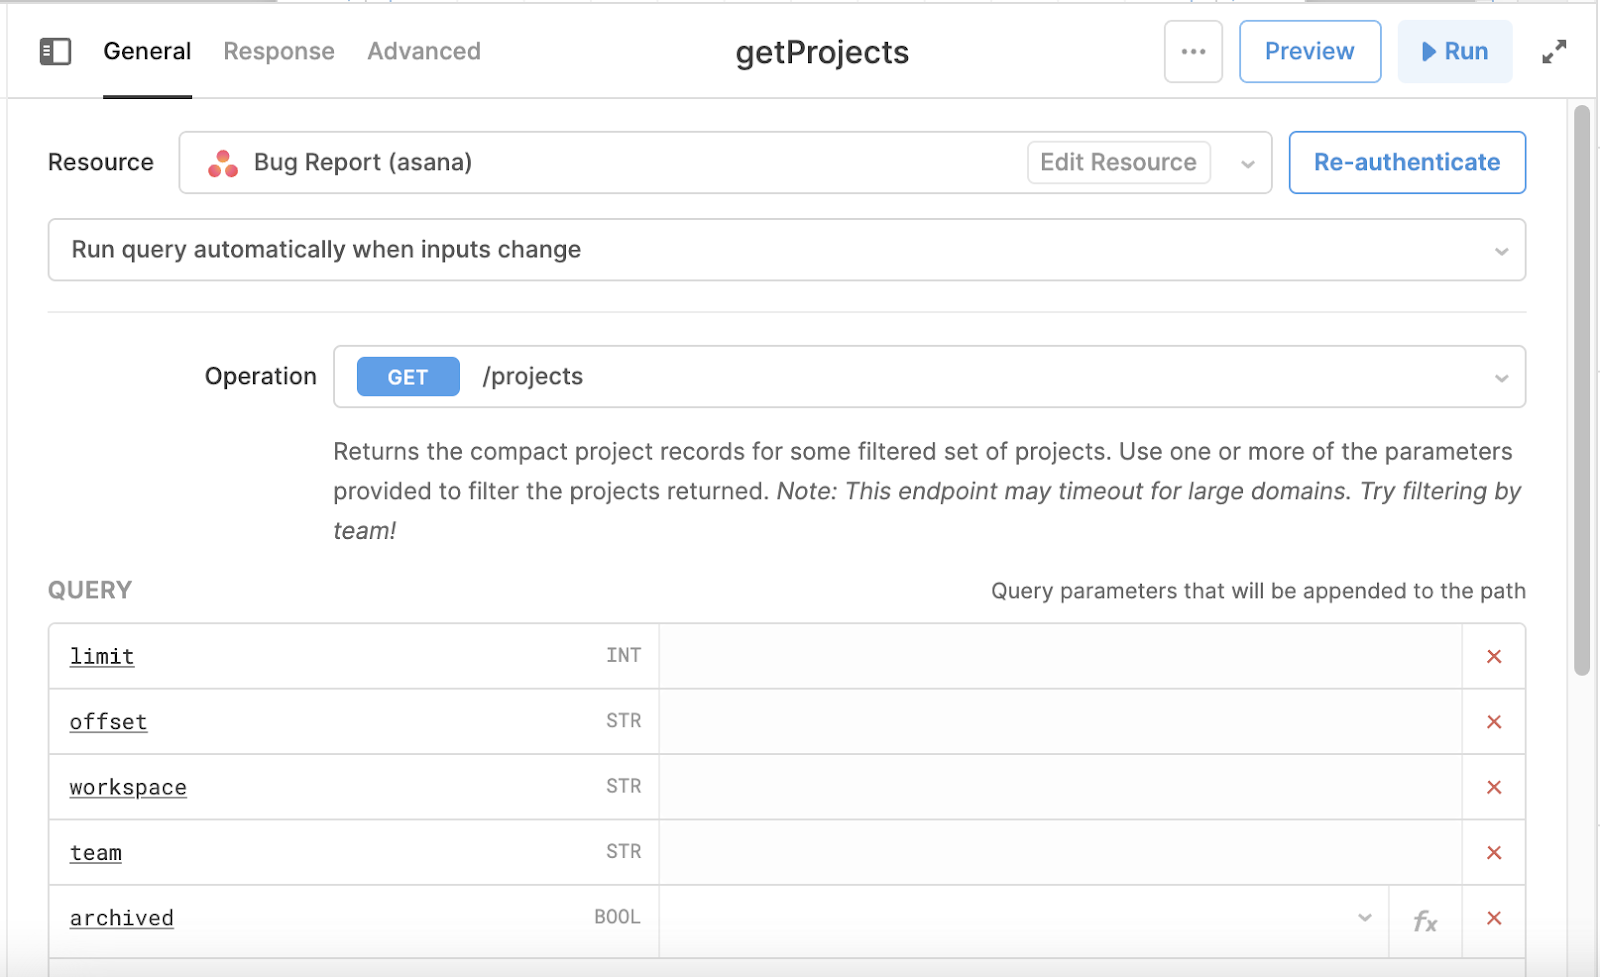
GET/projects, which will return the project names and gids:
And finally GET sections, where you will take the project gid from the previous getProjects query to pull in the sections available on that project (note: this information is harder to find in Asana's platform):
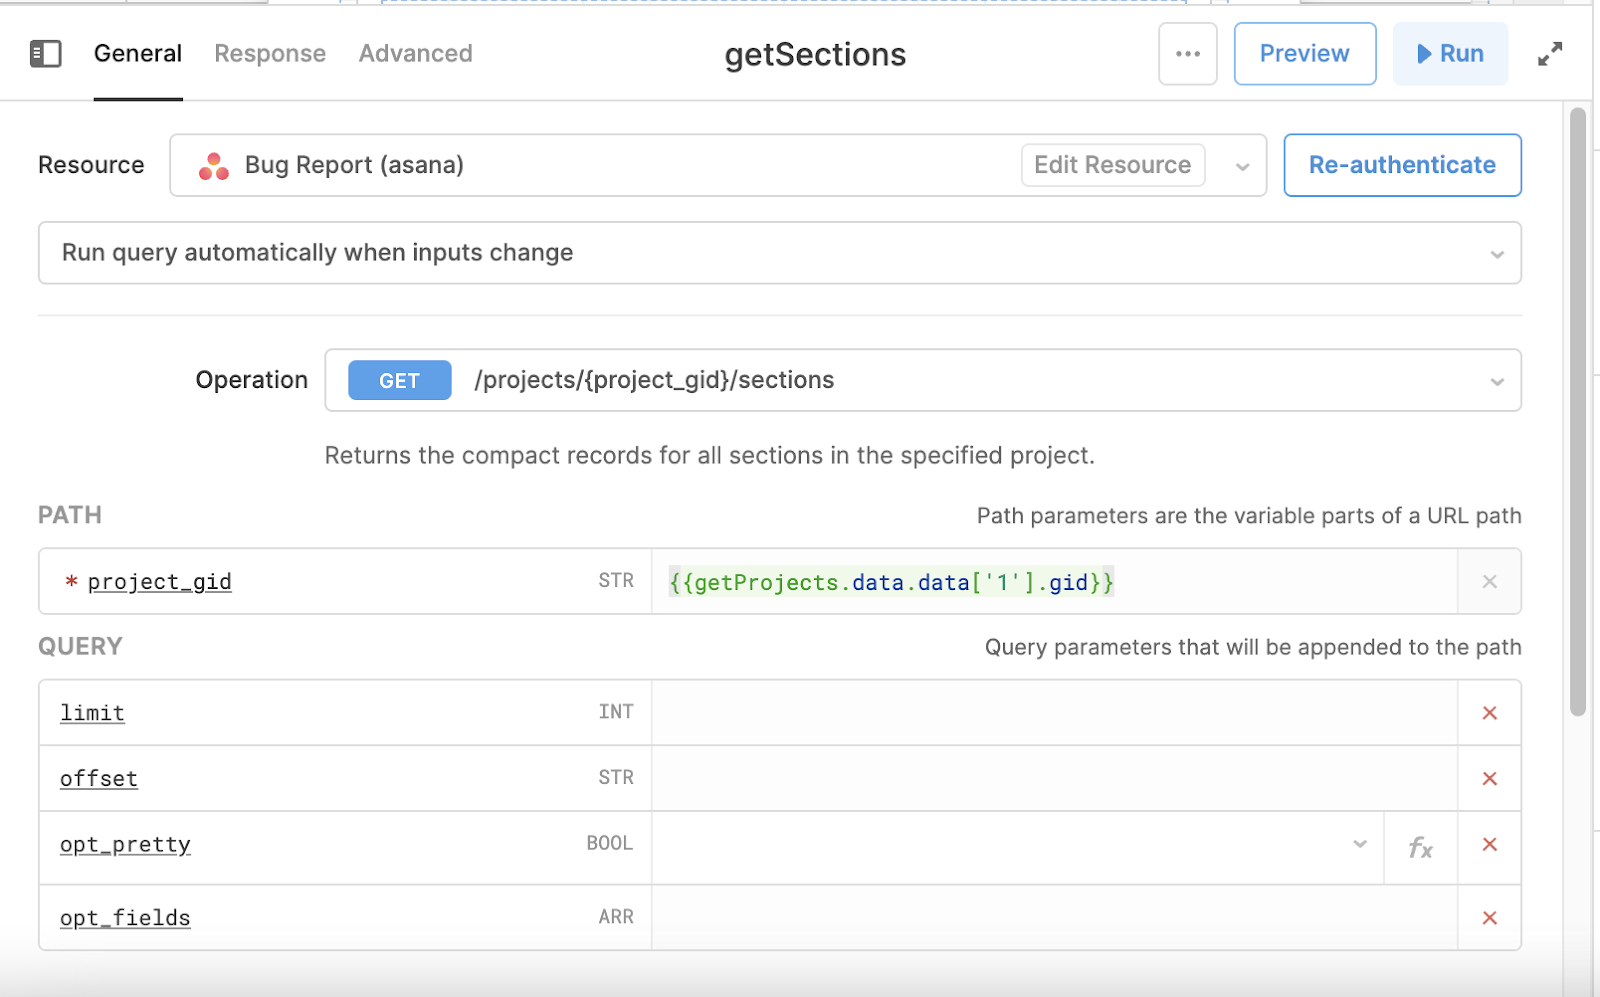
Once you've pulled in these gids, it’s best to copy and paste them for the next queries, rather than referencing the query response, as the reference index number of each project can change depending on the developer using the app.
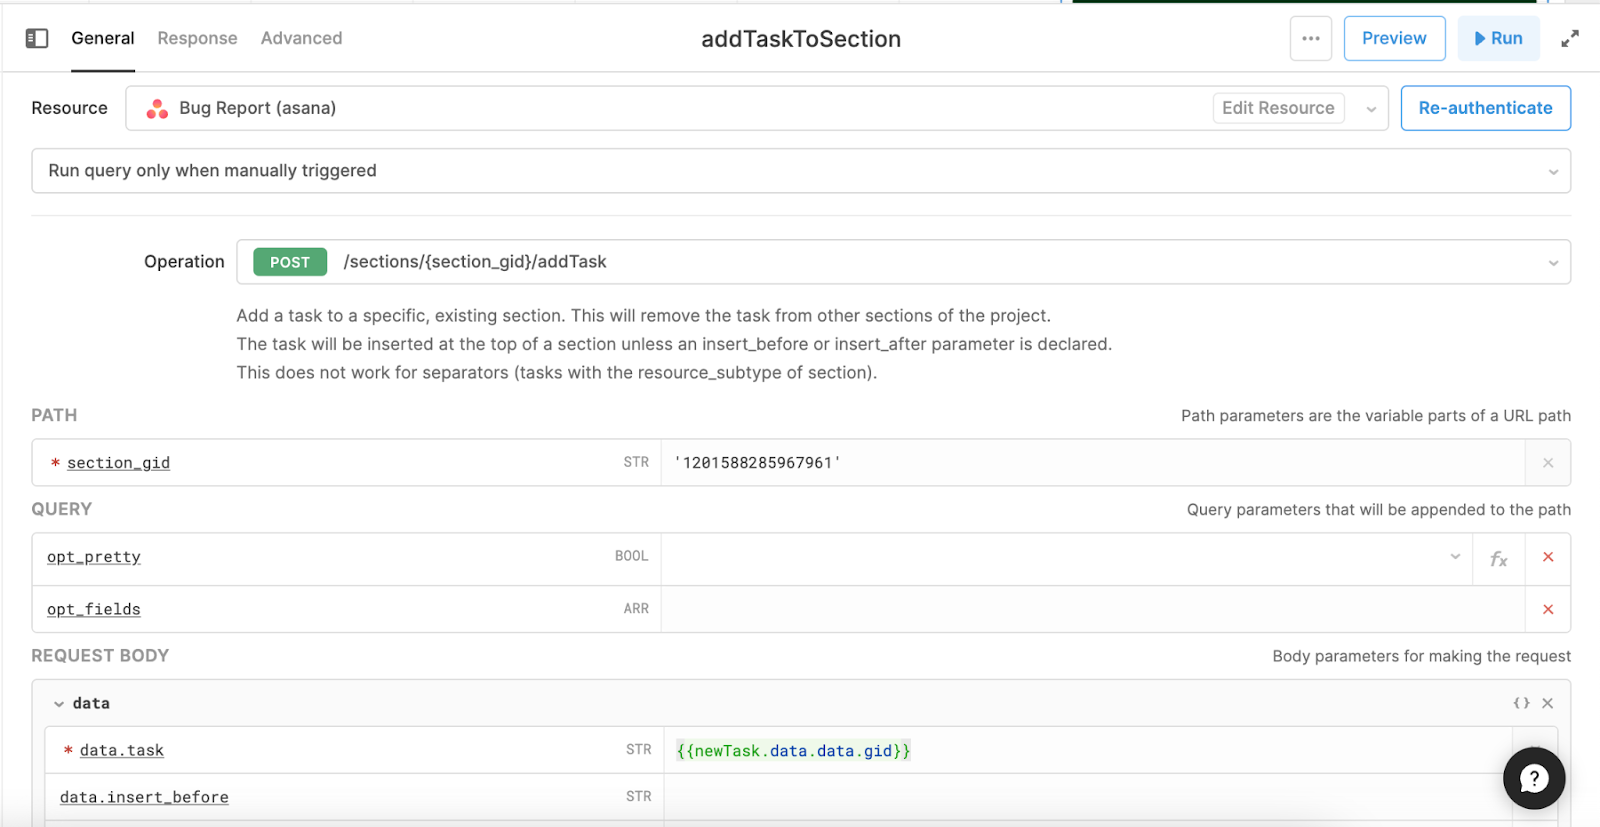
Now that you have all the relevant gids, you can create a POST /tasks query. This will connect to your bug form and send the relevant information to the task board once submitted.
This is how ours looked:
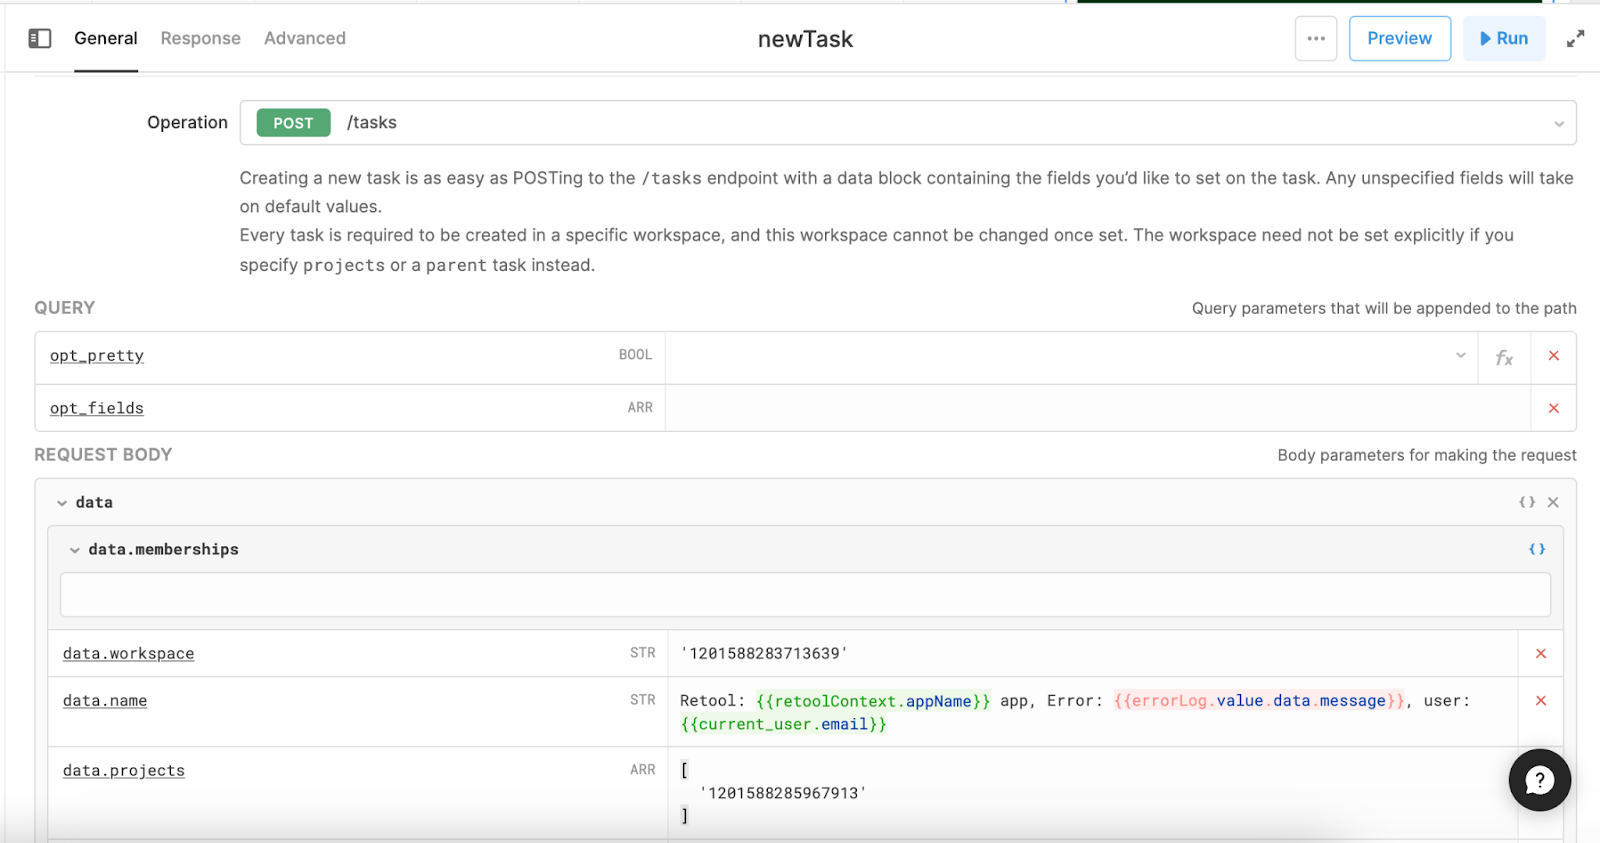
In the data.workspace parameter and in the data.projects parameter, we have inserted the workspace and project gid. Note the project in box brackets as this input requires an array (ARR).
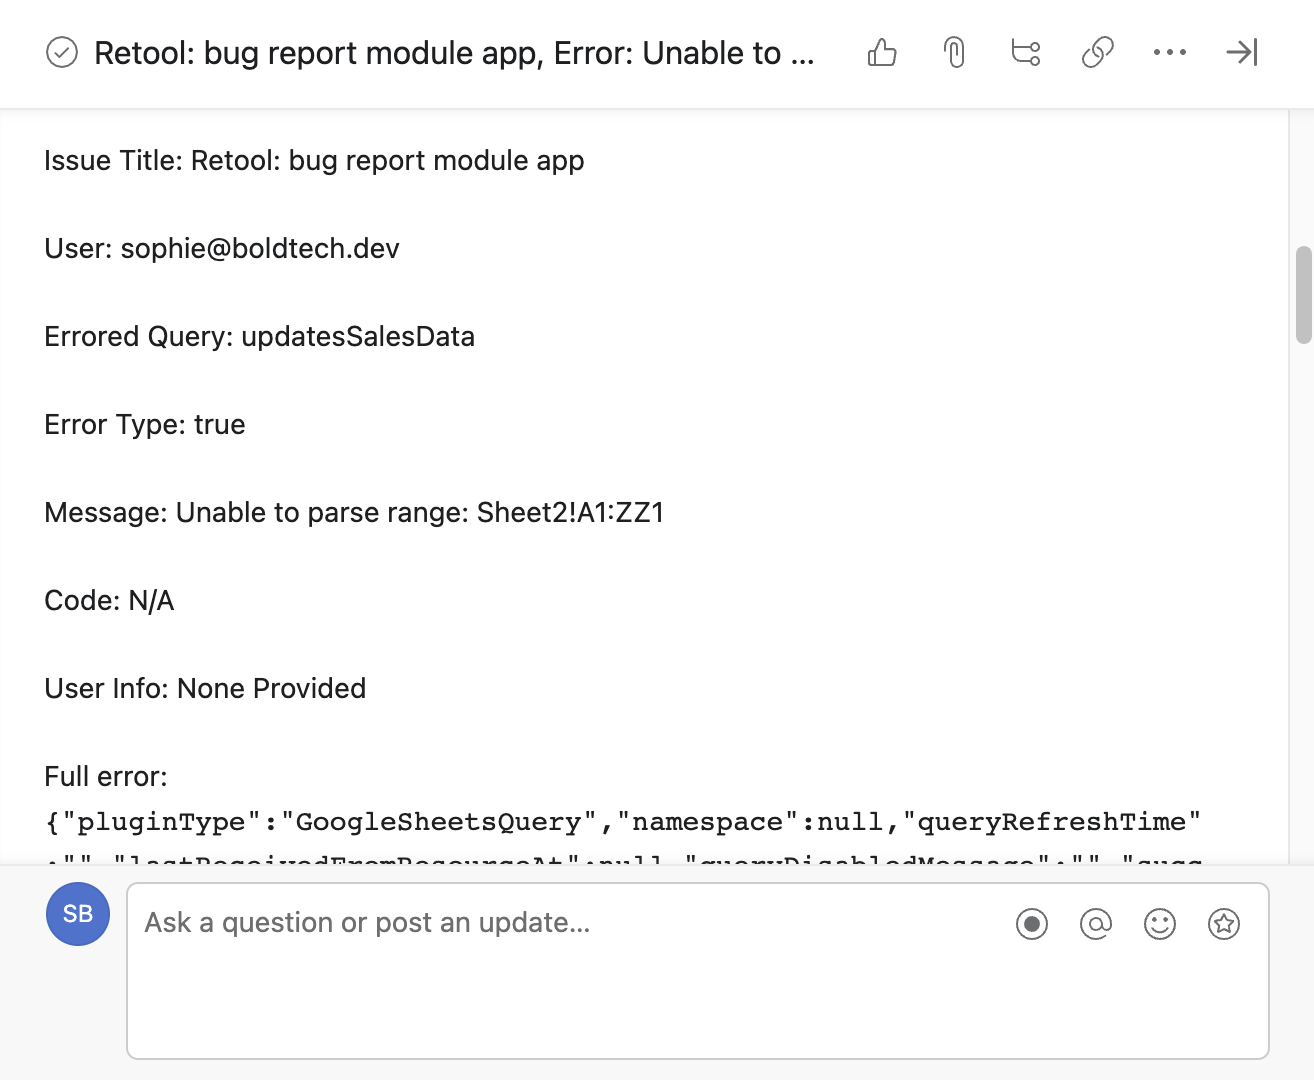
For the data.name parameter, we are setting the name of the task, i.e. the title on the task card. For clarity, as these ‘tasks’ will work as tickets for the developer, we have included the Retool app name, the error message and the current user.
When you run this query, it should post an Asana task like this:
Include the Error Log data in the Asana task description
Now we have our task set up and posting to Asana, we need to include all the data from our error log temp state.
To do this, we are going to add some details into the description of the task, using the data.html_notes parameter. You can either use data.notes or the data.html_notes version: we are opting for html so that we can use <code> to set the errorLog code to be in a code block for clarity.

'<body<{{errorTextSummary.value}}
\nUser Info: {{!textInput3.value ? 'None Provided' : textInput3.value}}
\nFull error:
<code<{{JSON.stringify(errorLog.value)}}</code<</body<'
This html note will include the value of the text box summary we already programmed in our modal {{errorTextSummary.value}}, the user information provided in the text input {{textInput3.value}}, as well as the full error object from the errorLog temp state in a code block, where we used the JSON.stringify() function to parse the object into a string. This means that the developer has as much information as possible to fix the bug.
This is how that task description will look in Asana:
To make things as clear as possible, we also added an ‘assignee’ to the newTask parameters, so that the developer is notified:

Now that our 'newTask' query is fully populated, we need to connect the form Submit button to an event handler that triggers the query. It's a good idea to make sure that the submission button is throttled for around 5 seconds (5000ms) after submit in the click event handler, so that it can only be submitted once while the queries run:
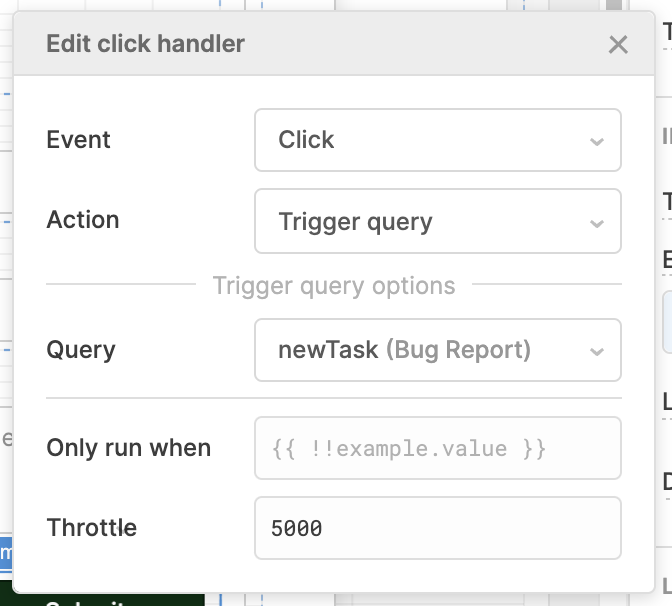
Click handler for the form 'Submit' button
With that, you have a simple bug report being filed quickly to your Asana project as a ticket! Keep following to find out how to connect this to custom fields, set some priority tags and move the task to another section.
Connecting bug report to Asana custom fields
For our final trick, we are going to set the values of some custom fields which are useful in a bug report, in this case ‘Priority’ and ‘Browser’. This part is a little fiddlier, and it’s worth noting that custom fields can only be created on premium versions of Asana. In this case, we used a Bug Report template for our Asana board, where these custom fields were pre-made, but you can learn more about creating them in the Asana documentation.
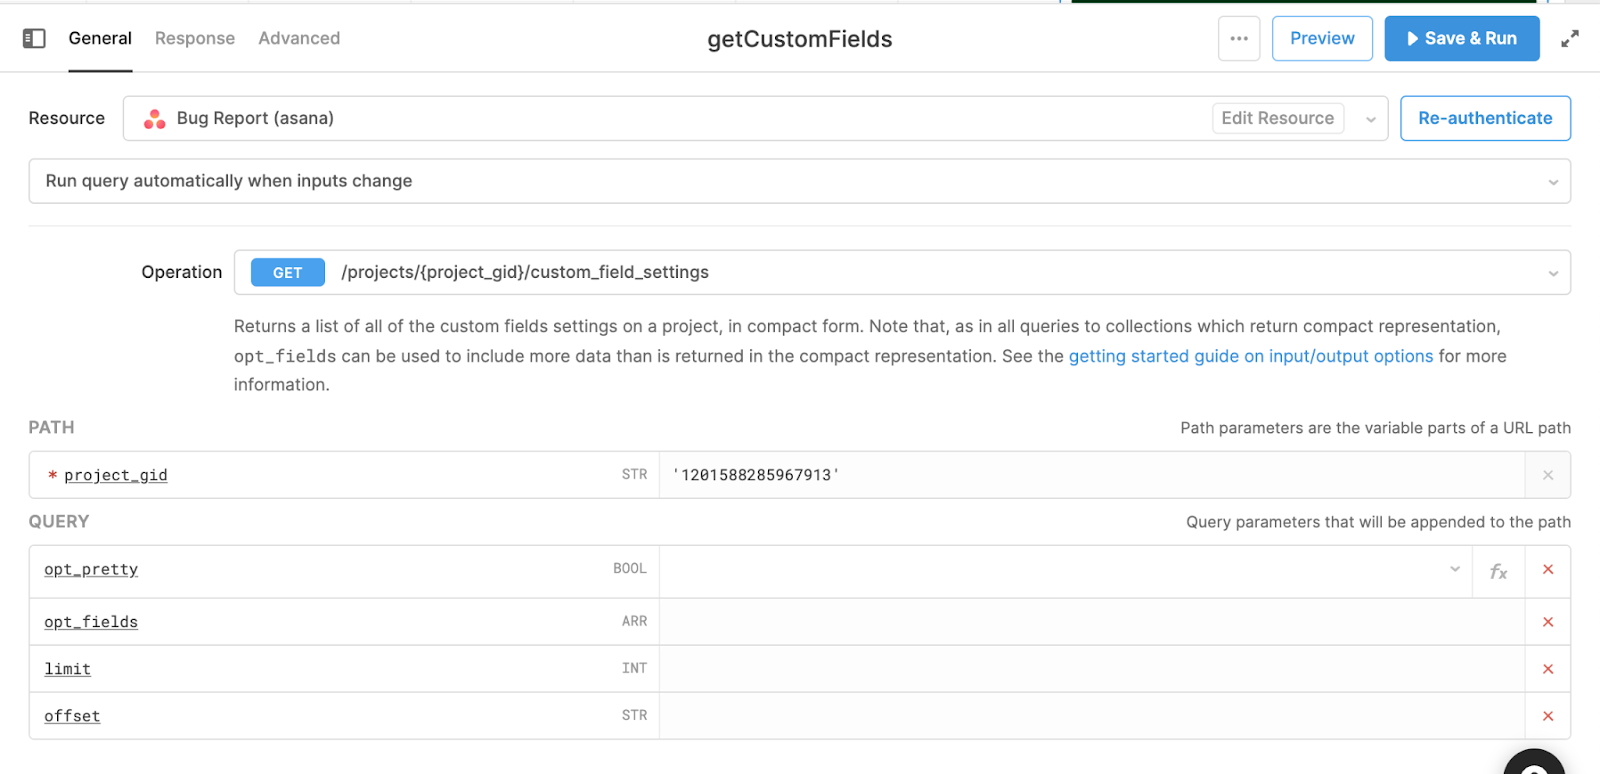
To connect to the custom fields of a workspace, you'll need those gids again. Like we did before, the best way to do this is a GET query to pull them in:
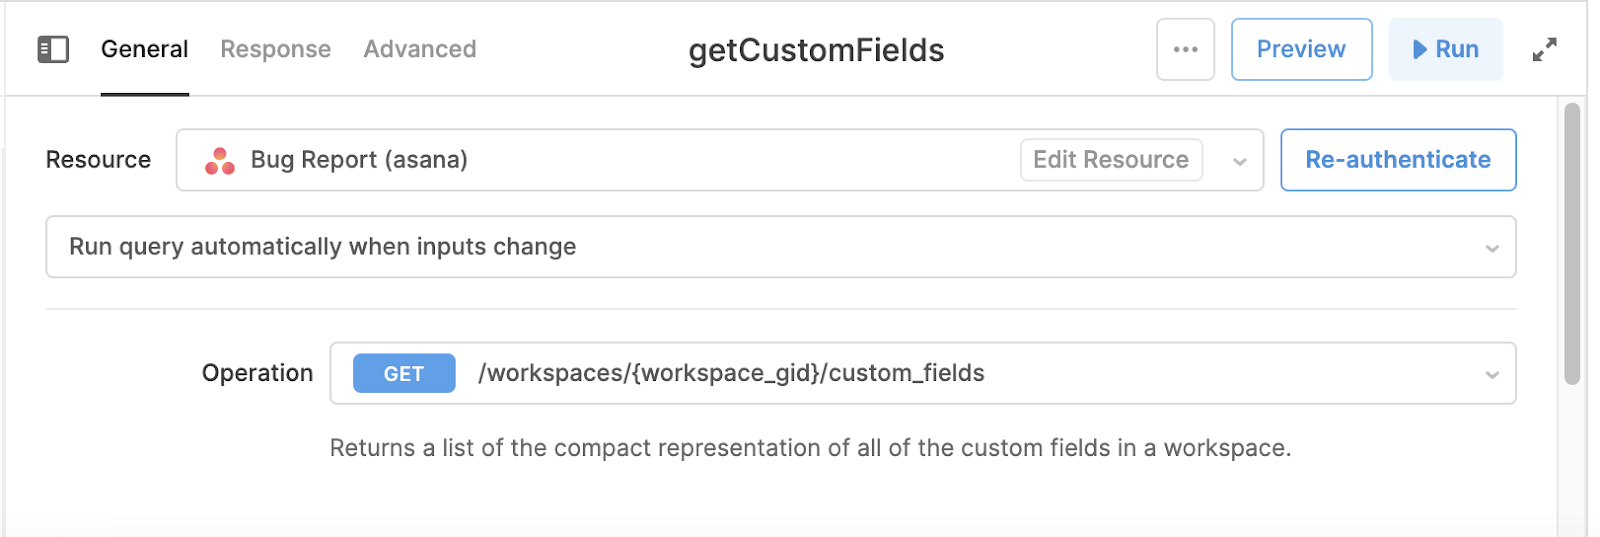
This will return all the custom fields available in your workspace. If the custom fields are specific to your project, you can use this query instead, and specify the project gid:
Now, head back to your Bug Report modal and add two Select components, one for the Priority and one for the Browser type:

In the component settings, connect the values of each to the array of custom field gids, and the label to the array of custom field names, so users are shown the human readable name but the associated value is the gid, like this:
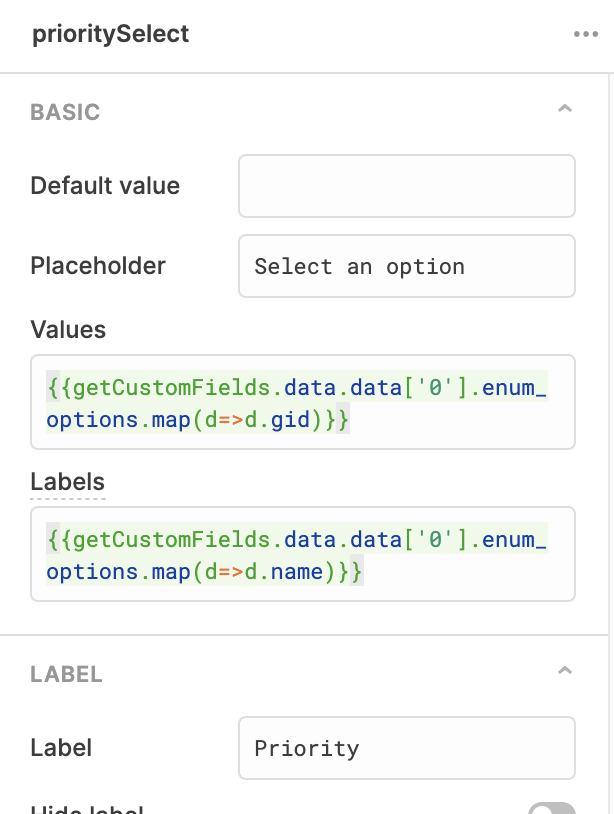
The 'Priority' dropdown option labels are populated by the custom field names, and the values by their respective gids.
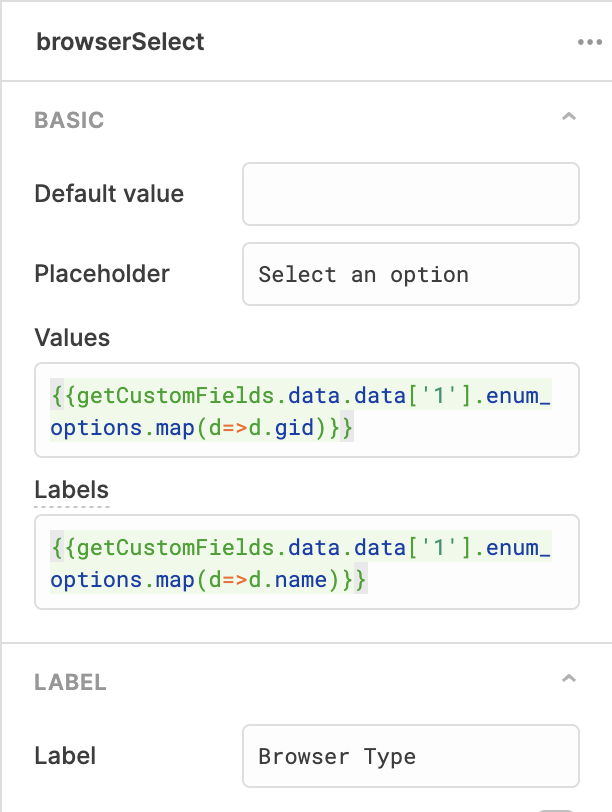
As above, but for the browser options.
📌 Note: you will need to adjust the index number in the array - ['1'] in the code above - to connect to the correct custom fields. As these index numbers can change if different developers are logged into the same app it may be better to hard code these options as an array.
Now that your dropdown options are set, you can go back to the newTask query and connect them to Asana.
Under the data.custom_fields parameter, enter the references to the selected gids as a JSON object, by defining the key as the custom field gid, and the value as the select component value (the gid of the selected enum option). Separate each key:value pair with a comma:
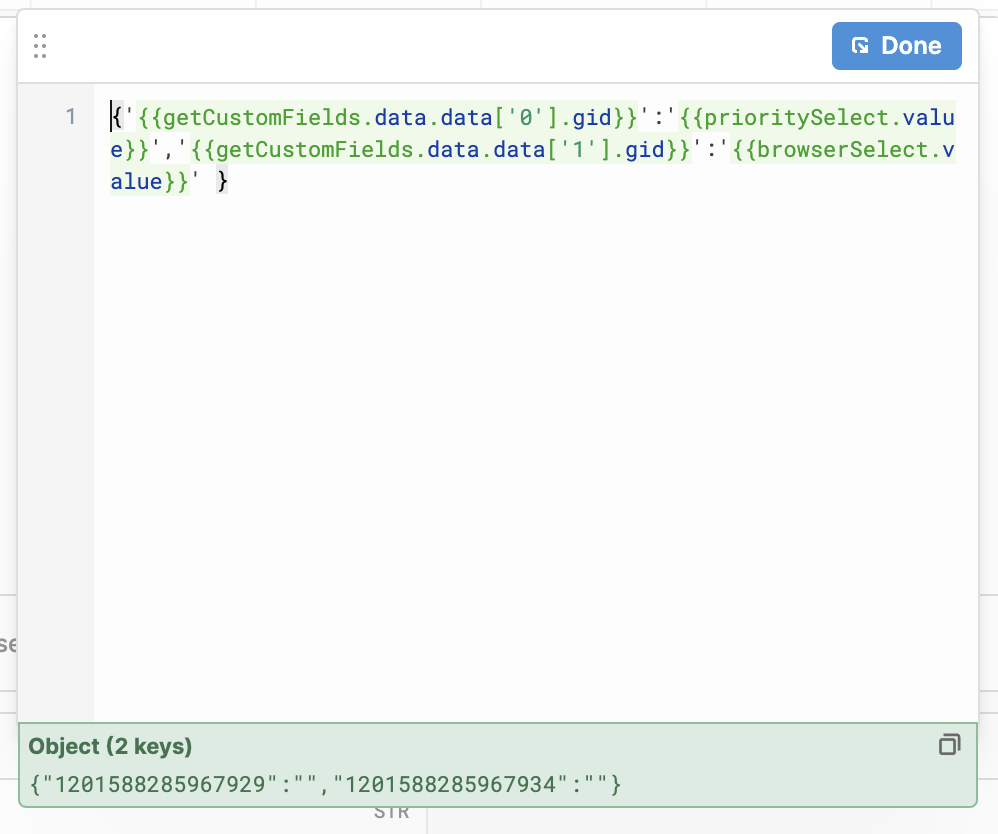
{'{{getCustomFields.data.data['0'].gid}}':'{{prioritySelect.value}}','{{getCustomFields.data.data['1'].gid}}':'{{browserSelect.value}}' }
Again, you can simply paste in your gid’s in place of the query reference.
Now your custom fields are connected!
Adding the task to the correct section in Asana
So far, when we set up a new task, it's automatically posted to the first (or left-hand) section, or column, of the Asana project. If you need to, there are two ways to define a different section for this task.
In the Asana docs, there is an option to define the target section in the data.memberships parameter, but in our experience this can be a little fiddly and doesn’t work perfectly, so the option we will use is by setting up a second POST query to move the task to a different section.
This query uses the section gid (which we copied from the getSections query response), and references the response of the newTask query we just created, referencing the gid using {{newTask.data.data.gid}}.
Now, go back to the original 'newTask' query and set it to trigger the 'addTasktoSection' query on success in the event handlers.
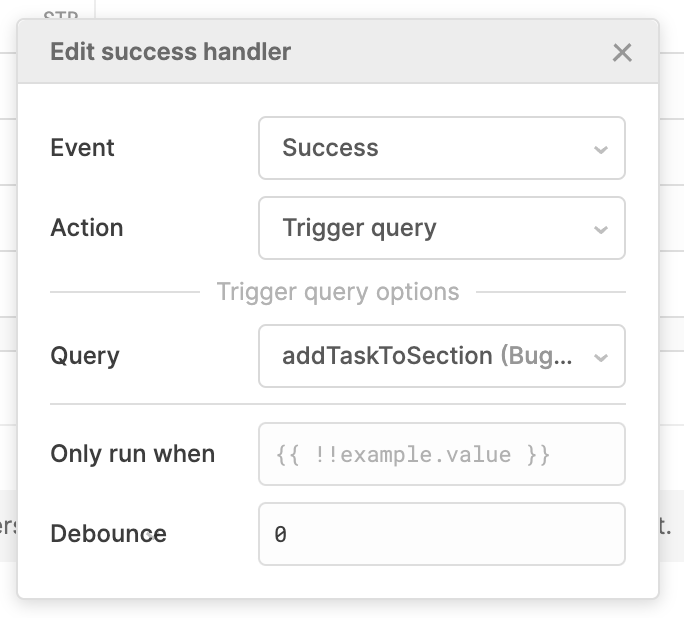
Now, when you run the newTask query, it will create a new task in the Asana project, and then, on success, trigger the next query to move this task to the correct section.
Results and Final Touches
Now let’s test this to see the results!
Now that’s all done, let’s clean up the UI a little by adding a clear success notification to newTask after submitting the report:

Make sure the success notification is only enabled for one of your queries if you are addingTasktoSection as well, so that the user isn’t bombarded with messages.
In this same event handler section, you can also set the modal to close on success of the newTask query, and the temp state to be set to false to clear the form.
Finally, and most importantly, make sure to connect each of the queries and action triggers (buttons, for instance) in your app to the bug reporter by copying the failure event handler script from our first query.
Now you have a simple system to help report key Retool bugs to engineers with all the error log information!


