


Harnessing the power of ChatGPT with your own knowledge base is a great way to ensure rapid, informed answers to complex questions. Building chatbots with OpenAI is a common practice in many customer-facing spheres, but they can also be highly useful for internal purposes, such as searching across internal wikis, blogs, or documents within teams.
Since we specialize in building on Retool, we built a Retool chatbot tool that searches their docs and forum as well as our own blog, where we share articles and tutorials about internal tools and Retool specifically.
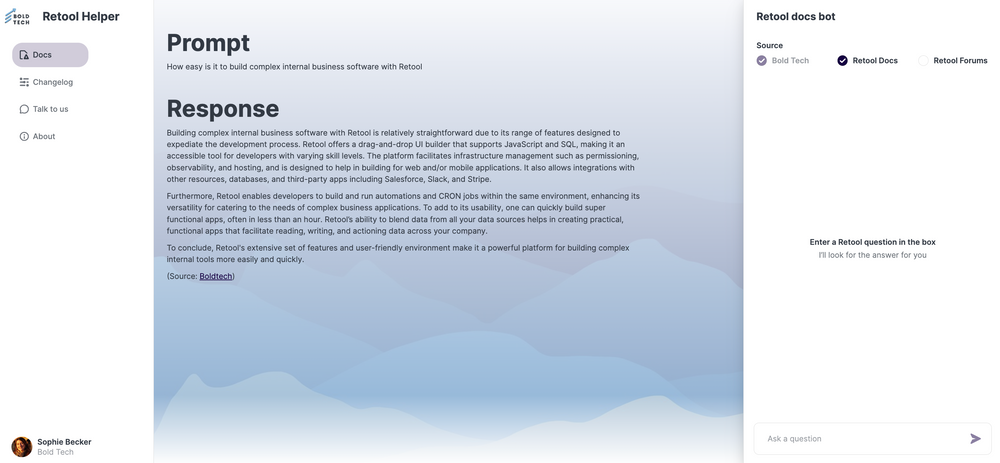
Naturally, we also built the chatbot on Retool itself too. Here\'s how it looks:
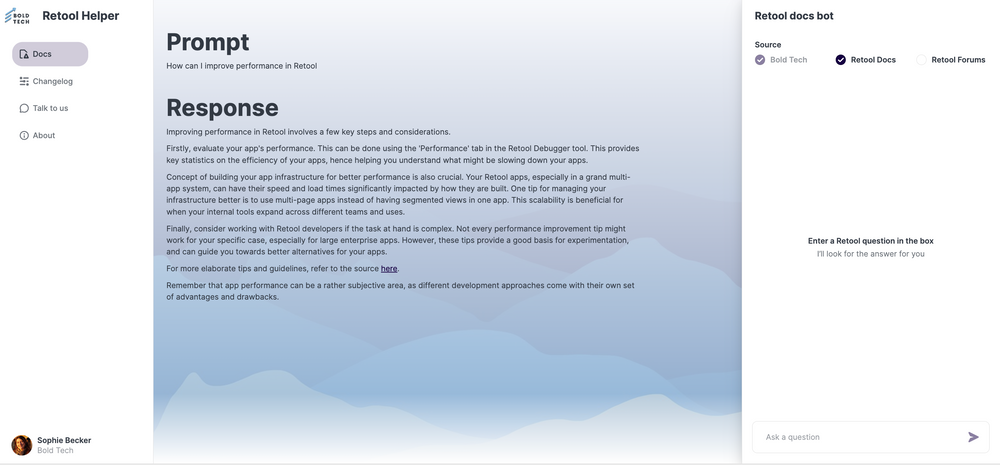
The app is designed for internal use, but we also released a version with a sign-in wall for public users to test.
The chatbot is powered by ChatGPT and then enriched with these Retool resources using Vectors that are integrated into Retool.
You can test the chatbot yourself - note that public users are limited to 20 runs per user due to API limitations.
We built it in less than an hour - here’s how you can do the same!
How we built our AI chatbot
We used these native Retool functions to build our app:
- Retool Vectors
- Retool AI (powered by the ChatGPT model)
- Retool app builder
OpenAI’s ChatGPT4 model is already natively integrated into Retool. If you open an app and create a ‘AI Action’ you can ask ChatGPT questions straight away. This can be useful for generating quick code snippets when building or can be integrated into your apps’ functionality like we have done here.
📌 Note: OpenAI charges for each API call. Typically, it will take many chat responses to generate a significant charge, but make sure to check out the OpenAI pricing before proceeding with your app.
Since our app needs to be informed by our custom knowledge base and not just by ChatGPT, we first need to set up Retool Vectors to inform our responses. Here’s how.
Retool Vectors
If you haven\'t heard of them already, here’s what our Retool chatbot had to say about Retool Vectors:
A Retool Vector is a managed vector database feature of Retool that enables you to store unstructured text from documents and web pages for use with AI models. Retool abstracts the complexities of preparing text and automatically generates the required data for AI models to make decisions using your data. Each vector you create can contain either document text or URLs, but not both. Vectors can be used in AI actions where they provide context from your data, which can be great for responses in customer interactions. Also, Retool Vectors perform operations such as calculating the vector for the AI action\'s input, identifying which embeddings in the chosen vector relate to the input, and appending the text from the embeddings when making the request to the AI model. This process simplifies the use of AI models by reducing backend complexities.
Source: Retool-Documentation
Not bad, huh?
To set up Retool Vectors, once you set up your Retool account, head to the resources page.

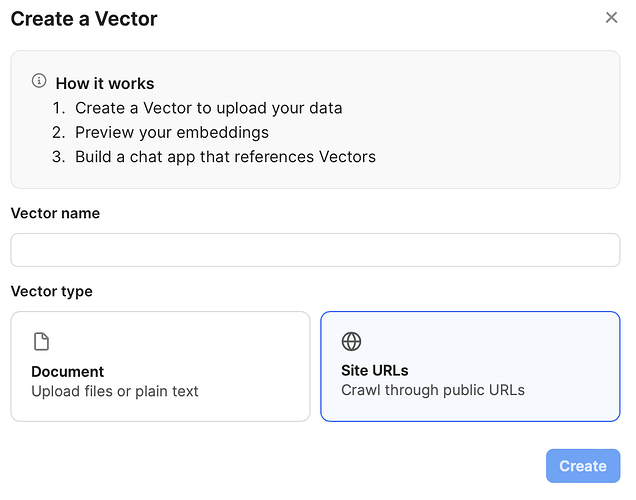
Navigate to Vector page and "Create Vector".

Since our data is publicly available in the Retool docs, in the Retool community forum, changelog and on our own blog, we chose "Site URLs" as the source for these. For your chatbot use case, you could use this to crawl through your public docs or website for company-related information for instance. Vectors can also be documents, such as files or plain text, and so this is where you can make use of internal documentation or wikis to source company insights.
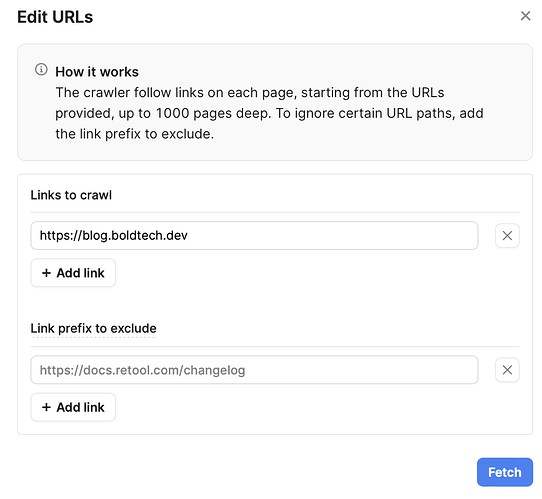
For each of these Vectors, we added the public link to crawl.
Building the chatbot UI in Retool
Now that we have our custom knowledge base ready in Retool Vectors to inform our answers, we can create the UI.
In our public app, we have several different sections, but the important ones are the Docs helper and the Changelog helper.
For the structure of our UI, we use several frames. For the side menu on the left side we have used the Sidebar frame for our navigation component and branding, and we’ve used a drawer frame on the right side for our chat. You can set up the frames from the ‘Component Tree’ section of the Retool environment.
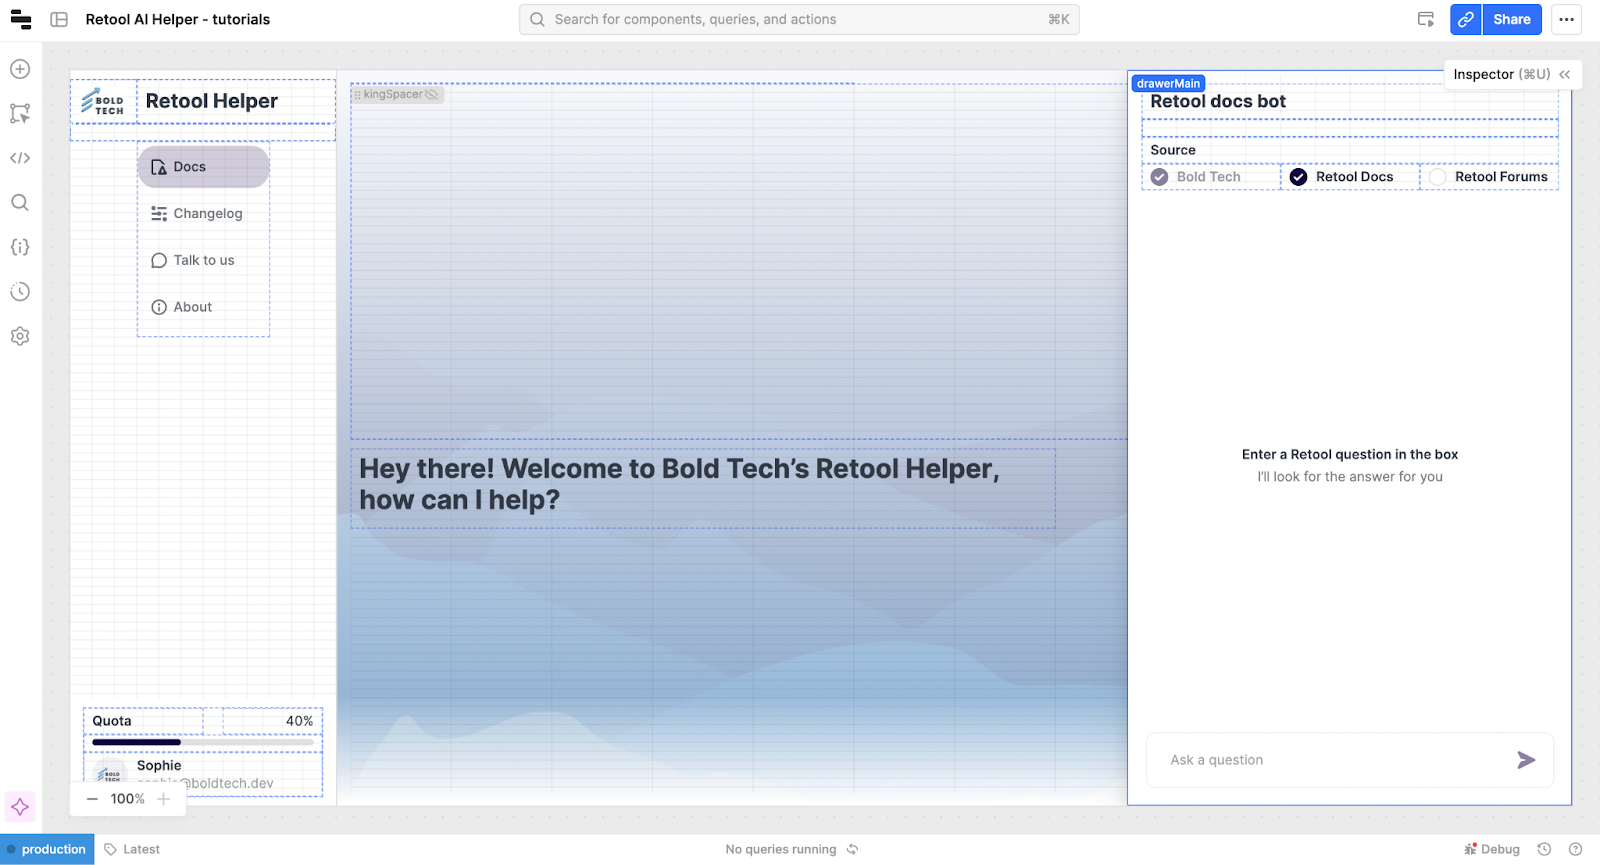
We have built one drawer frame for our chats, split between docs and the changelog by a tabbed container. We chose to use a tabbed container to avoid the animation of the drawer frame opening and closing, but another drawer frame would work fine here too.
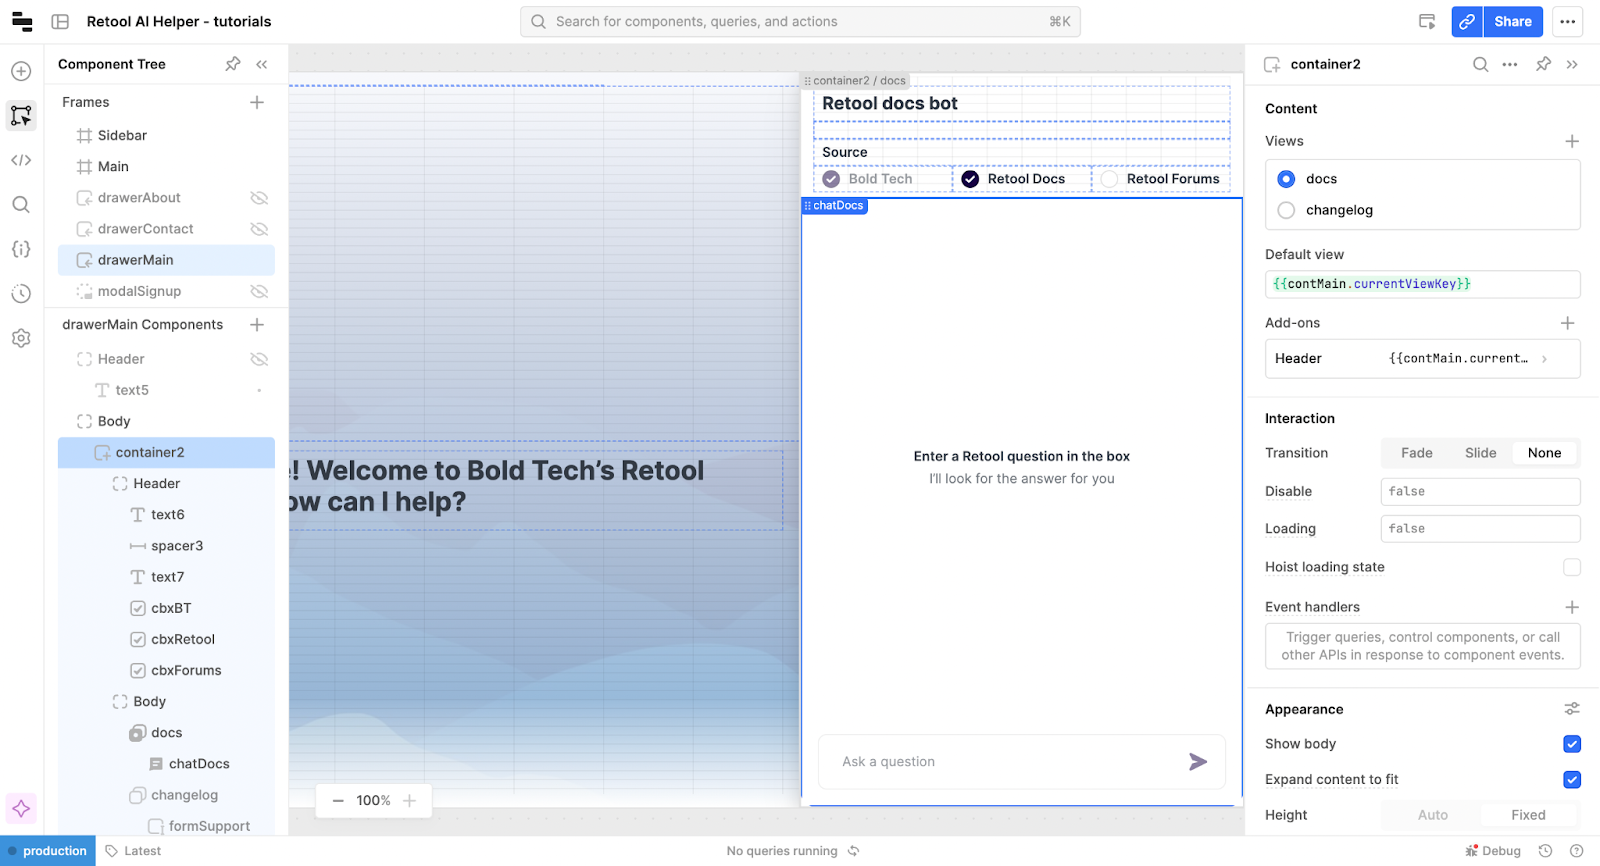
In the first view of the tabbed container, the ‘docs’ view, we added a chat component. With Retool you can easily drag and drop pre-built components from the left-hand side, and configure them using the UI or custom code in the right-hand Inspector panel.
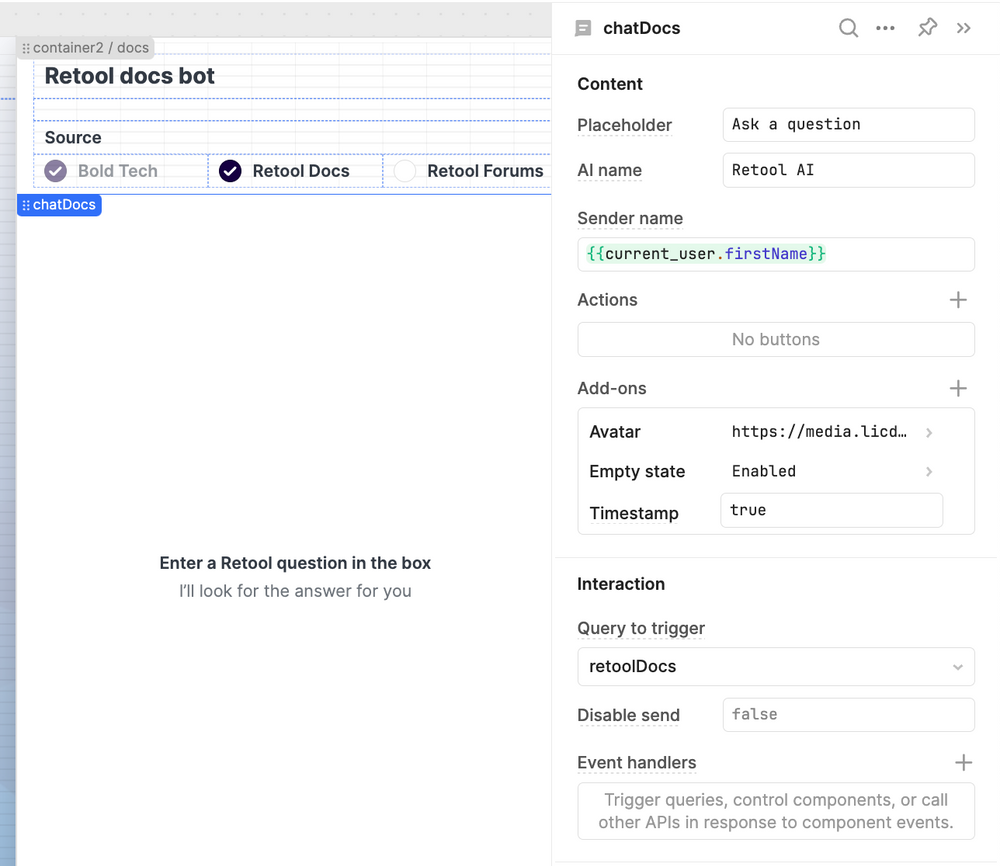
For the chat, we simply personalized a few elements of the design, such as setting the current user name as the Sender, their avatar, and personalizing the question placeholder text and AI name.
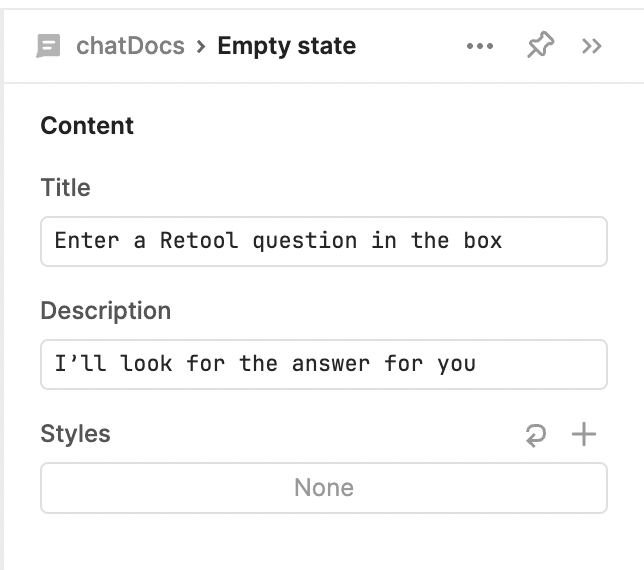
We also set the empty state text to help users understand the purpose of the chatbot.
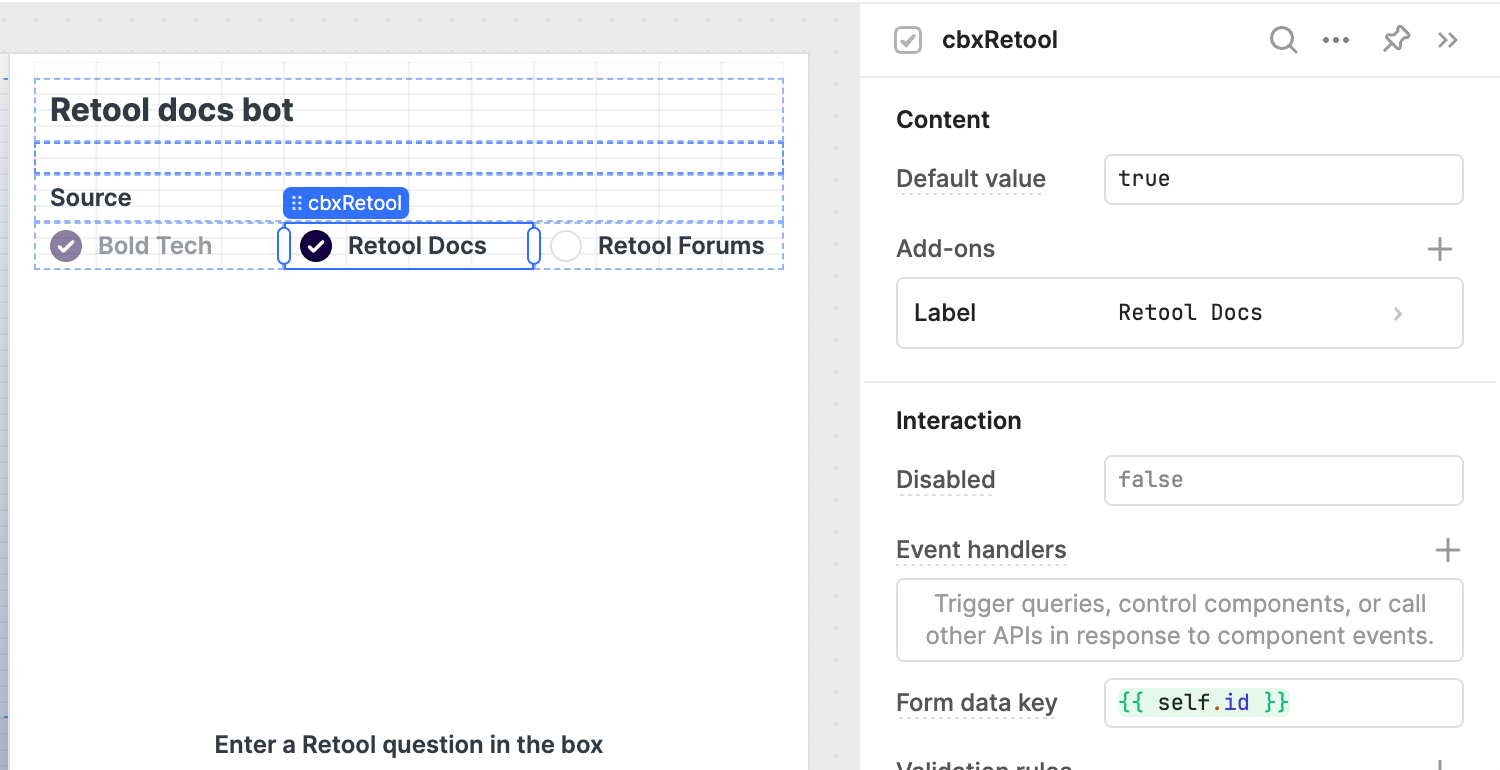
So that our users can decide what knowledge bases they wish to search, we added some checkbox components to allow them to select each. All we needed to do to set these up was add a label and set a default value to true or false.
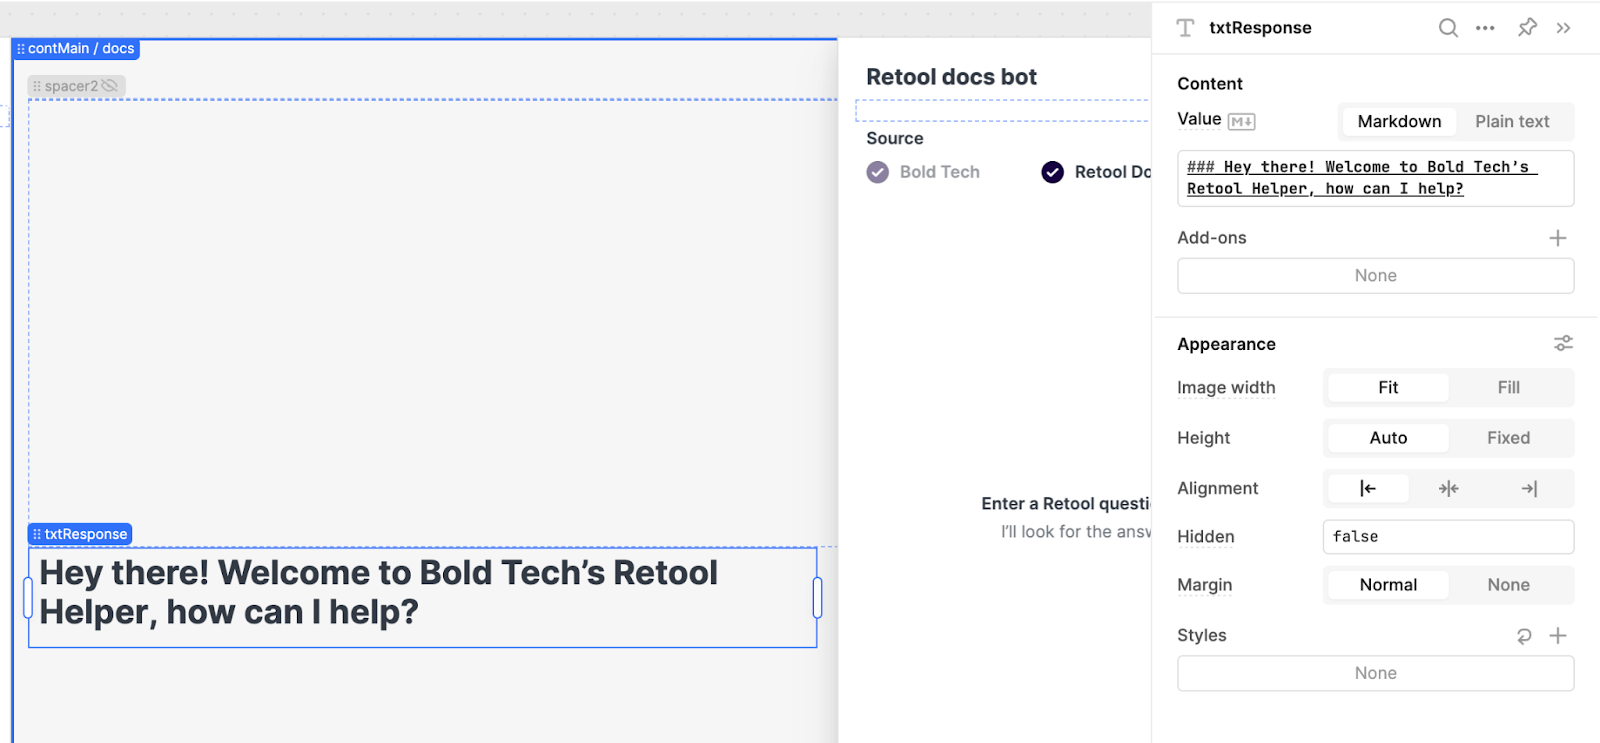
Finally, we added a textbox to display our initial placeholder text and later the response.
All we needed to do was pull in a text component and set the value to our default text, using markdown formatting.
Now, we just need to set up the AI query.
Writing queries to the OpenAI API
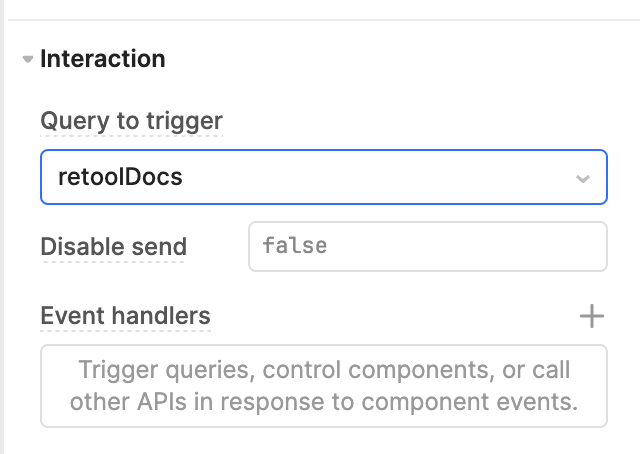
As you can see in the first image of the chat component settings, when submitted, this chat triggers the retoolDocs query. We added this option under the Interaction section of the chat component like so:
To build this AI query was really simple. First we needed to select the action \'Generate chat response, but other built-in options include ‘Summarize text’, ‘Generate image from text’ and more.

Our input is simple, including the dynamic value of the question posed in the chat docs by the user, and specifying that the question is Retool related. It also adds the sources and adds UTM links to our blog, since this is a publicly available app on which we want to track click-throughs. We set the temperature to 1 to ensure a more accurate answer. It also takes into account the chat history.
We then linked the Retool Vectors by checking the box. Since there are checkbox options for deciding which Vectors to use, we used this JavaScript query to check which are selected.
{{[cbxRetool.value?"Retool Docs"\n:null,cbxBT.value?"Bold Tech Blog"\n:null,cbxForums.value?"Retool Forums"\n:null].filter(x=>x)}}This code snippet dynamically constructs an array based on the selected values of checkbox components (cbxRetool, cbxBT, cbxForums). Each checkbox is checked for a selected value, and if the value is present, it adds a corresponding string (e.g., "Retool Docs", "Bold Tech Blog", "Retool Forums") to the array. If the value is not selected, it adds a null value instead. The filter function is then applied to remove any null values from the array, resulting in a final array containing only the selected options.
Finally, we set the model to ChatGPT 4 and the system prompt to ‘You are a helpful assistant’ to set the tone of the answer.
On success of the query, we added two more actions. The first one changes the value of the placeholder textbox we set earlier, adding the initial prompt and then the response. We used markdown hashtags to format the text.
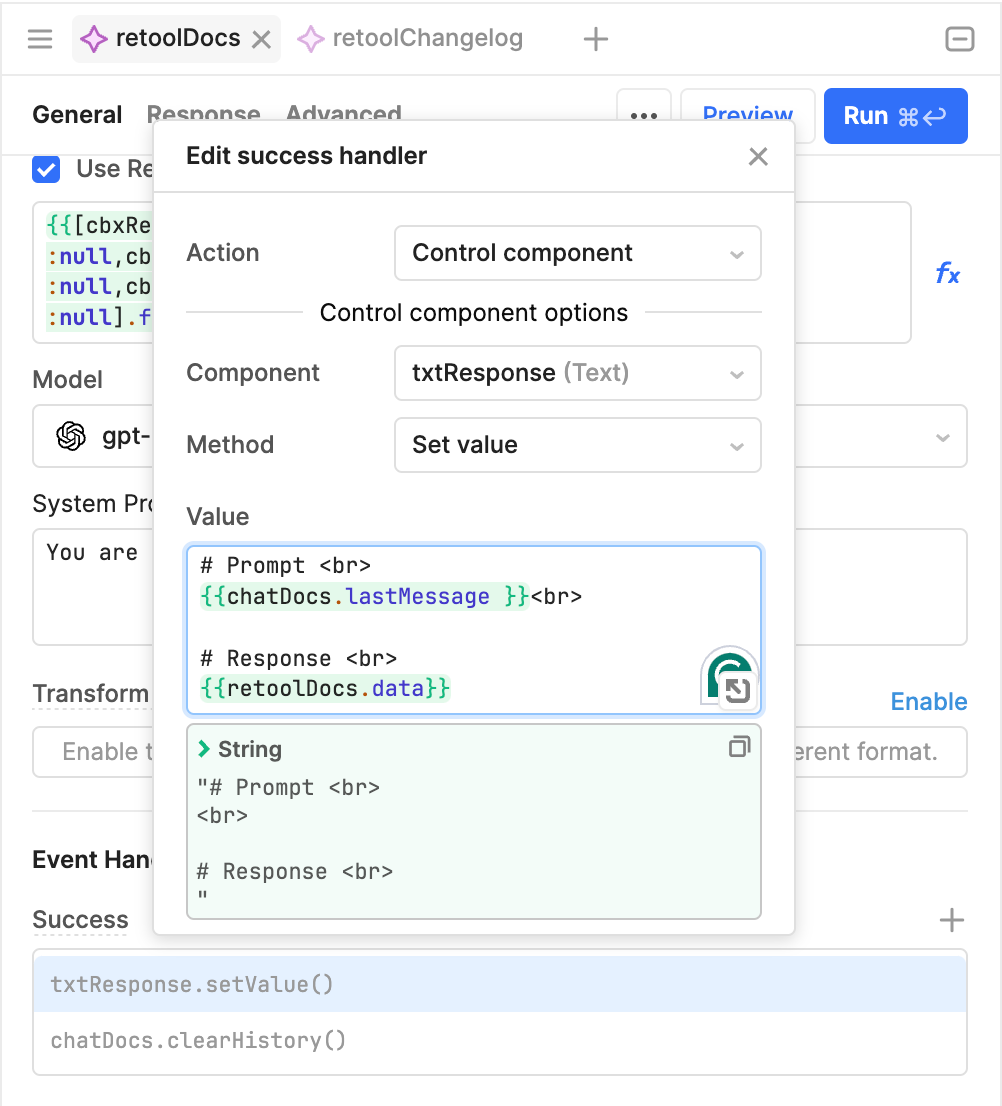
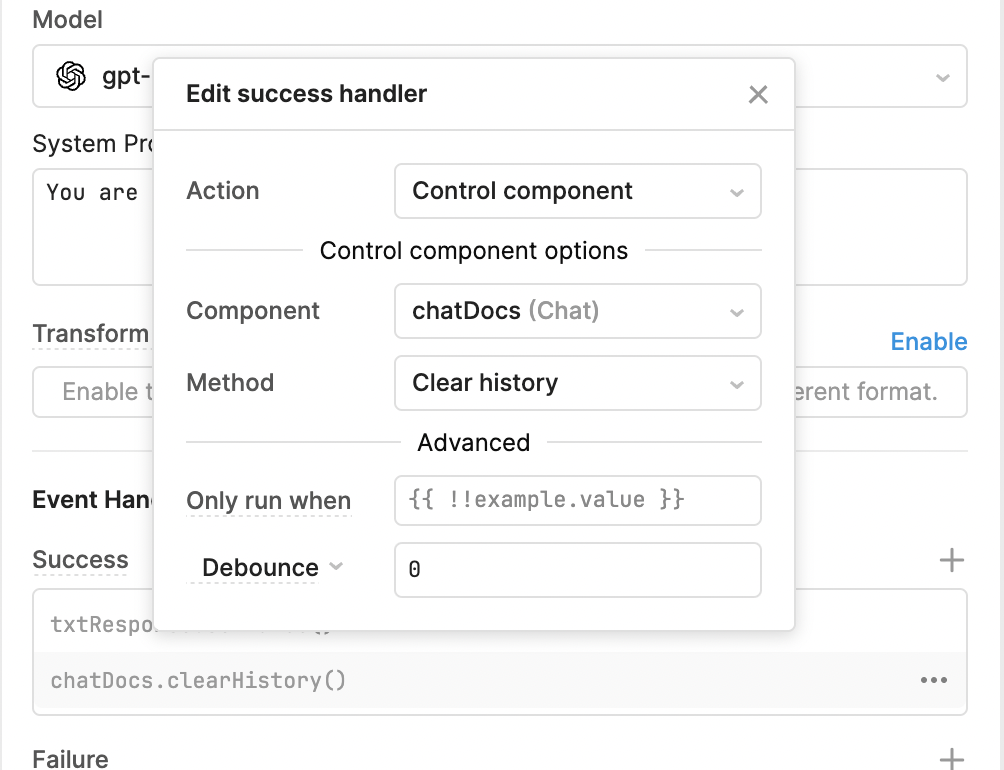
The second query clears the chat history. This isn’t necessary, but we preferred to display the answer as a textbox clearly in the body of the app rather than in the chat box.
And this is how the response now looks:
Next, let\'s build our changelog chatbot too.
Building our Retool Changelog chatbot
The second function of our AI chatbot is similar to our first but focuses specifically on the Retool changelog. In another tab of the container in our drawer frame, we added a form, with a title, a dropdown component, and a textbox for more context.
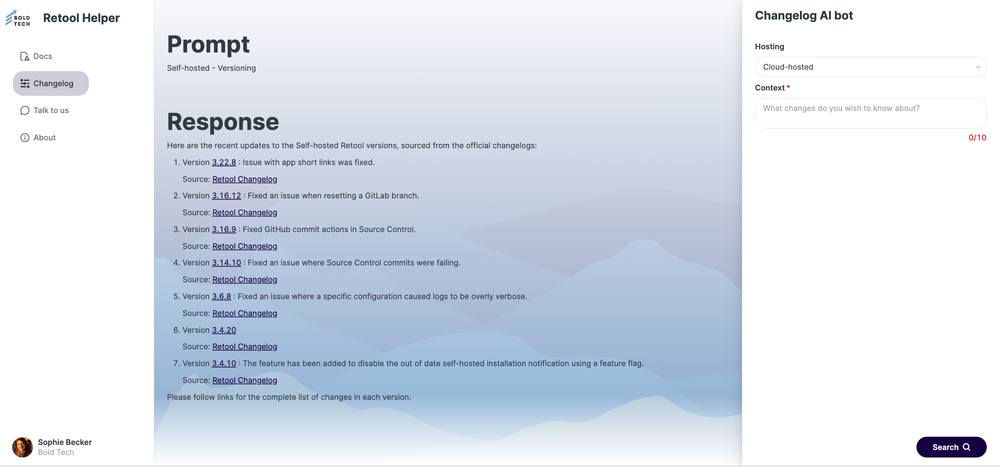
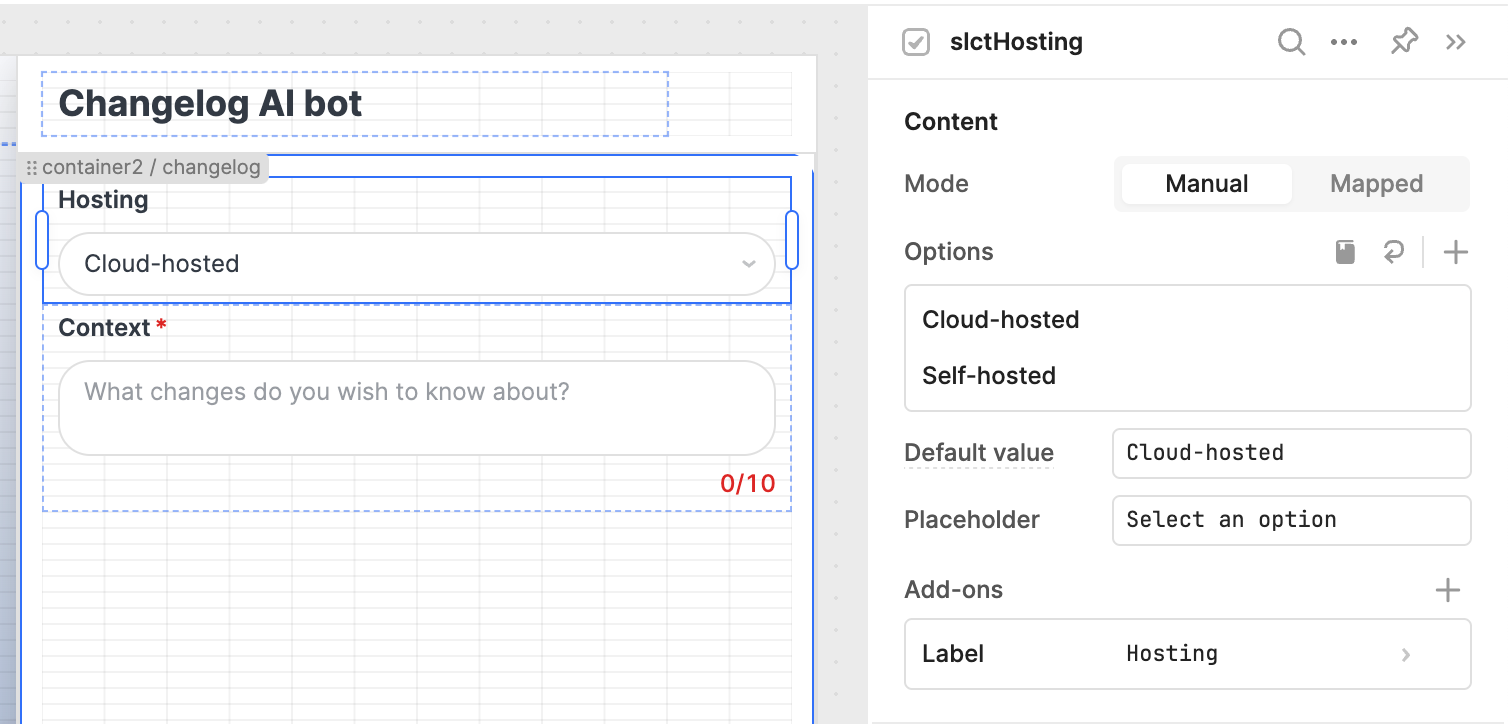
For our dropdown - known as the Select component in Retool - we manually set the values to cloud-hosted and self-hosted:
For the text area component, we set the input to be required and the minimum length to 10 characters to ensure data validation.
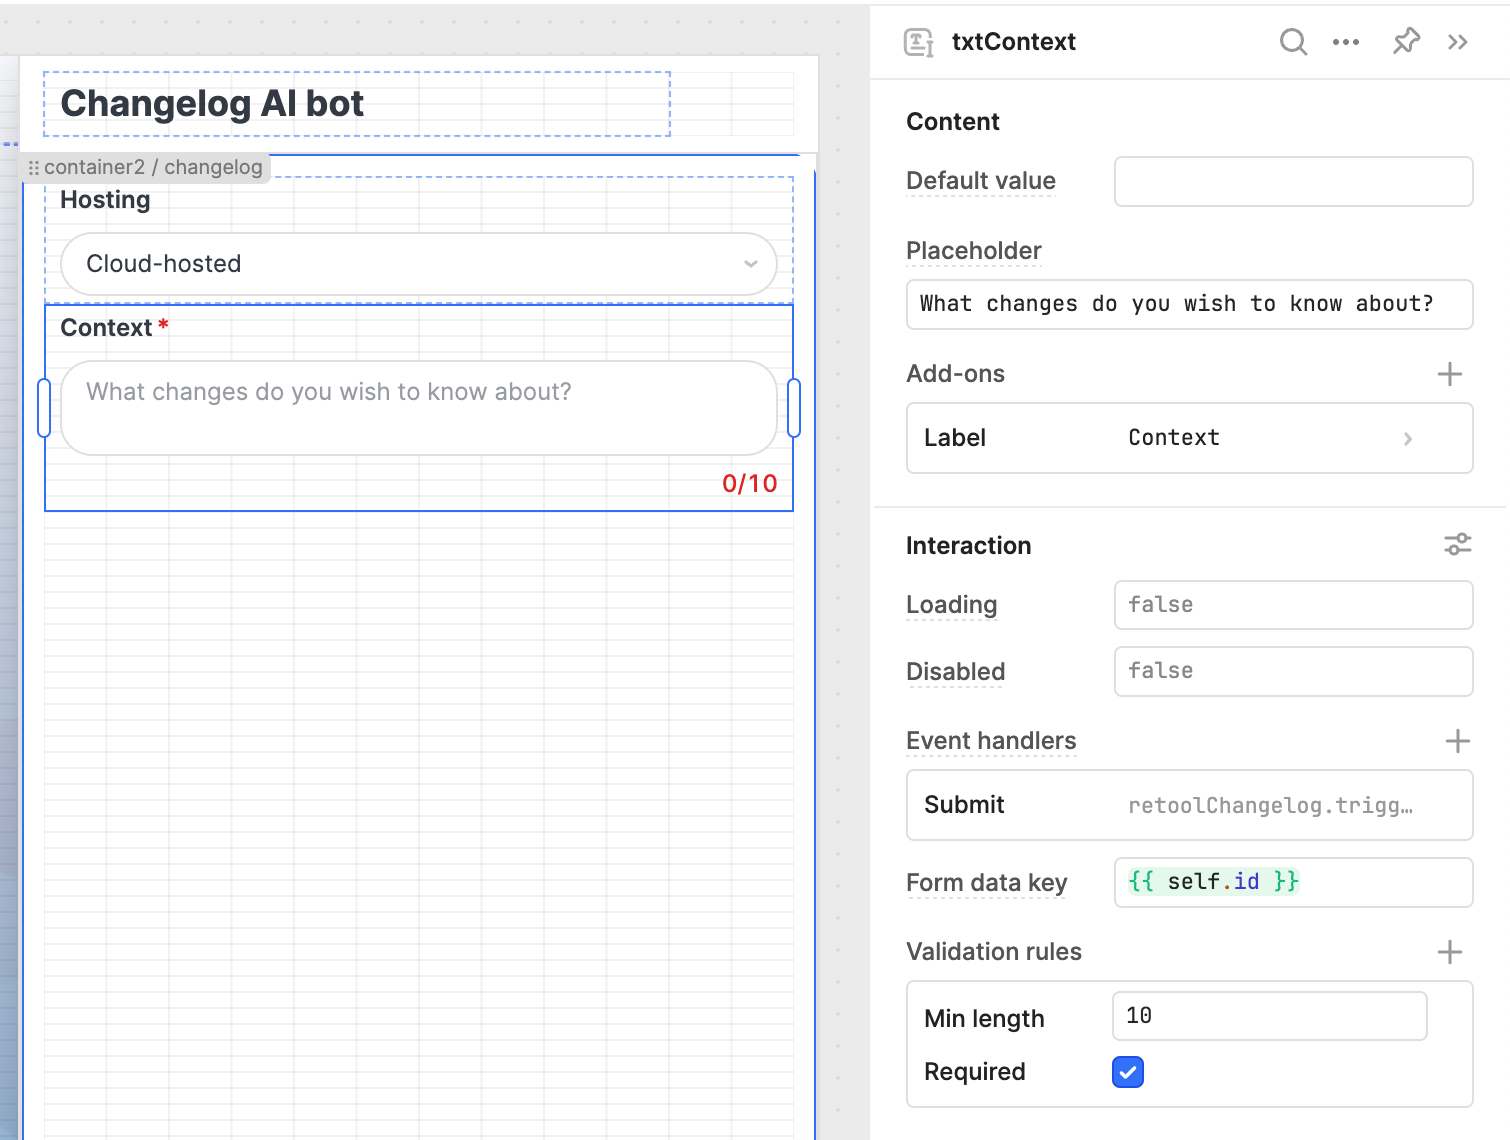
On submit of our form, the changelog query is triggered with the added values. The setup is much like our first query, with a clear chat response generated with the dynamic values from the form.
The first part of the text specifies the context form the text area in the form, and the second part ensures it only searches for entries from self-hosted or cloud-hosted respectively. The values of these fields are added to the query dynamically using the JavaScript escape handlers.
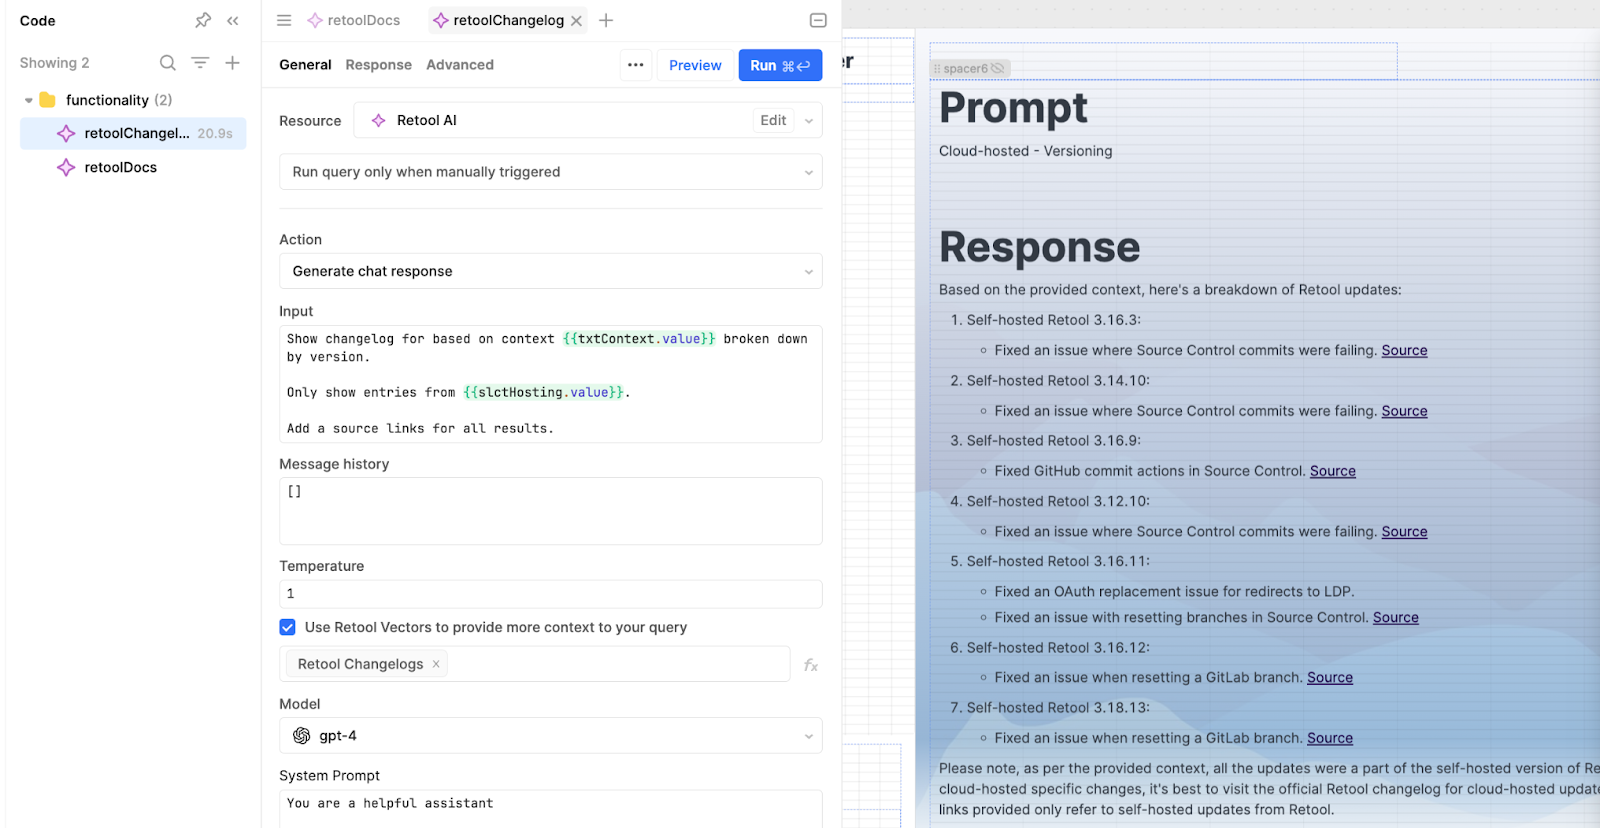
Once again, we set the temperature to 1, the model to GPT-4 with a system prompt, and added the Vector Retool Changelogs, which scrapes the Retool changelog public link.
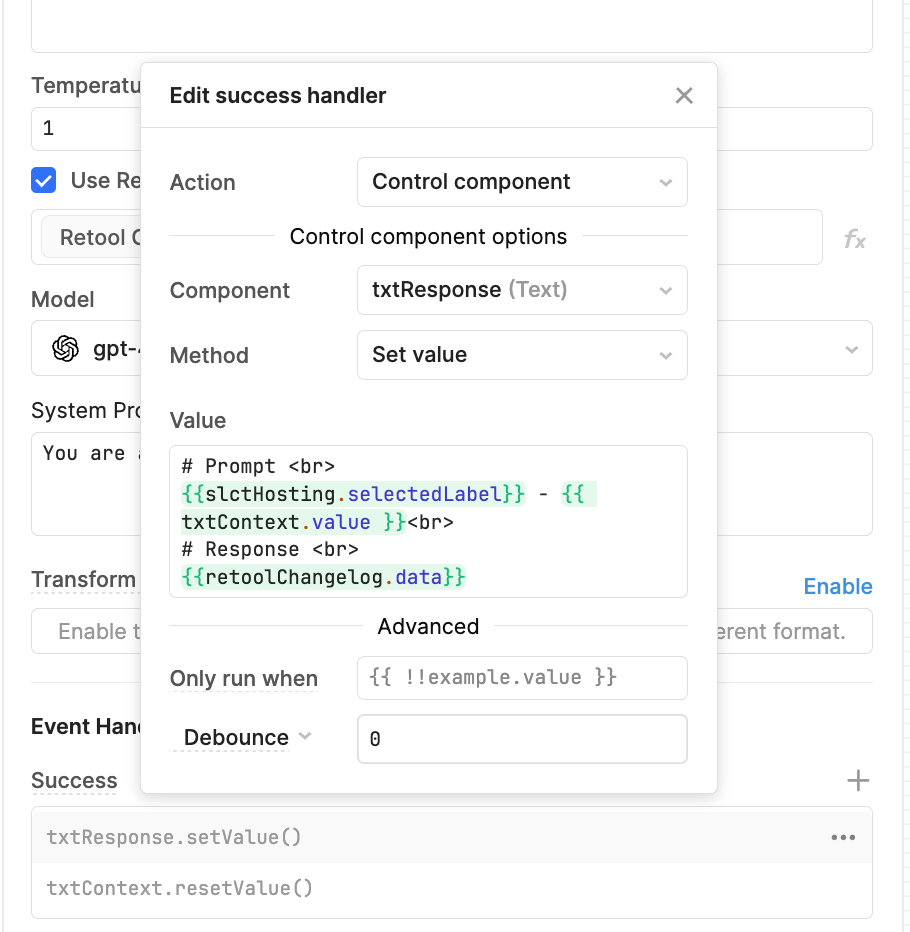
On success, the query triggers two more actions. The first sets the value of the text component using the information provided and the results of the query.
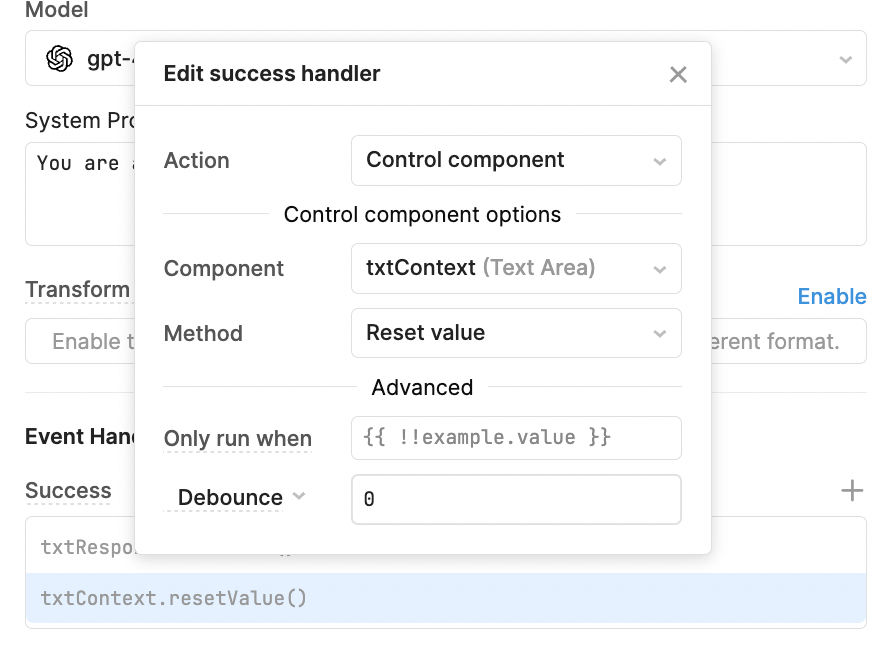
The second resets the value of the context component.
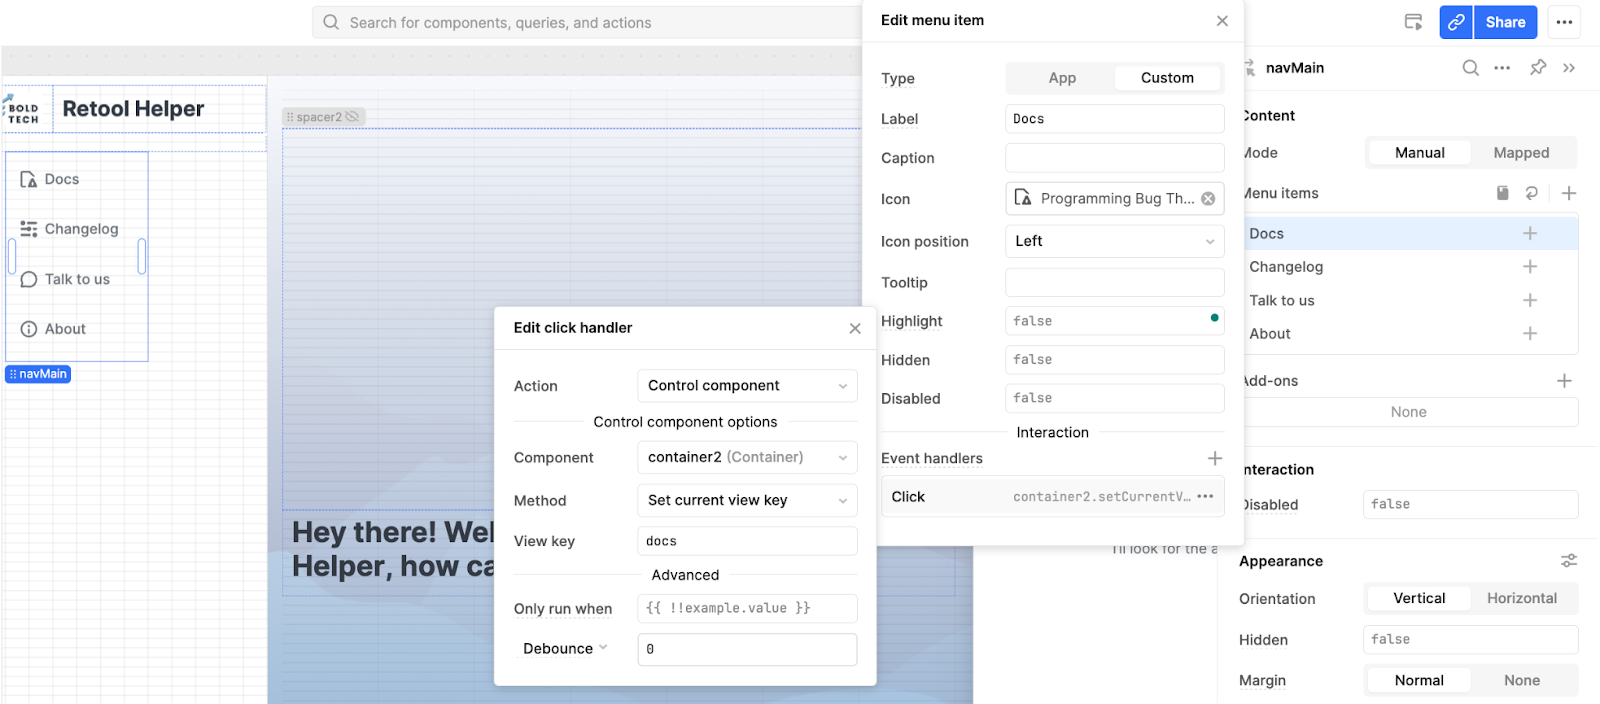
Now all we need to do is set our navigation to change the container to be the docs or changelog, using the event handlers of the nav bar to ‘docs’ or ‘changelog’ respectively.
And with that, you have a functioning chatbot that can search and inform your users on a custom knowledge base!
Want to learn more about internal tools and how to build them? Check out our sections on low-code tools like Notion and Airtable, or developer tools like Retool and Windmill.

