

Download, print, sign, scan, send ... start again. Signing essential documents, from freelance contracts to business agreements and more, can be a real chore. Enter: DocuSign, a brilliant way to electronically sign and manage key documents between different users and devices, saving you time (and paper) whilst being completely secure. With over 200 million users, DocuSign is the clear leader in this space and therefore a key tool for many businesses. Using the DocuSign API, we can embed, extend, and connect DocuSign elements with our own applications, workflows, and processes in Retool.
In this tutorial, we are going to help you connect and authenticate your API using DocuSign’s OAUTH2.0 Authentication workflow, as well as showing you how to create a custom Retool application that allows you to view your DocuSign signed contracts depending on the email address they are associated with. The end product will (hopefully!) look something like this:
This entire tutorial should take about an hour and is completely free to build on Retool.
NOTE: While development is free, the production tools themselves incur a monthly cost: DocuSign has different Developer Plans and Pricing for their API ranges from $50 to $480 a month.
Authenticate your DocuSign API connection
Create a developer account and gather credentials
To get started, create a developer account on the DocuSign Developers site - using the Developer account dropdown in the top right corner.
Once you have created an account, head over to the Platform 101 section of the API navigation tab. In the left panel, you’ll see a section called “Authentication”, which is where we’ll start.
To create a secret key for authentication, click your user icon in the top right, and select My Apps & Keys. Click Add App & Integration Key.
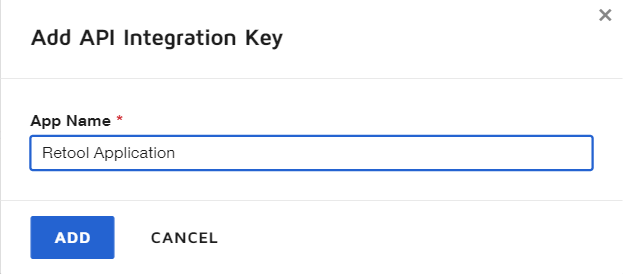
Enter a name for your application and click “ADD”. This makes it easy to keep track of which secret keys pertain to which app. Take note of this page - this is where you will copy the integration and secret key in your new DocuSign application’s settings later on.
Create your resource in Retool
Now that you have the authentication credentials you need, head over to the resource tab in your Retool environment and create a new Rest API resource.
Name your resource, scroll down to the Authentication dropdown, and select OAuth 2.0. Before you copy the OAuthCallback URL Retool provides, you need to choose whether or not you want to share OAuth2.0 credentials between Retool end users. If you do, this means that the OAuth workflow isn't user-specific, but specific to the Retool environment, ultimately allowing all users who have access to this resource to be authenticated in one go. This is important to establish at this point (and note when changing) because this selection will change the URL we use to authorize the API.
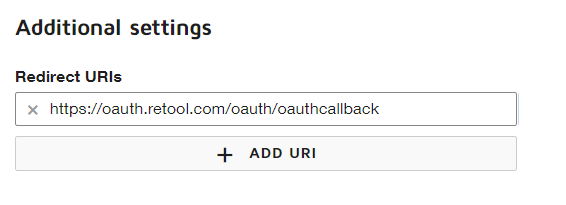
Once you’ve chosen, copy the OAuthCallbackURL and head back over to your application in DocuSign. In your Application settings, under Redirect URI, click “+ Add URI”. Paste the OAuthCallback URL here, and hit save at the bottom of the page.
For those who are unfamiliar with callback URLs: this alerts DocuSign that it is sending this authentication data and that once DocuSign is done with it, Retool is on this callback URL waiting for the response. The API will process the data you have sent, look at the callback URL, and send you the response back to that URL.
Now that your callback is ready, you are going to set up your Retool resource according to DocuSign’s specifications.
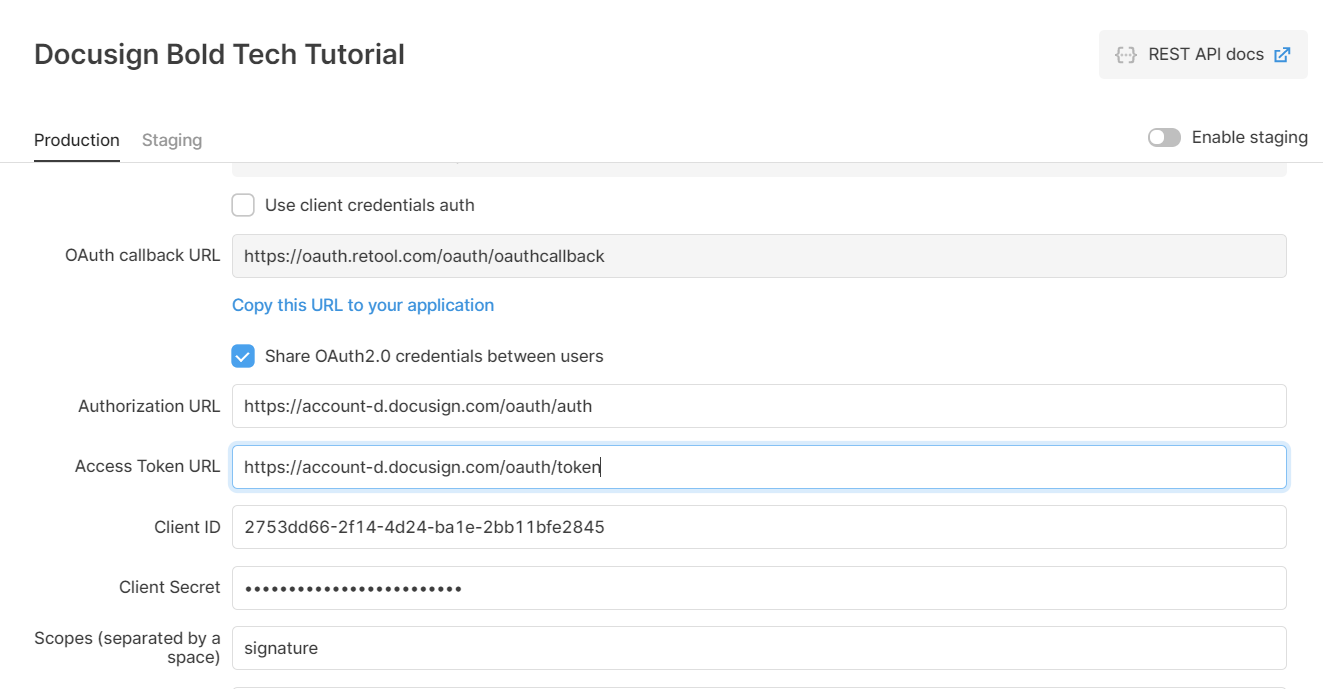
For the rest of the authentication process in Retool, you need to input five pieces of information (1-4 are from Step 1 of the Authorization Code Grant):
- ‘Authorization URL’ - this is: https://account-d.docusign.com/oauth/auth?
- ‘Client ID’ - in your DocuSign app, this is the ‘integration key’ you copied earlier
- ‘Client Secret’ - this is on the same page as your integration key, called ‘secret key’
- ‘Scope’ - for now, just input ‘signature’
- ‘Access Token URL’ - this is: https://account-d.docusign.com/oauth/token (Step 2 of the Grant process)
Retool will handle the redirect_uri and the response_type parameters for you. Your Retool Resource setup should look something like this (with your own Client ID & Client Secret):
The final step is adding the authorization token in the resource’s default header. In the ‘General’ section of your resource, under ‘Header’, add ‘Authorization’ in the first column and ‘Bearer OAUTH2_TOKEN’ in the second: this token value is a placeholder for Retool that makes sure it knows where your access token belongs when you make your API request.
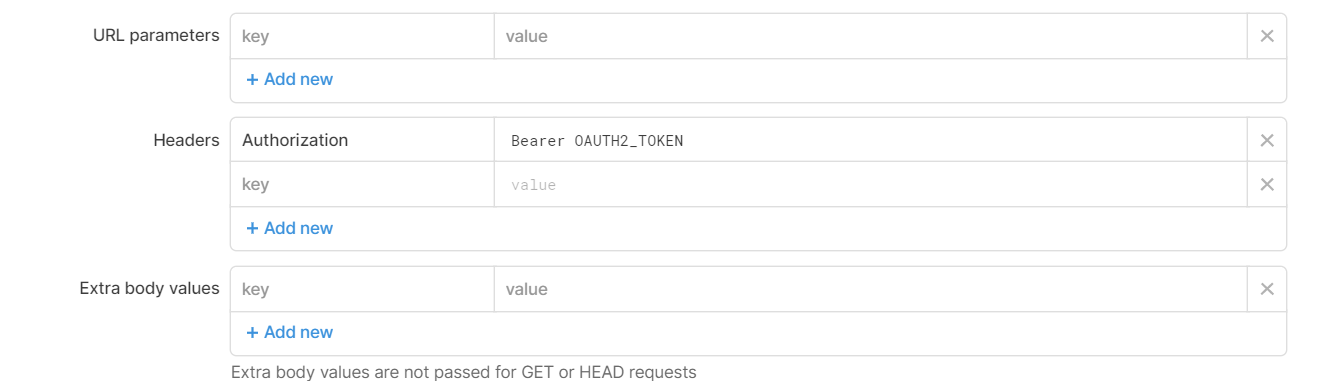
Your final Retool Resource should look something like this:
Click save changes in the bottom right-hand corner and refresh your page. In the bottom left, click Test OAuth integration with your own account. If you’ve done everything correctly, this should bring up an authorization tab with DocuSign’s sign-in:
Click Accept and it will bring you back to the resource tab.
Congratulations! You now have a DocuSign resource integrated with Retool.
Pulling Contracts from Docusign into a Retool App
The next part of this tutorial will run through several steps to build an app that will help you track and preview DocuSign contracts specific to a client. Here’s what it involves:
- Pulling in a database of user information (in this case from GSheets)
- Using a dropdown component to filter and display this client information in a container
- Pulling in a contract template from your DocuSign account and displaying it in a PDF viewer
- Searching DocuSign for contracts by the client email selected by the dropdown and pulling all available contracts into a table
- Showing those selected contracts in a PDF viewer, and saving them to your computer
Connecting to a Client Database Through Google Sheets
To build the basic structure of this app, we need a database of clients and their details. Our example app pulls in client information from a Google Sheet, but you can pull in data from anywhere: Postgres, MongoDB, and more. The goal here is to pull in all contracts on file for a selected client. In this case, their email address will serve as a unique identifier and the search parameter for our queries. It’s also possible to search for contracts based on dates, names or any other values associated with your envelopes by changing your search parameters (but we’ll get to that in the ‘Pull in DocuSign contract by email’ section).
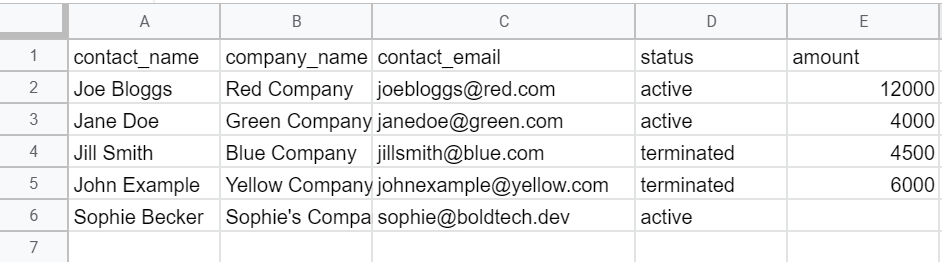
If you are following along with the tutorial, you can start with some basic contact details in a Google Sheets database. You can copy our version to start building your app more quickly.
To pull these contracts in you need to connect to your Google Sheets account and select the spreadsheet in the Google Sheets resource. You can learn how to do this here.
A drop down menu keeps this app nice and tidy so that you can select each company individually and see all the details and contracts you need. Alongside your dropdown component, add a container with some text boxes as in the image below (your dropdown menu and values will be blank for now).
To connect the dropdown menu to your database, reference your Google Sheet query and map the values of the dropdown input to recognize the company names (column company_name in the Google sheet) as an array (see ‘values’ box below for how this should look). Then set the initial value.

Once your dropdown filter displays the list of companies, you can display associated values in text boxes in your container. To connect these to the data of the company selected in the dropdown, use SQL (the ‘Query JSON with SQL’ resource) to filter the values - see example below (swapping out the Google Sheets query and the dropdown number for your own).
Your SQL query:
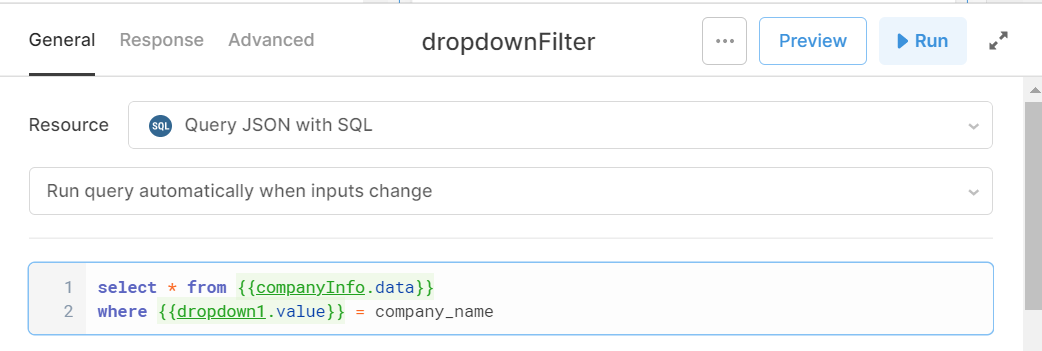
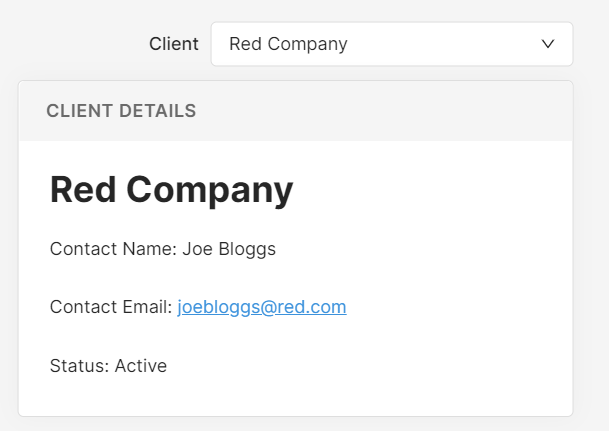
Then, reference the SQL query in your text values to show the results in the container according to the dropdown option selected. You will need to connect each text box individually to the relevant data.
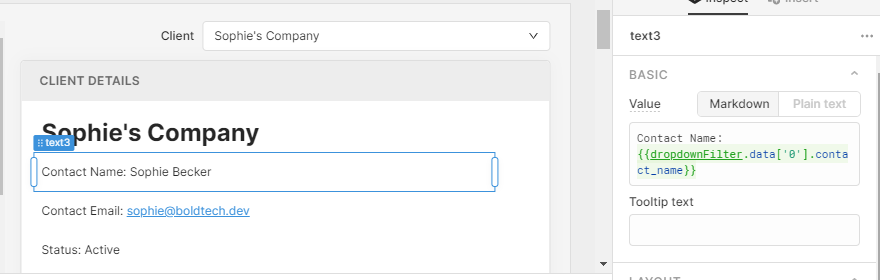
This is how your final dropdown should work:
Using a Get Query to pull in Envelopes and Documents
To kick things off with the DocuSign integration, you need to know how to build your basic GET query. There are two key pieces of information you need under the ‘My Apps and Keys’ section of your DocuSign developer account.
- Your API account ID. You will need this in each query to retrieve information from your account.
- Account’s Base URL: This will be at the beginning of each query you make.
It’s helpful to be aware that in DocuSign, each document is stored within an ‘Envelope’ and you will need to pull in the Envelope ID before you can retrieve any information about the document itself. You can find the envelope ID by clicking on a contract and clicking on the top left link under the title, or you can use the from_date/to_date parameters to pull all available envelopes into your query, by setting a large date range to search for (head to the ‘Pull in DocuSign Contracts by Email’ section for how to do this).
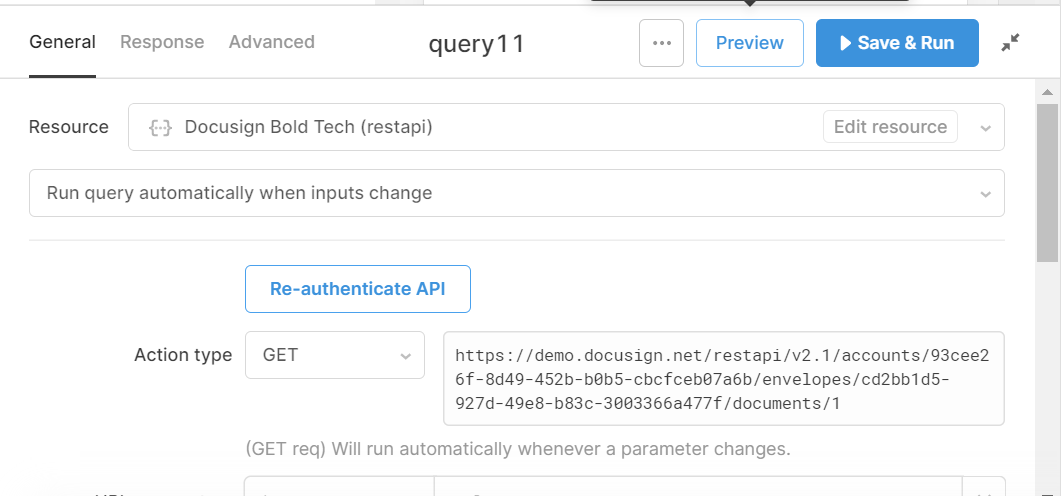
Most GET requests to pull a specific document will look something like:
https://{accountbaseURL}/restapi/v2.1/accounts/{APIaccountID}/envelopes/{envelope ID}/document/1
Replace the URL and IDs with your own
This query is a great place to start to test if all your dynamic values are working correctly.
See below for an example:
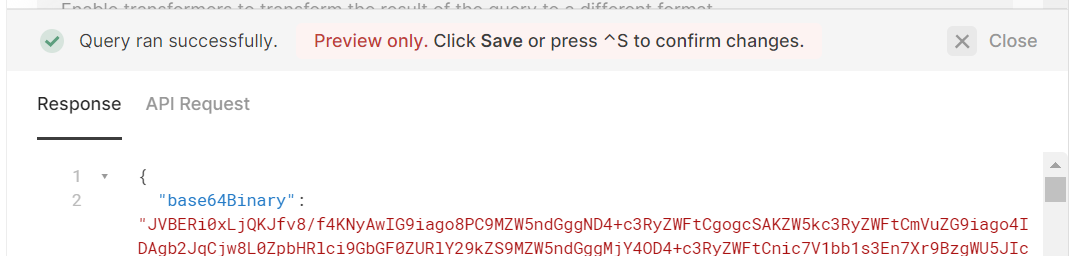
The response will return a Base64 Binary, which is an encoded version of the PDF - you can add this to the ‘Base64-encoded Binary PDF’ value in the PDF viewer component to see a preview of the PDF.
Head to the Docusign documentation for more info on your GET query and the other possible query parameters (more info on these parameters below).
Pull in DocuSign Template
For this tutorial, you are searching for contracts by client email. If an email doesn’t have any contracts associated, we're looking for the PDF viewer to show the blank contract template instead. This first section will tell you how to pull this template in.
Now that you have your base URL and API account ID, you only need the envelope ID and document number from the template doc. You can find the Template IDs and more details within Retool by using this GET query:
https://{accountBaseURL}/restapi/v2.1/accounts/{APIaccountID}/templates/Swap out the curly braces for your own URL and ID
Or you can find these in your DocuSign developer account under ‘Templates’. Click on your desired template (you’ll need to create one if you haven’t already), and in the top left corner, select its Template ID and copy.
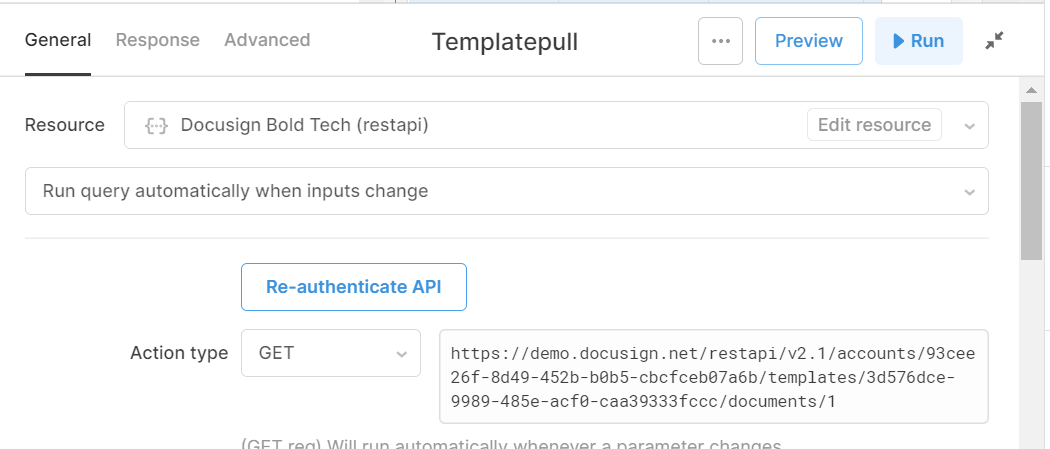
This is how your GET query should look:
https://{accountBaseURL}/restapi/v2.1/accounts/{APIaccountID}/templates/{templateId}/documents/{documentId}
The document ID is the chronological order of documents added to the envelope. If you’d like to display the first document here, you can leave it as 1.
Here is an example of a successful template GET query:
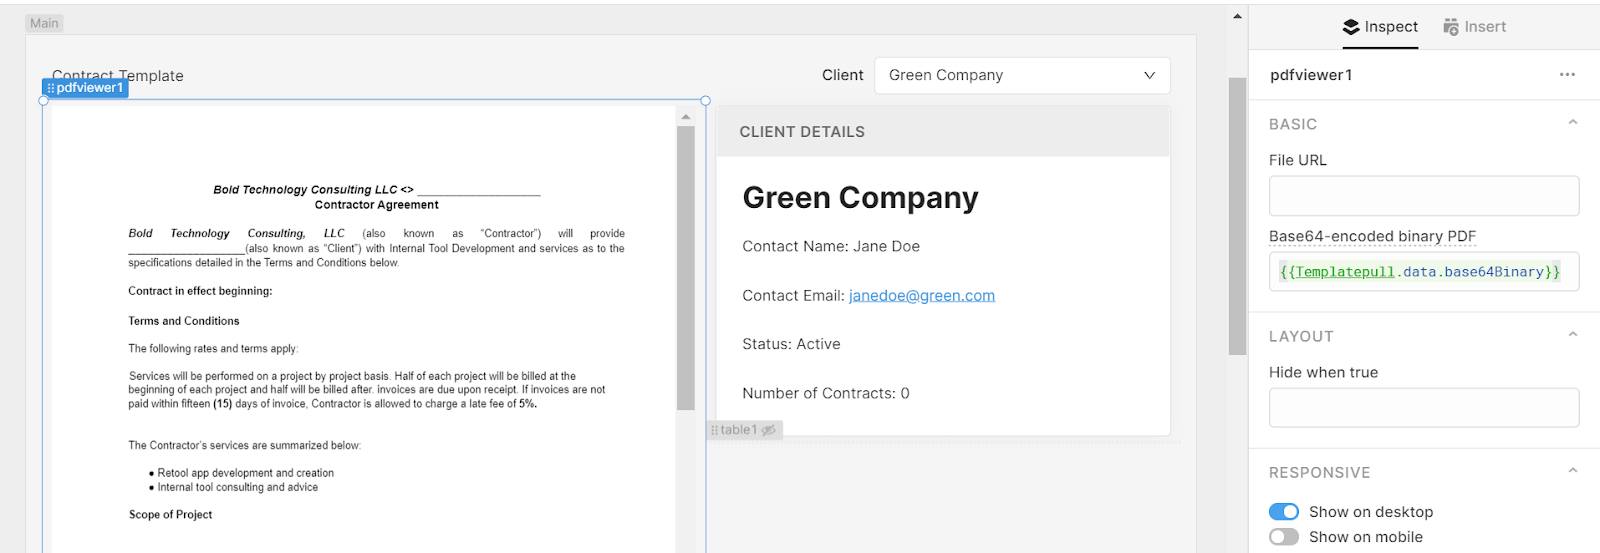
This query will return a Base64 Binary formatted PDF. As in the GET query section above, pull a PDF viewer component into your app and in the Base 64 value box, reference your query using the code below:
{{GETquery.data.base64Binary}} As you can see below, using this query the template contract shows in the PDF viewer. To make this dynamic switch between the template and associated contracts, we will use a JS ternary, but more on this in the next section.
Hey Presto! Now you have pulled in your first PDF view of a DocuSign template!
Pull in DocuSign Contracts by Email
For the final part of this tutorial, you will search DocuSign for the contracts by email, display the envelope details in a table, and show a preview of each selected contract in the PDF viewer.
Creating your GET Query Using Search Parameters
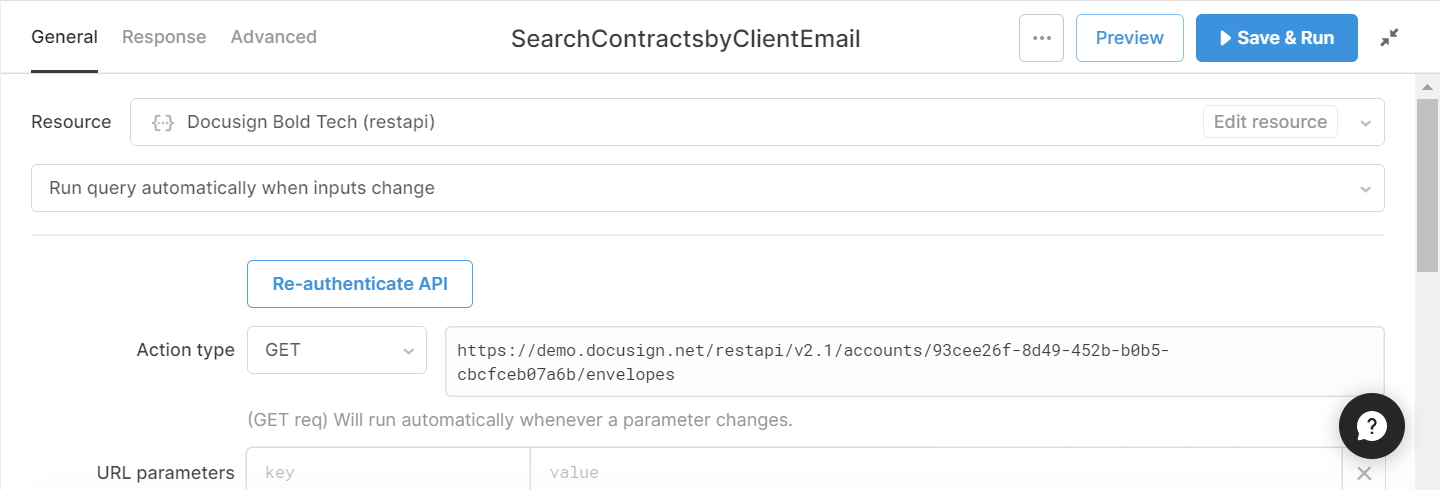
To pull in contracts from your DocuSign account according to a client’s email, you will need to create a new query that uses a search_text parameter to search for a client’s email address. (Learn more about other possible parameters here.)
As in the first GET envelope query section of this tutorial, this is the format for the base of your GET request and is what you will input as the URL for your query:
https://{accountbaseURL}/restapi/v2.1/accounts/{APIaccountID}/envelopes
To search for envelopes, to_date and from_date are required parameters and must be included in every envelope search query you do. To keep things (relatively) simple, for the from_date you can use a moment function to input a date one year in the past, and for the to_date to add a day to the current date (to ensure we pick up on any contracts signed or created on the present day). You can use the moment library (pre-installed in Retool) to set these automatically, or manually input them - whichever suits you and your app best (see image below for where to input these).
To search the Docusign contracts according to the client selected by the dropdown filter you initially made in the Retool app, you need to reference their contact email using the search_text parameter. You can also begin this query by testing it with a specific email address if you don’t already have your Retool components set up.
Here are our parameters.

This request returns an object with an array of envelopes inside that have satisfied our search parameters. We will use the ‘documentscombinedURI’ because this gives the URI of the contract with signatures from both parties (but you could apply the same principles to the other URIs the ‘envelopes’ object returns).
Displaying Contract Details in a Table
You can pull this envelope info into a table component in Retool using {{SearchQuery.data.envelopes}}, hiding all but the email subject (as a reference), status and completed date, and formatting these into a readable view.
You can then convert the ‘documentscombinedURI’ column into a button, which allows the user to download the pdf by opening the URI - adding the URL:
https://appdemo.docusign.com/api/accounts/{APIaccountID}{{self}}
as in the image below (the initial part of the URL may vary when the app is in production). When the button is clicked a download window will open to save to your computer. For some more ways to download and save PDFs, head to our PDF tutorial.
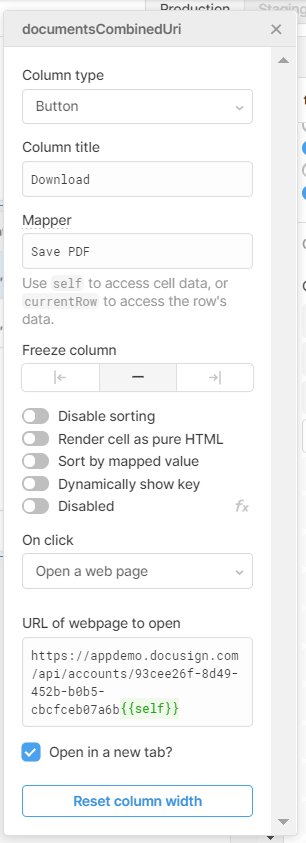
Here's how the button will look in your table:

Displaying the Selected Contract in the PDF Viewer
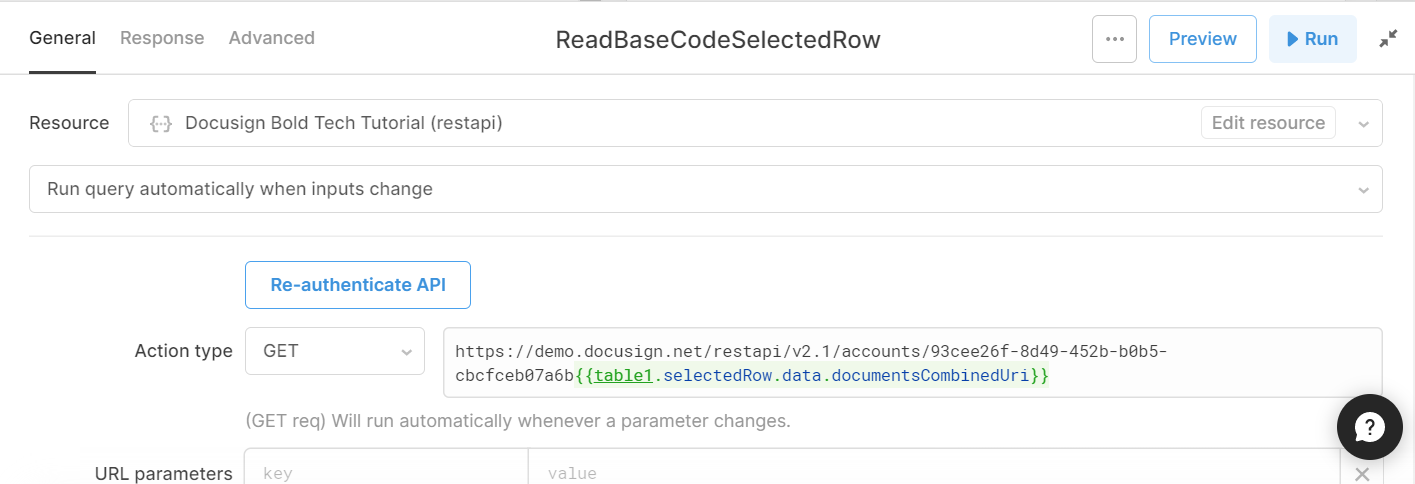
To display the PDF in the Retool PDF viewer component, you will need to get the Base64-encoded Binary code for this URI link. For this, we need another rest API query, which pulls the binary code for the CombinedURI doc according to the selected row in the table. It should look something like this (replacing the table reference according to the component used):
{accountbaseURL}/restapi/v2.1/accounts/{APIaccountID}
{{table1.selectedRow.data.documentsCombinedUri}}
Note: replace all values in braces with your own.
📌 Note: This same query should pull the Base64 code for any of the URIs you might want to pull in, if you aren’t looking for the combinedURI document, just change out the final reference for the URI you need.
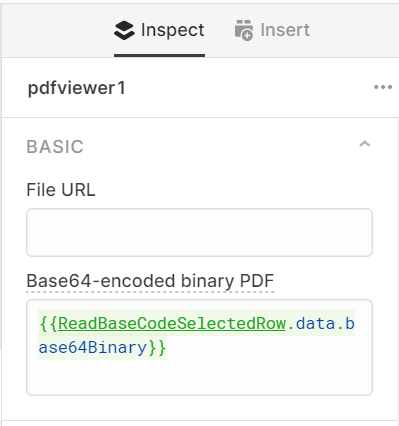
Finally, as with the others, we’ll use this query in the PDF viewer by referencing it in the ‘Base64-encoded Binary’ value of the component. Now, when you select each row in the contract table, the contract should be displayed in the viewer.
Finishing Touches
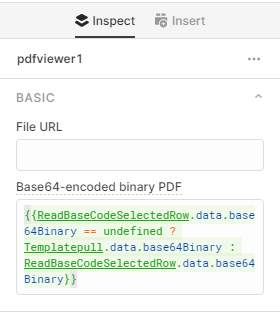
To make sure the viewer switches dynamically to the template when there are no contracts available for the selected email address, use this ternary (with your own queries) in the PDF viewer’s Base64-encoded Binary value box.
{{ReadBaseCodeSelectedRow.data.base64Binary == undefined ?
Templatepull.data.base64Binary :
ReadBaseCodeSelectedRow.data.base64Binary}}
Replace query names with your own.
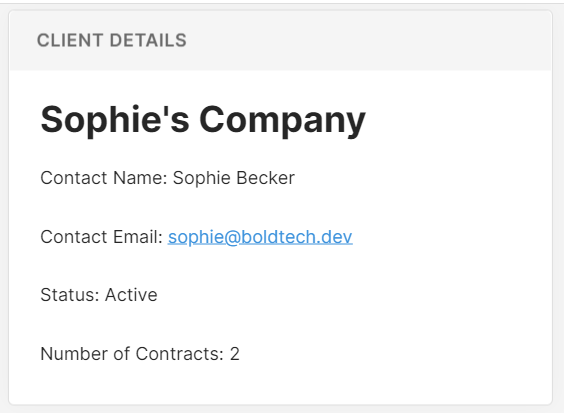
To finalize the project, you can add a ‘Number of Contracts’ element to your Client Details container, which pulls the ‘set size’ from your original search query:

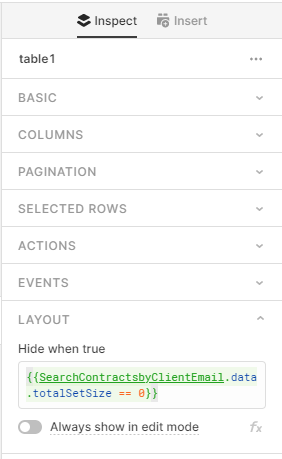
You can also set your contract table to hide when no contracts are present using this reference to link to your contract search query:
And with the end of that tutorial, you’ve learned how to authenticate your DocuSign API resource using OAuth2.0, and use it to search for and pull in contracts according to a client’s email address, and finally present them in a PDF viewer for a quick preview!


