


Collecting form responses efficiently and integrating them into your Retool applications can save time and streamline workflows. Fillout is a great alternative to Typeform that offers a seamless and affordable solution to handle form submissions and synchronize them directly with Retool.
This guide will walk you through:
- Setting up a Fillout account.
- Creating and sharing forms with Fillout.
- Integrating Fillout responses directly into Retool and creating a table to display responses.
Let’s get started.
Step 1: Set up an account with Fillout
Begin your journey by visiting Fillout. Once you're there, creating an account is quick and intuitive. Whether you prefer to sign up with Google or use your email, Fillout's interface is designed for simplicity.
Luckily, Fillout offers a generous free plan that includes basic form functionality, so you can get started without needing to pay a thing. For those who need more advanced features like question types, custom confirmations, white-labeled forms, and custom share links, Fillout offers several pricing plan options that won’t break the bank either.
We particularly like that Fillout charges based on functionality and doesn’t charge for extra users, which is a frustrating feature of competitors like Typeform. Now, upon signing in, you'll find yourself in a clean and user-friendly dashboard, ready to design your first form.
Crafting your form is where Fillout really shines. With drag-and-drop tools, conditional logic, and dynamic fields, it’s straightforward to create highly optimized forms for even complex use cases.
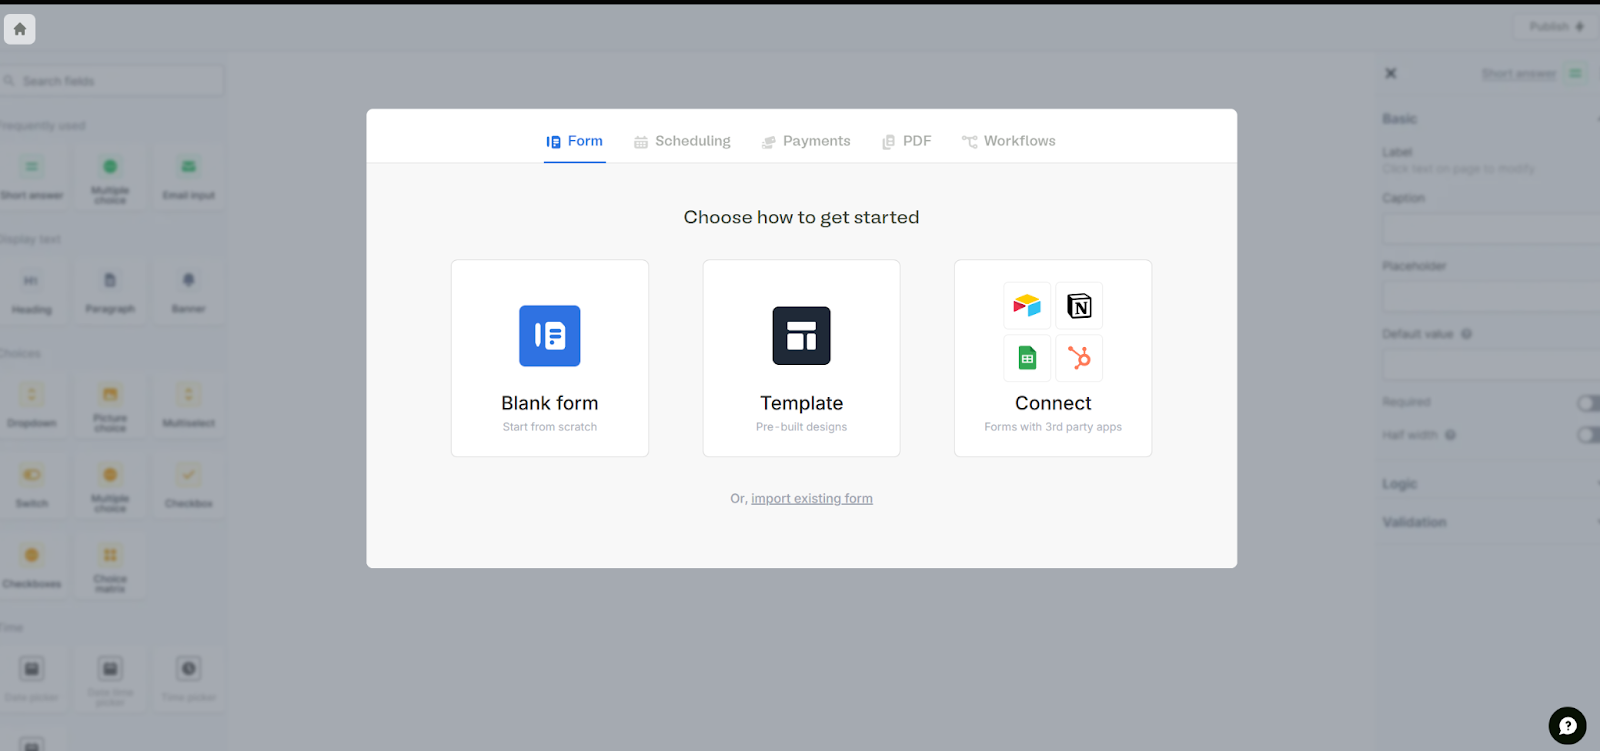
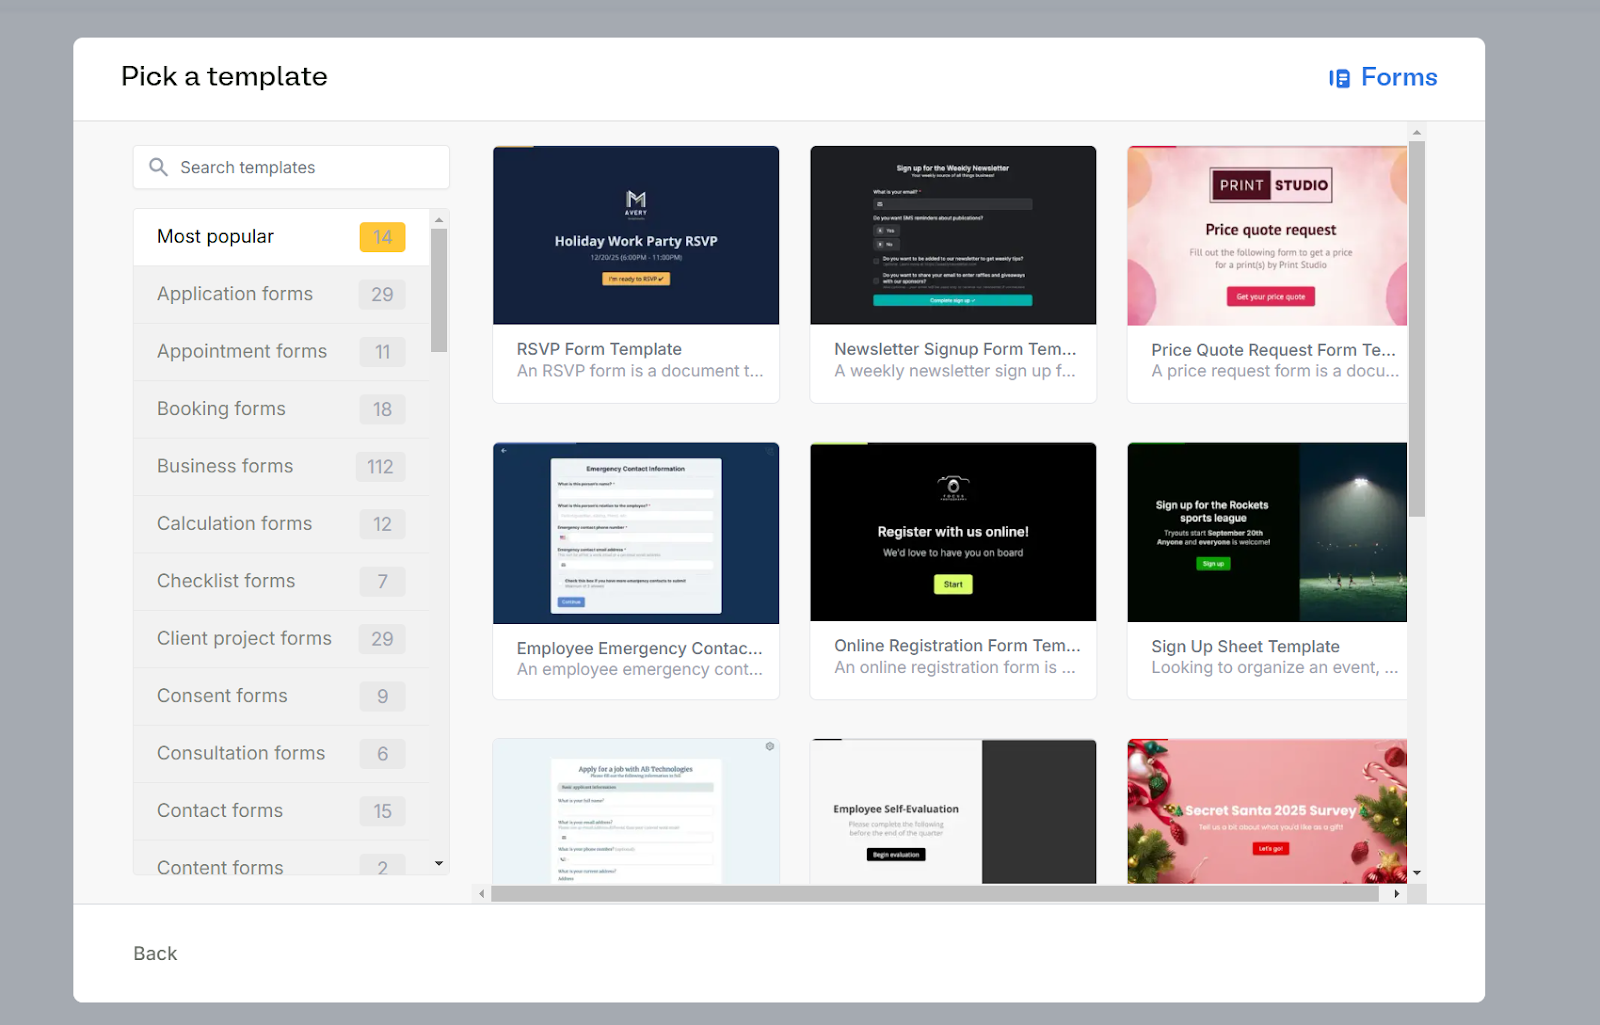
To get started, you can select one from hundreds of Fillout’s existing templates.
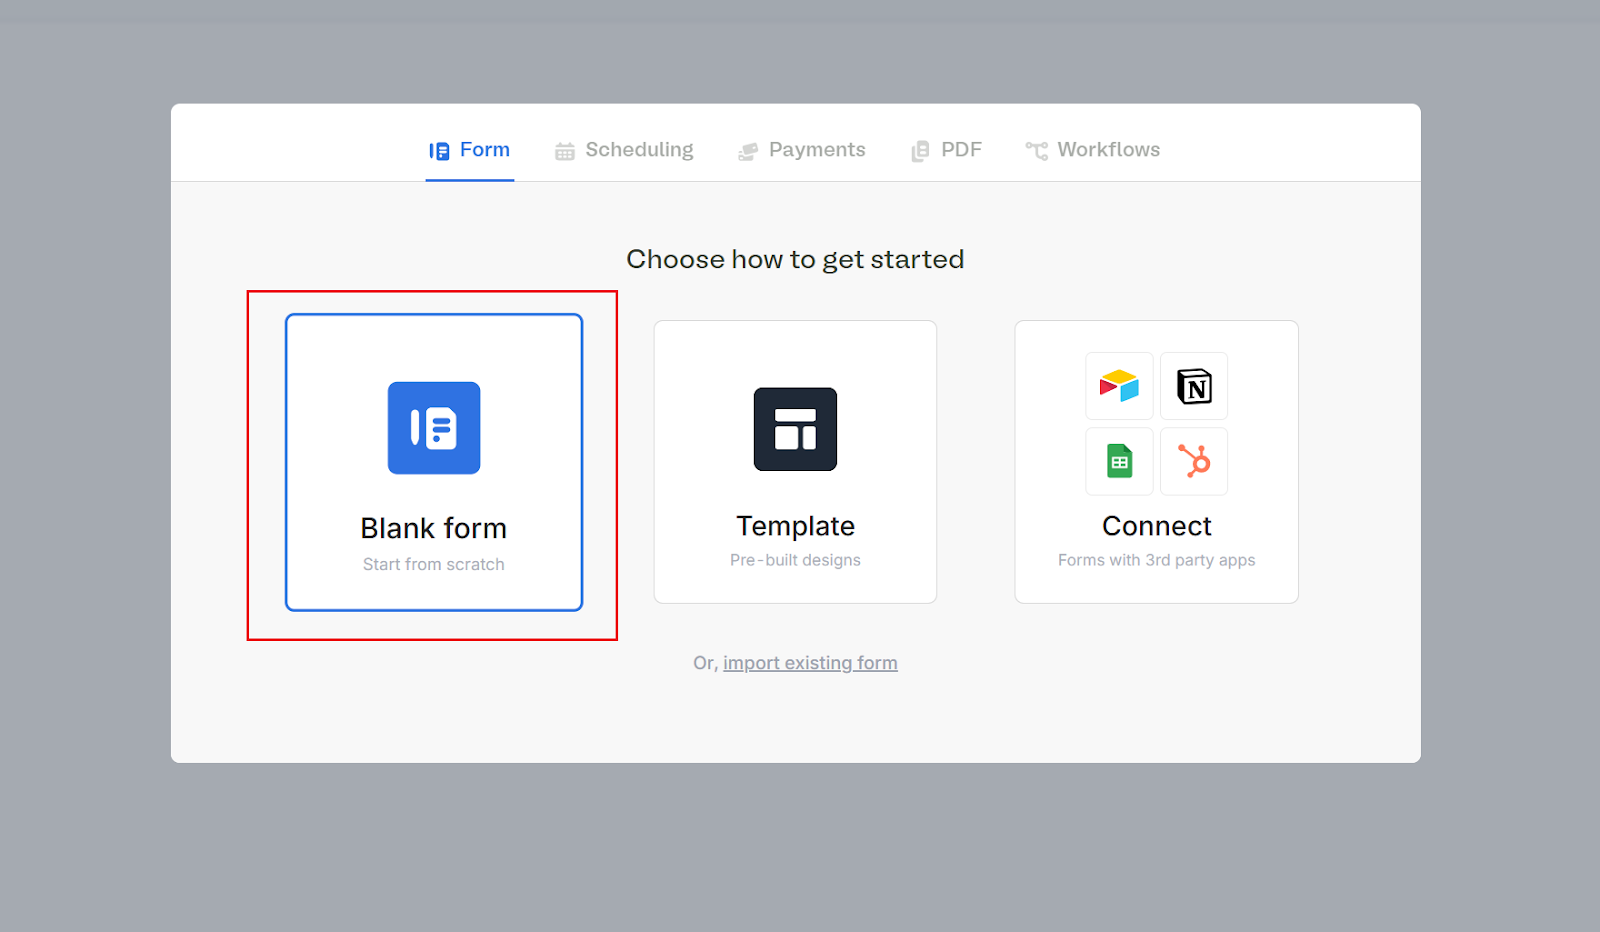
Or create a blank form tailored to your specific needs.
Since we’re pulling this data into Retool, let’s keep it simple for this tutorial. For this example, let’s create a form with fields for "Name" and "Email" and a text area for more details.Follow the following steps to create your simple form
Choose your form theme:

Then, name your form.
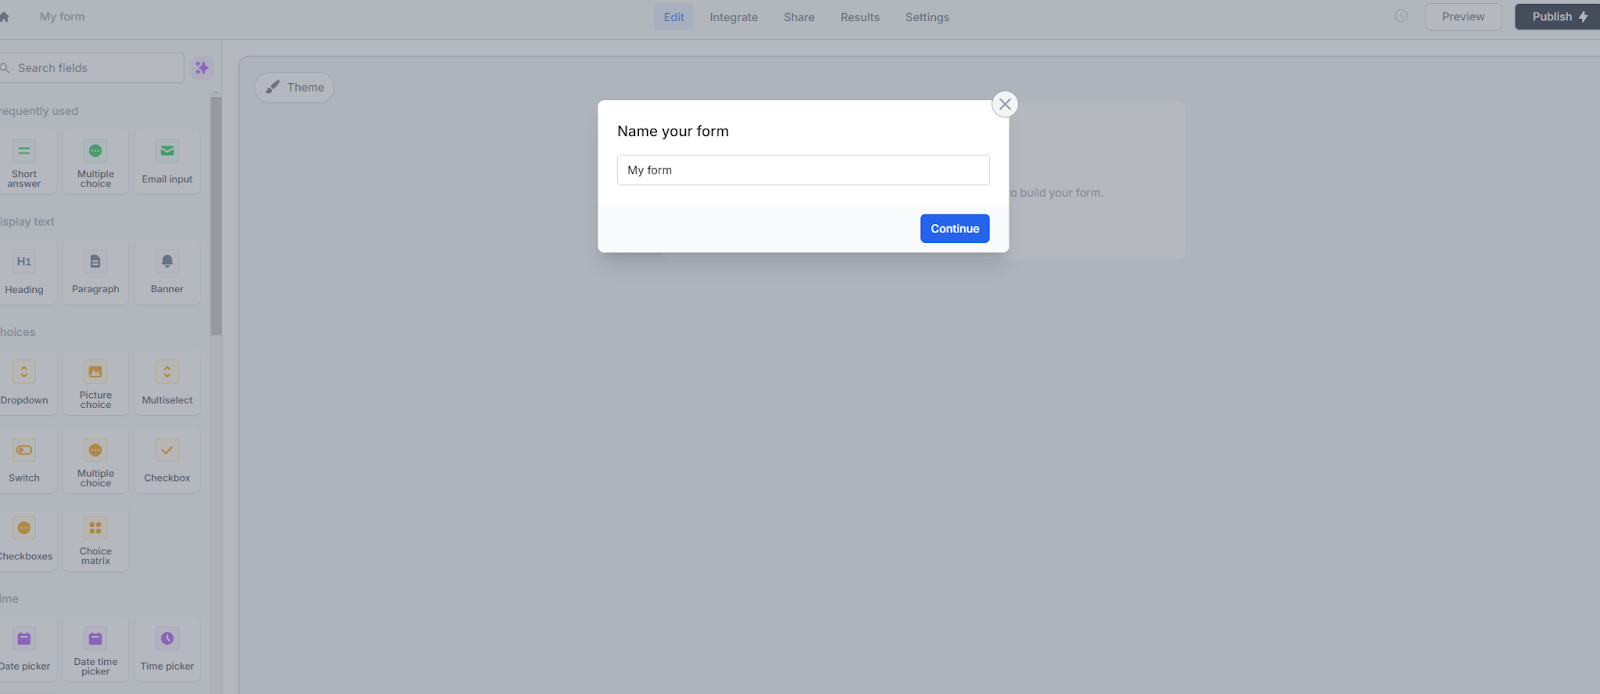
Now we can use the handy drag-and-drop interface to pull in some components. In this case let’s pull in an email input, a text input and longer text input.
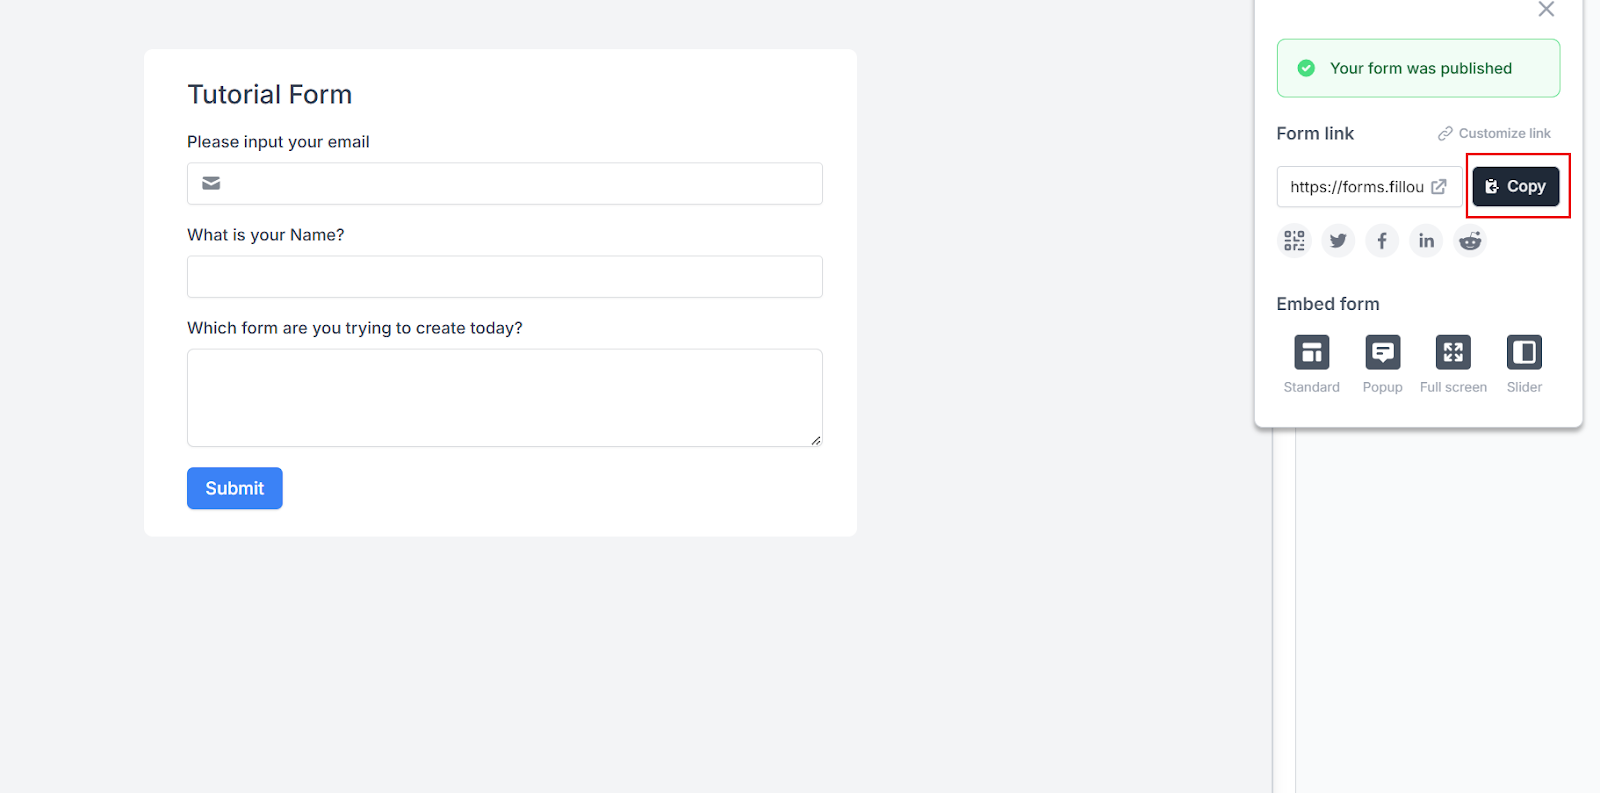
Once your masterpiece is ready, click Publish (top-right corner) of your screen to generate a shareable link or embed code. Copy the shareable link—you’ll need this later to test your form.
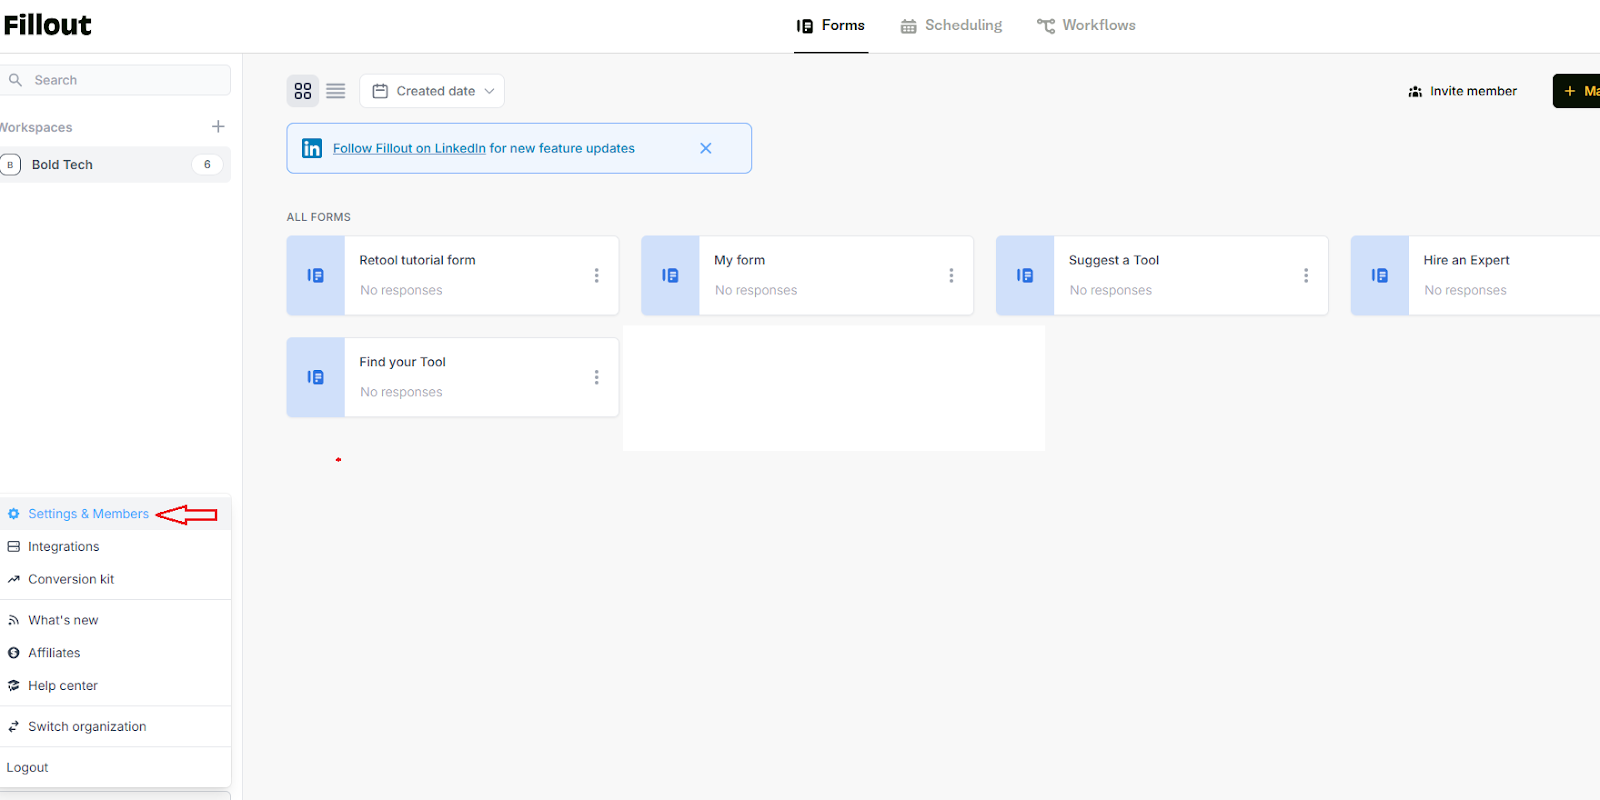
The next step is to Generate an API Key, this is what we’ll use in Retool to connect to your Fillout account.
Navigate to Settings in the dashboard (click your avatar in the bottom-left corner—it’s like finding hidden treasure).
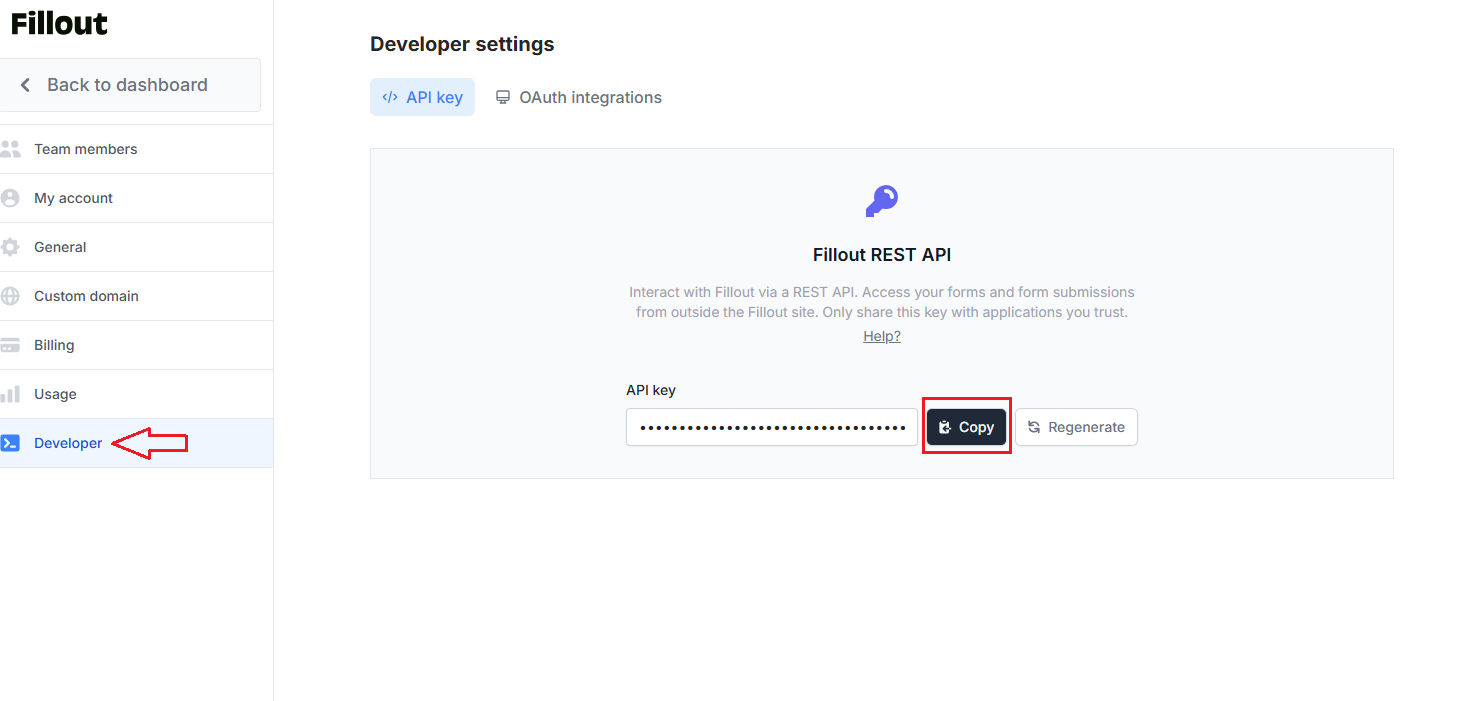
Go to the Developer tab and click Enable API.
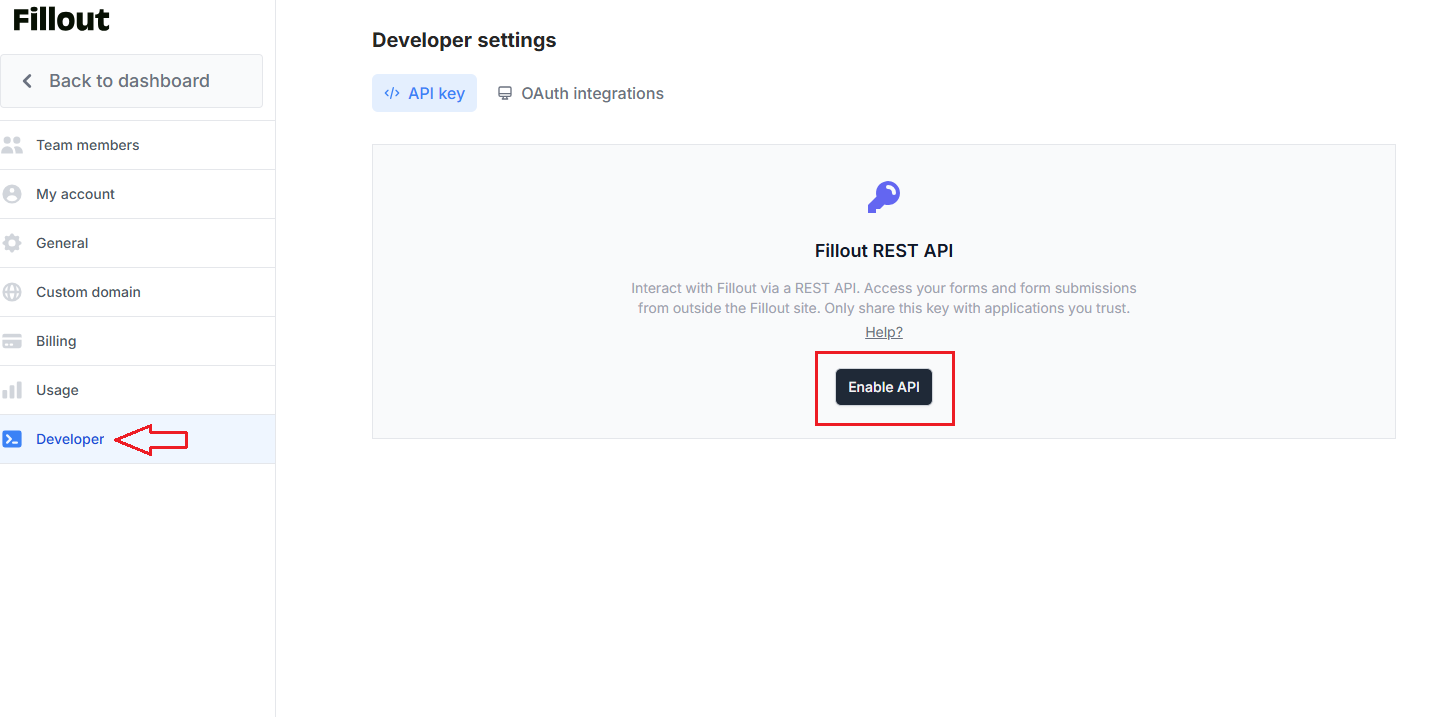
Once you enable the API, copy your API key for the Retool integration.
Step 2: Set up your Retool integration
Now let’s head to Retool and log in to our account. Click Sign Up if you don’t already have one.
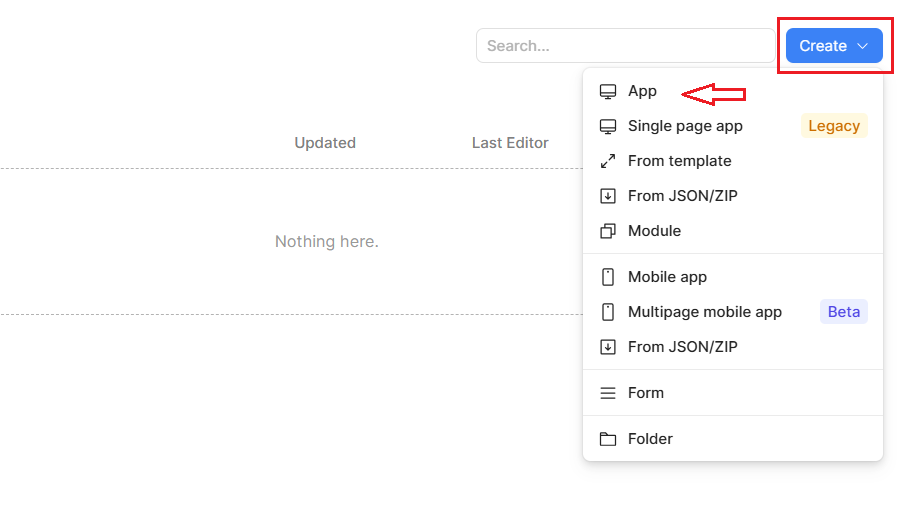
Once you’re on the homepage, click the blue Create button to start building a new Retool app. Time to channel your inner app designer!
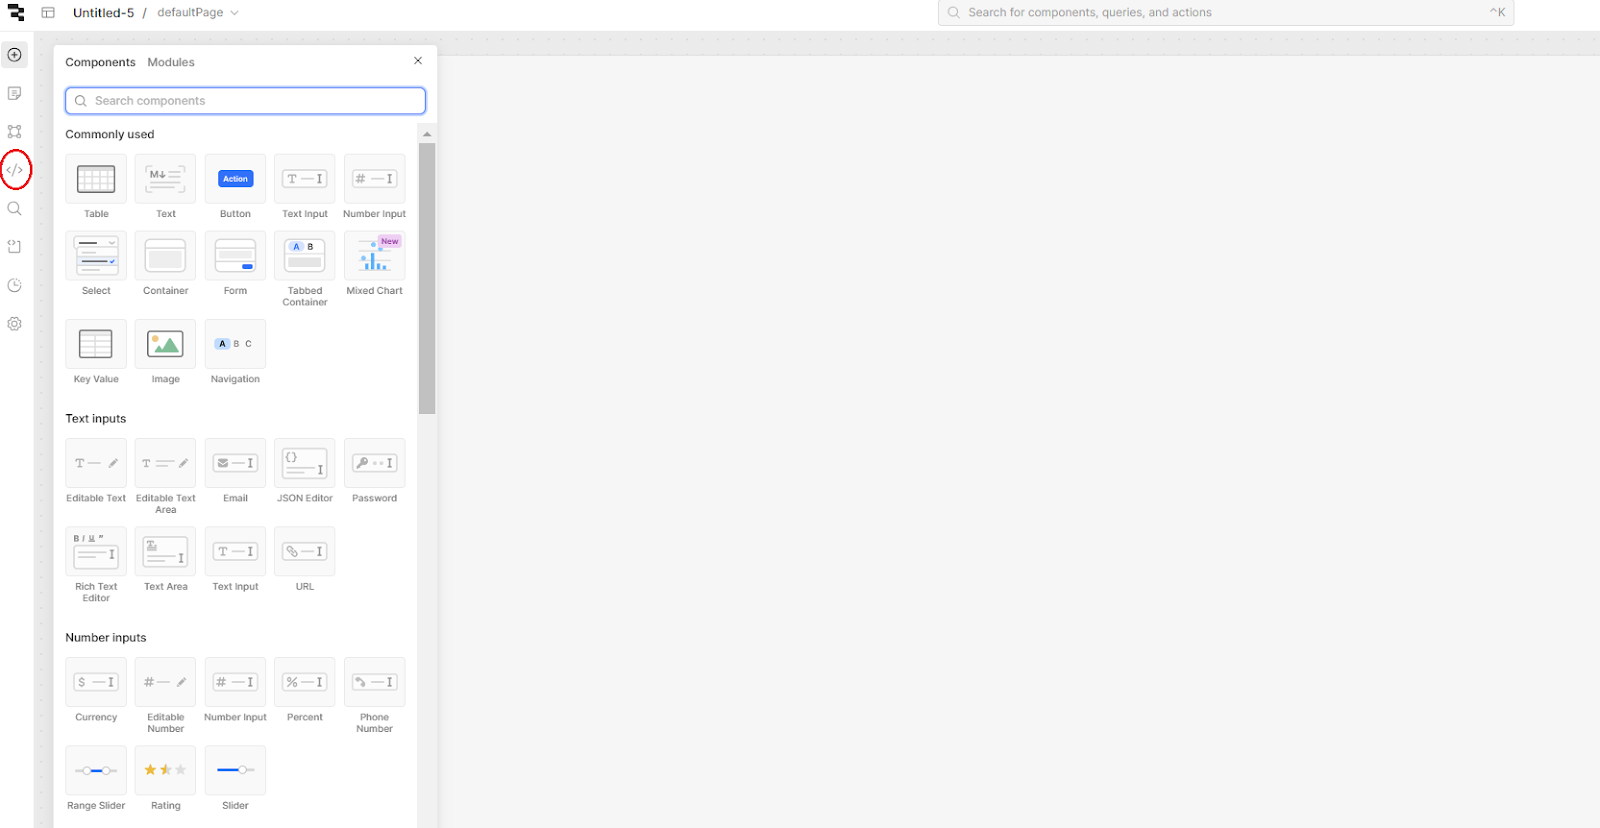
Click the </> icon on the left-hand side of the screen to access your app code and create a new resource.
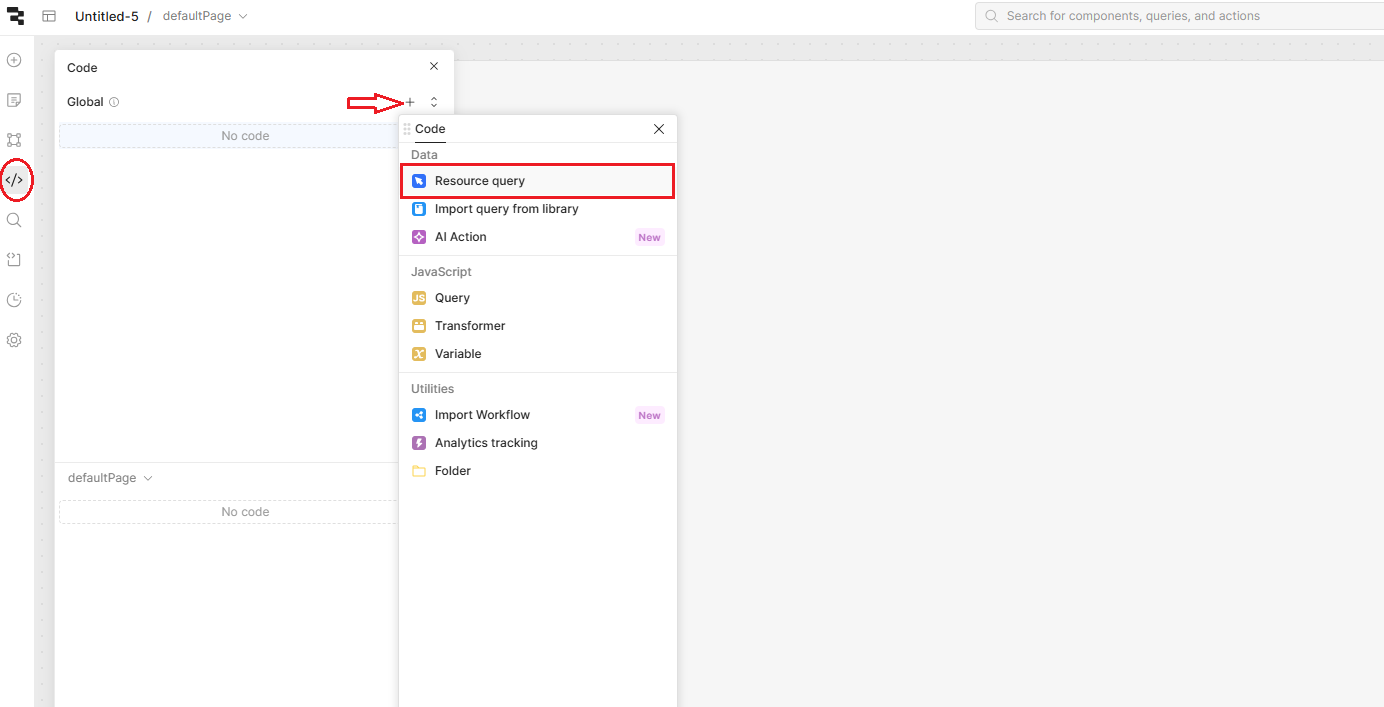
Click the + icon as shown in the diagram below to add a Resource Query
Select REST API as your resource type.

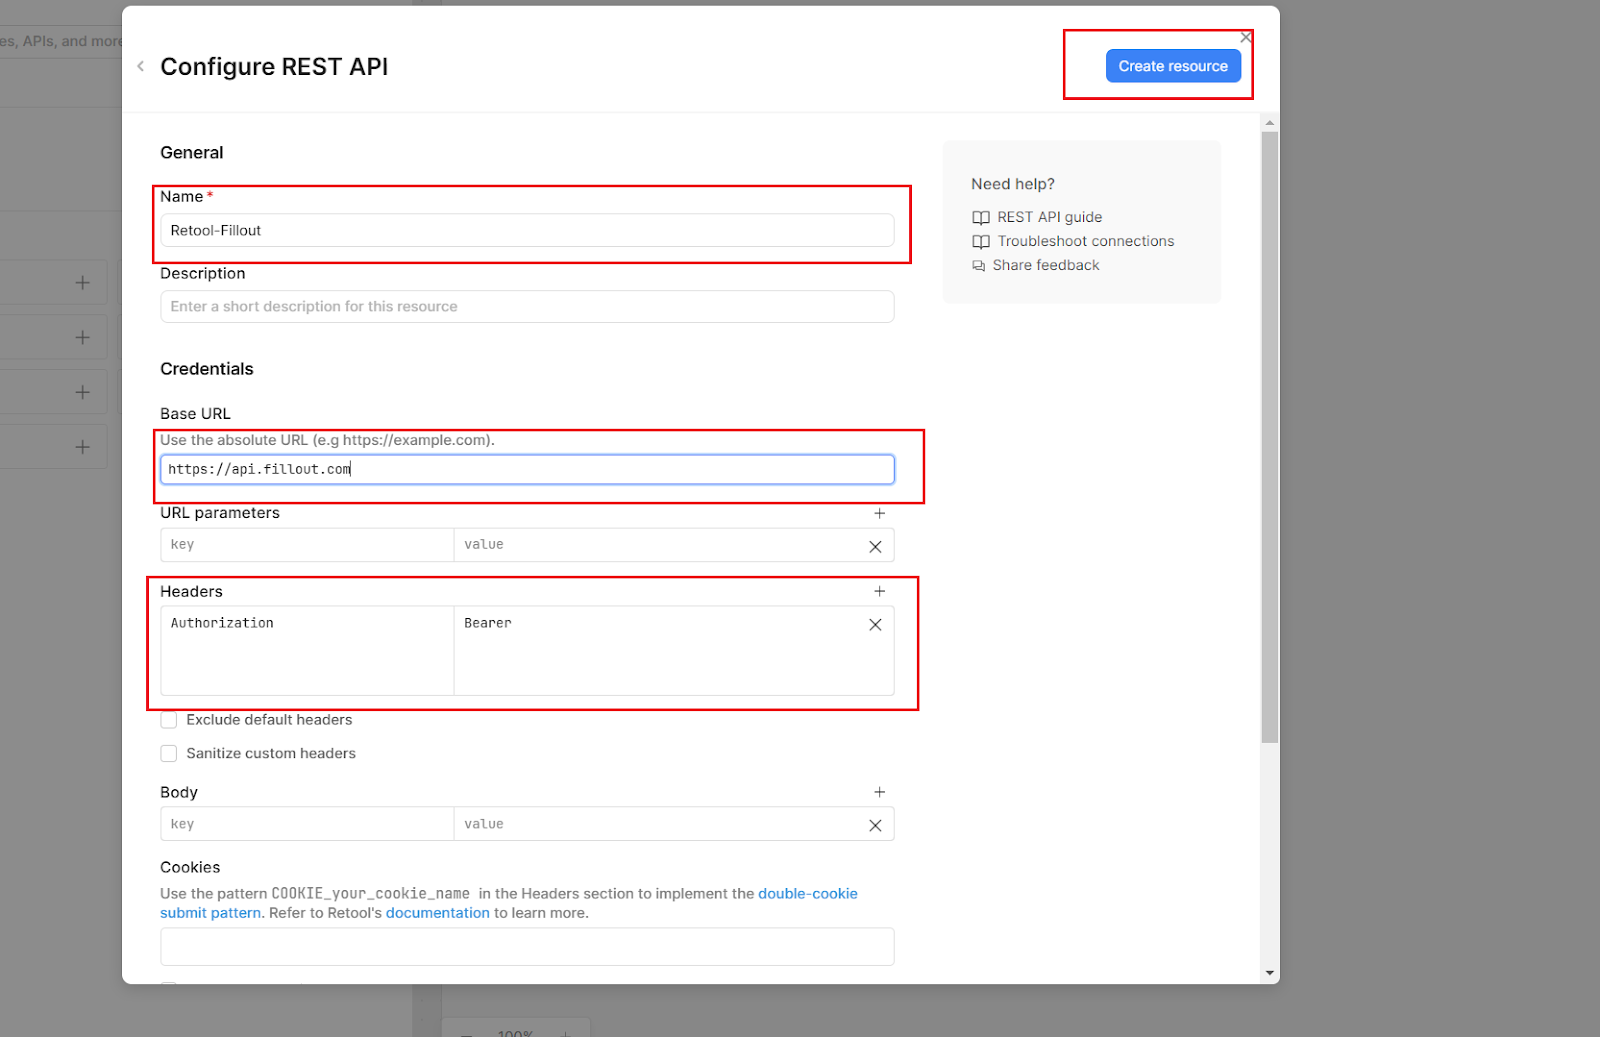
Fill in the following details in the modal. This is where you’ll need the API key you copied earlier:
- Name: Choose a name for your resource. Make it snappy!
- Base URL: https://api.fillout.com
- Headers:
- Key: Authorization
- Value: Bearer <your Fillout API key>
After filling out these details, Click Create Resource in the top-right corner.
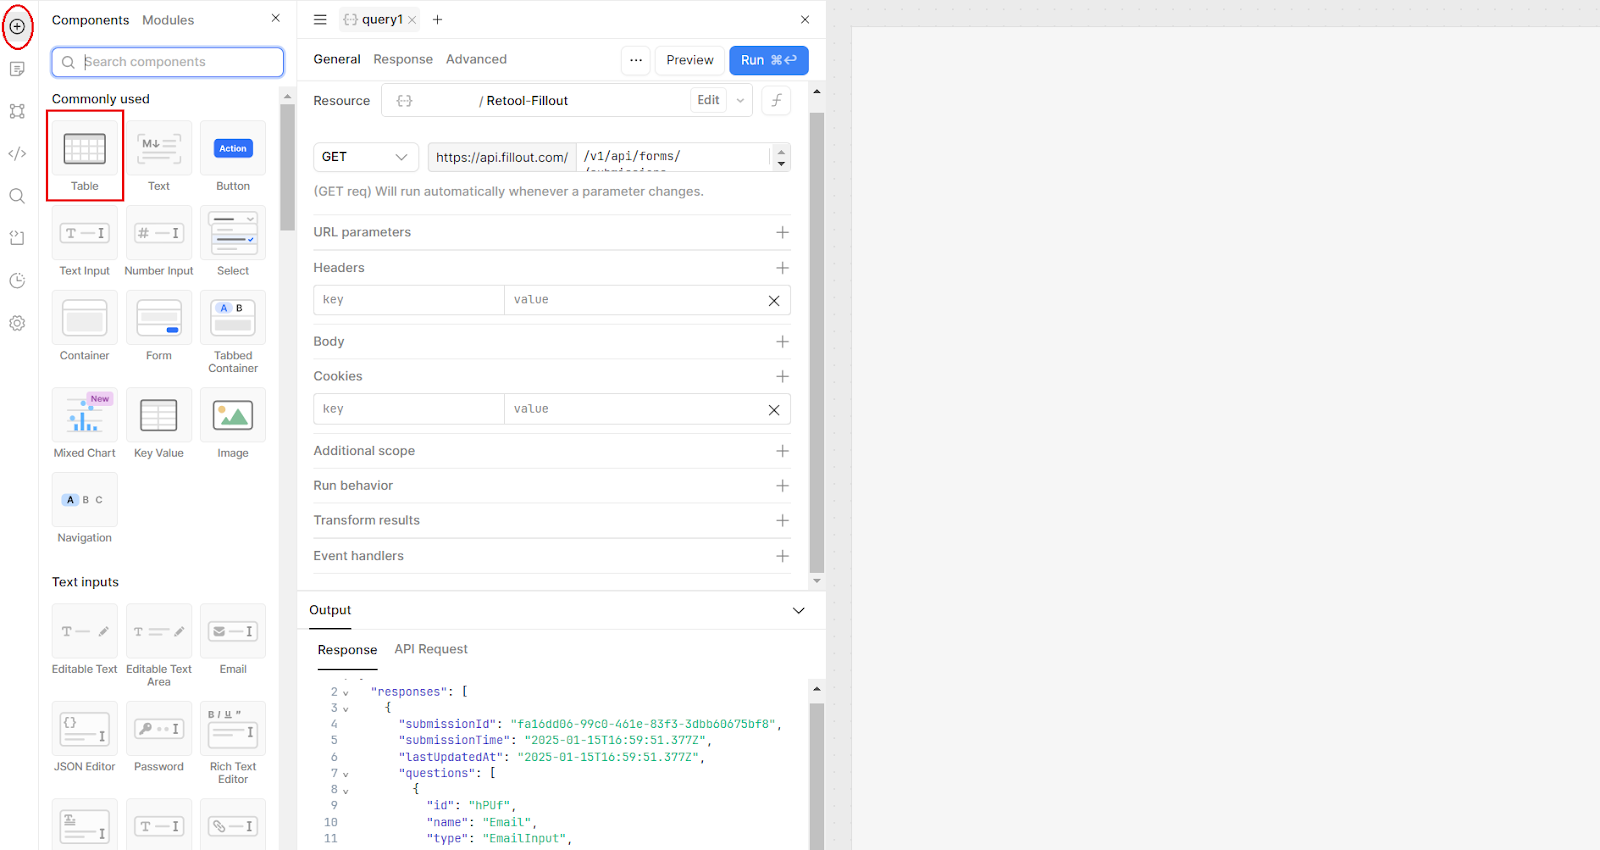
Now that the resource is created let’s head back to our Retool app and use the Get all submissions endpoint to pull in all our form responses. We’re just going to use the basic endpoint, but the Fillout docs contain more URL parameters that you can use too.
- Use this endpoint in the resource query you created in your app: GET /v1/api/forms/{formId}/submissions (see image below)
- Replace {formId} with the ID of your form. If your form URL is https://form.fillout.com/t/gHretr3UKYus, the form ID is gHretr3UKYus
Click Save and Run to test your query.

To explore more of Fillout endpoints and create more complex examples, you can visit their docs to find out more.
Now, let's talk about visualizing the data. Retool's components make visualizing data as fun as playing with Lego bricks. For this example, we’ll use a Table to showcase form responses.
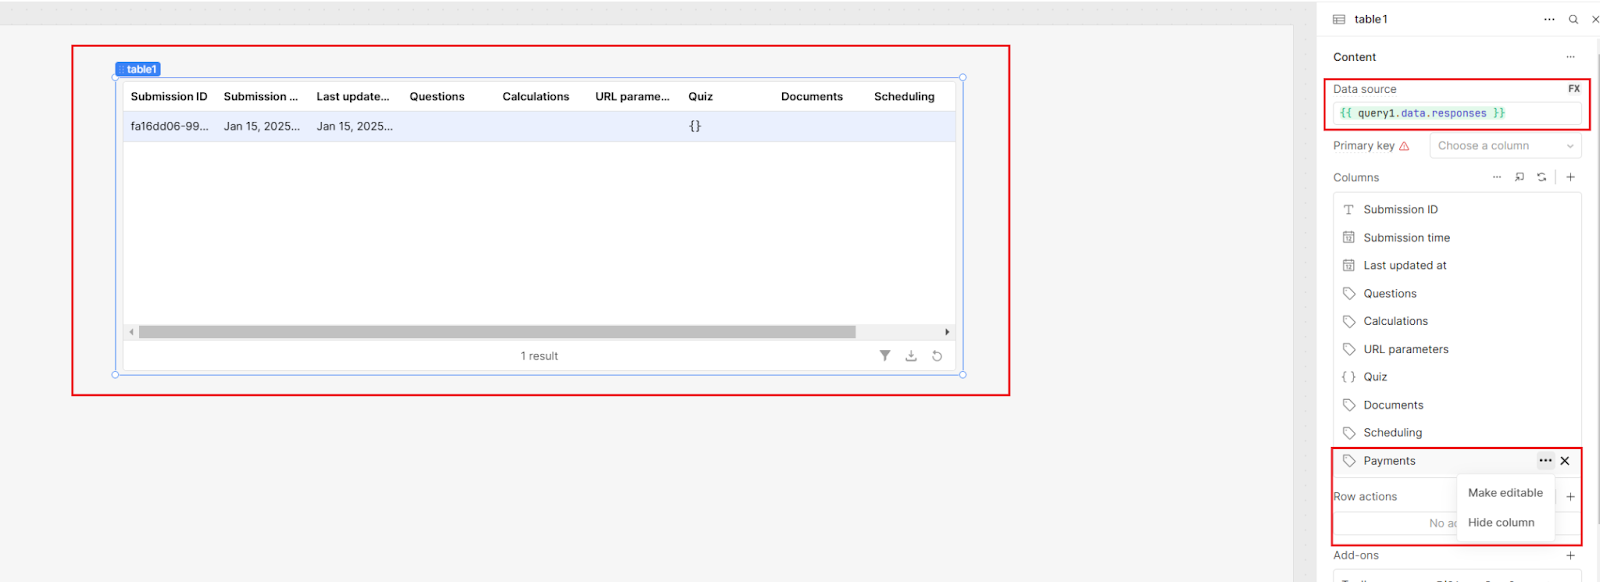
Since you’re already saved and run your query, the table should display the form responses automatically. If it doesn’t, you can connect to the data source by referencing the query in the ‘Data source’ value in the table, using curly brackets like this:
{{yourquery.data.responses}}
In the right-hand sidebar, you can:
Hide or remove unused columns by clicking the three dots. Out with the clutter!
Now let’s add some custom columns for better data visibility by clicking the + icon.
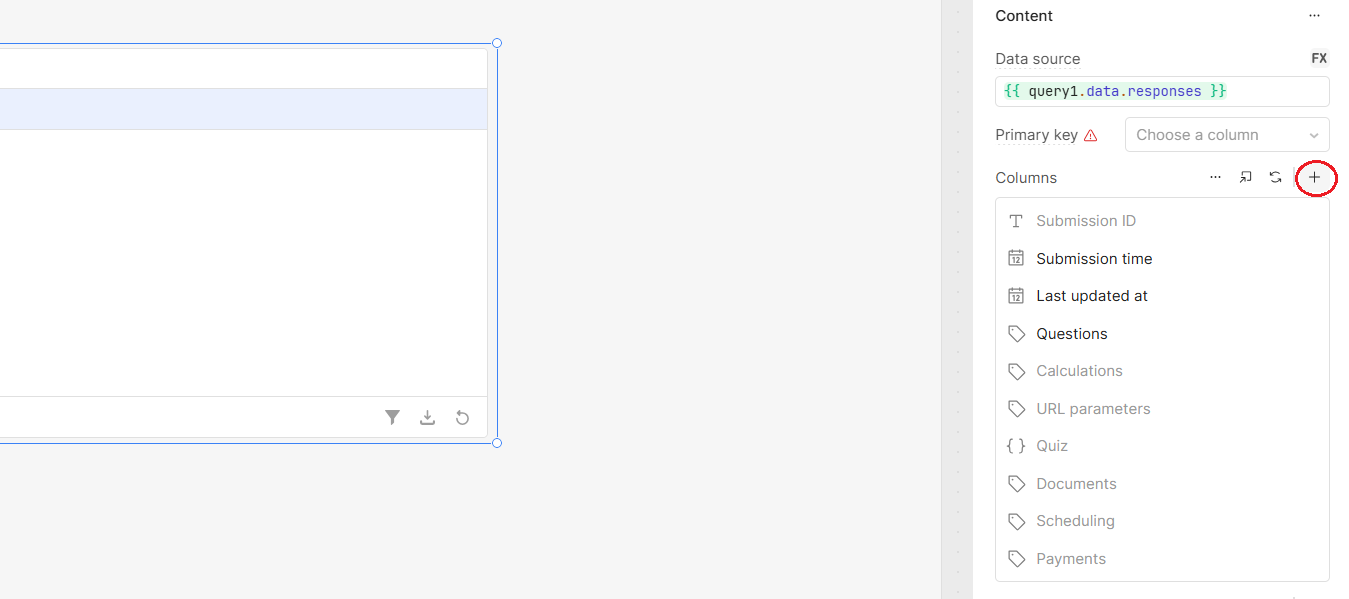
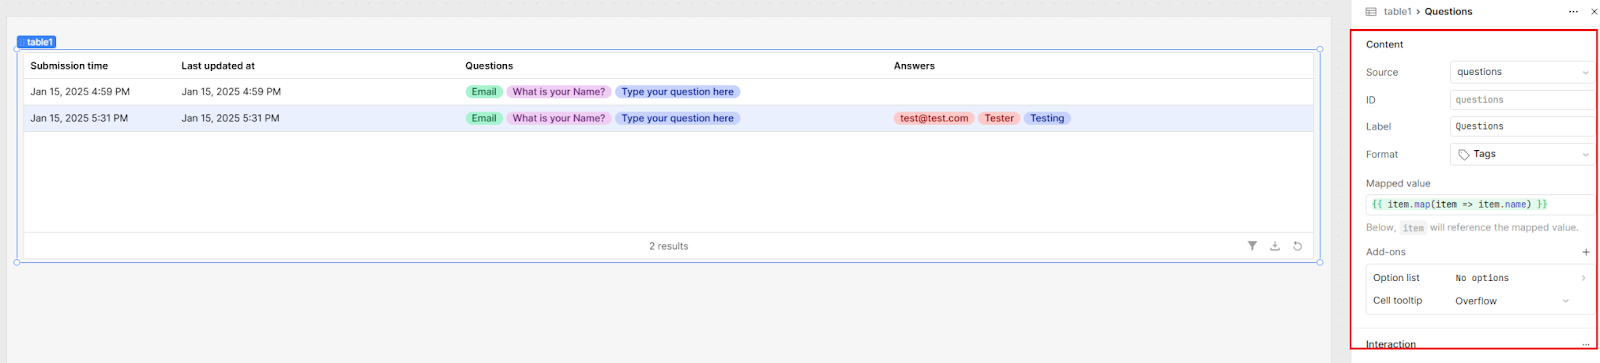
Now let’s add a column for us to display the questions too. and set it up with these values:
- Source: questions
- Label: Questions
- Mapped Value: {{ item.map(item => item.name) }}
To map the values, we are using curly brackets and the .map function. The curly brackets tell Retool that we are going to use JavaScript.
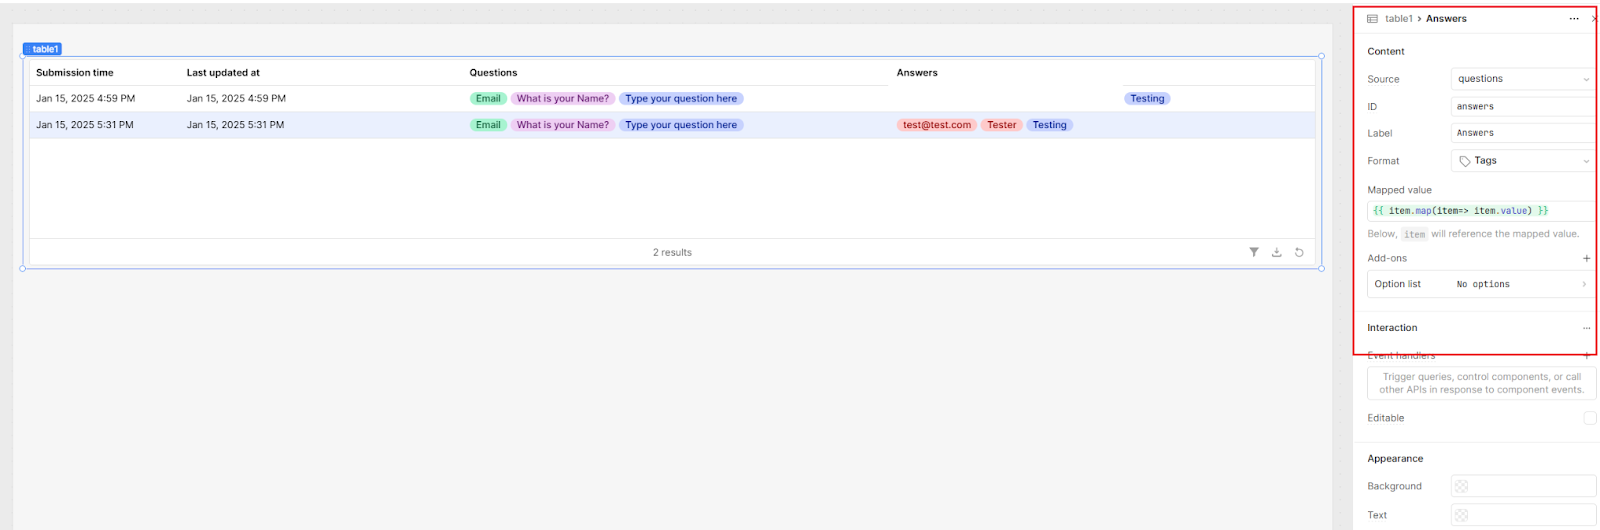
Add a column for Answers and set it up with these values:
- Source: answers
- Label: Answers
- Mapped Value: {{ item.map(item => item.value) }}
For better visibility, let’s add a modal component so that we can click a row and see individual responses.
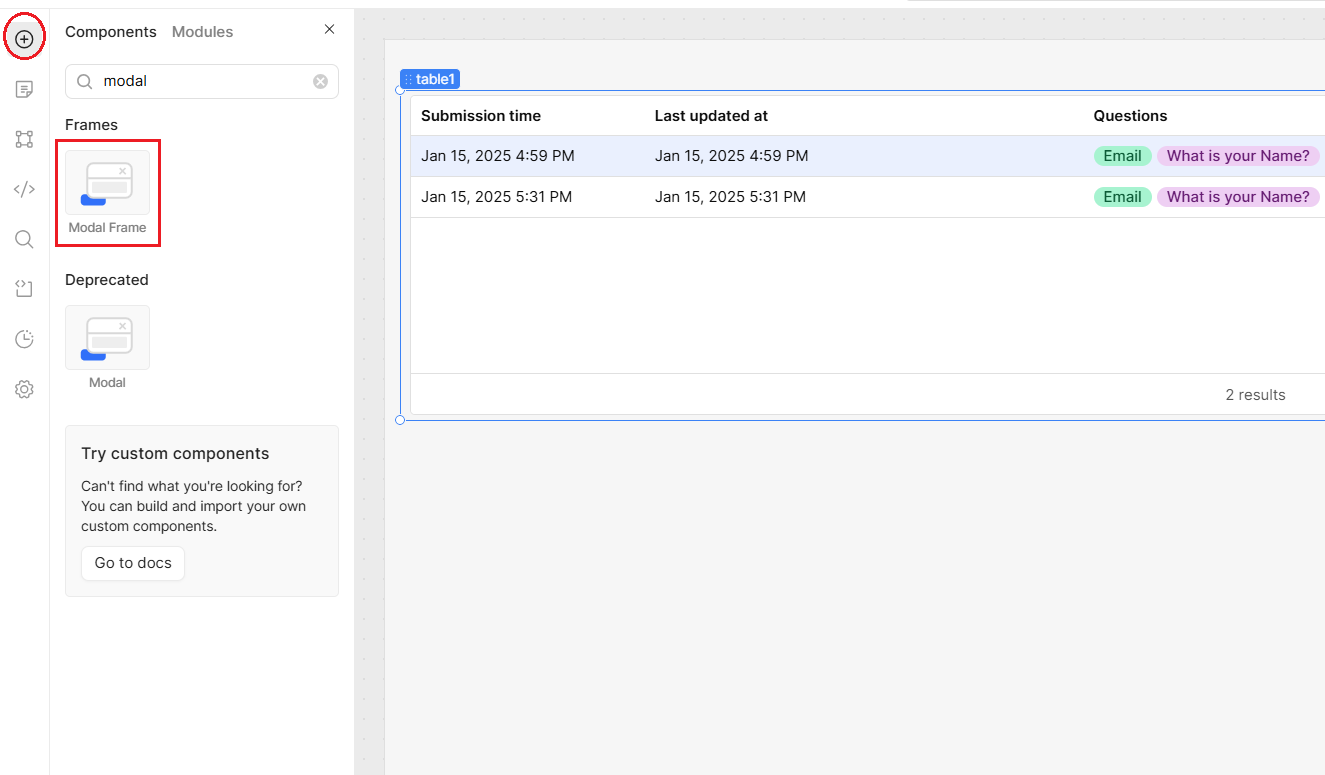
After dragging the modal component to your editor, you should see a Modal just like in the image below
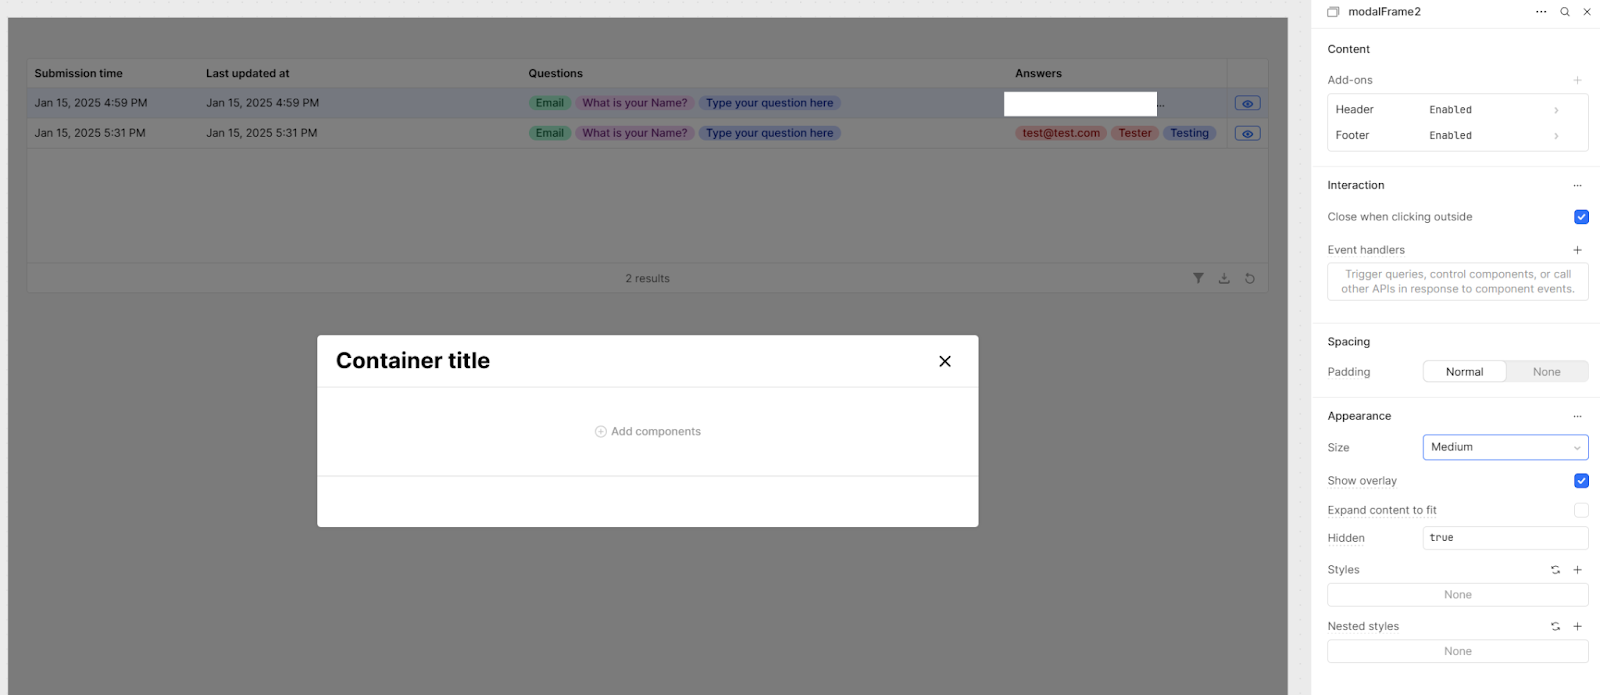
Go ahead and add a Table component to your Modal.
- Source: {{ query1.data.responses[table1.selectedDataIndex].questions }}
- Remove previously mapped columns and click “Generate columns from data source”
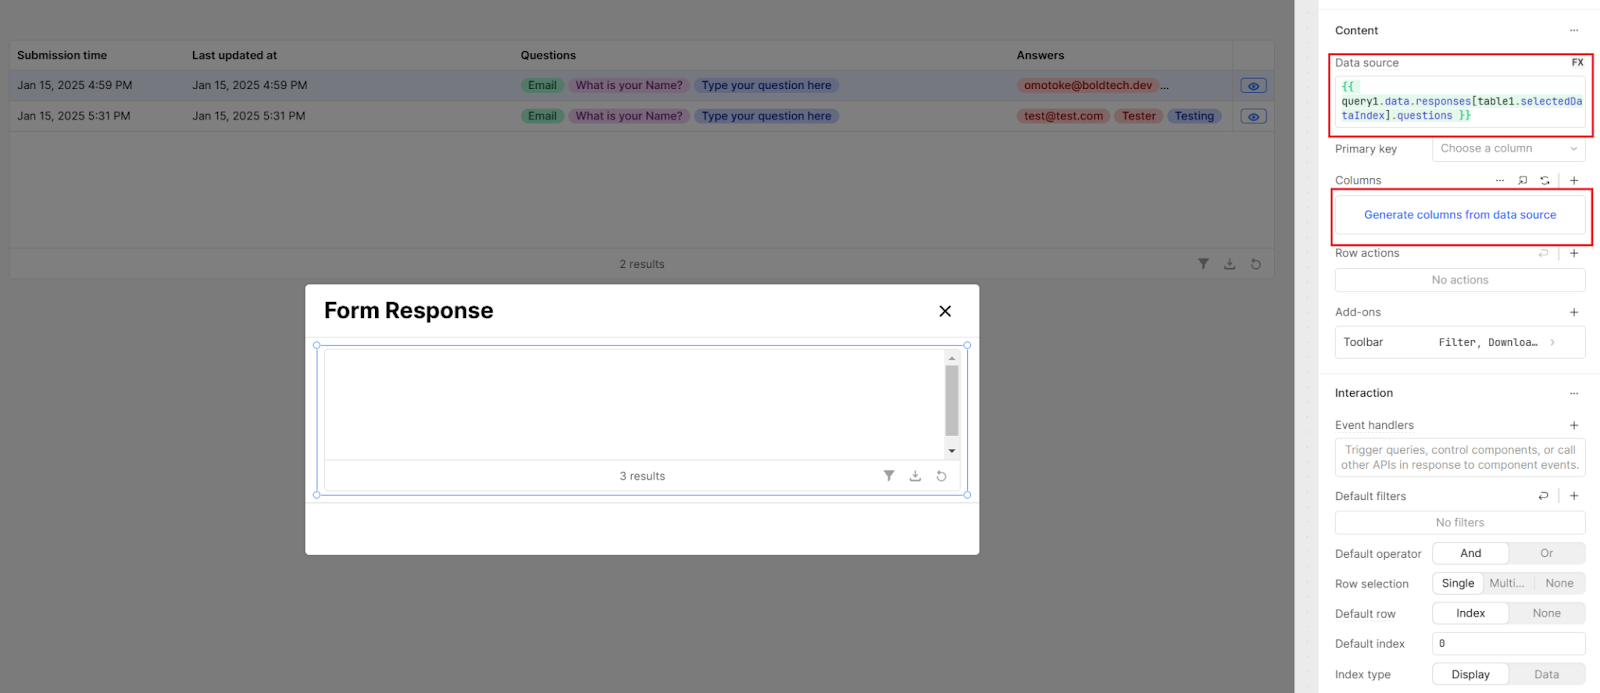
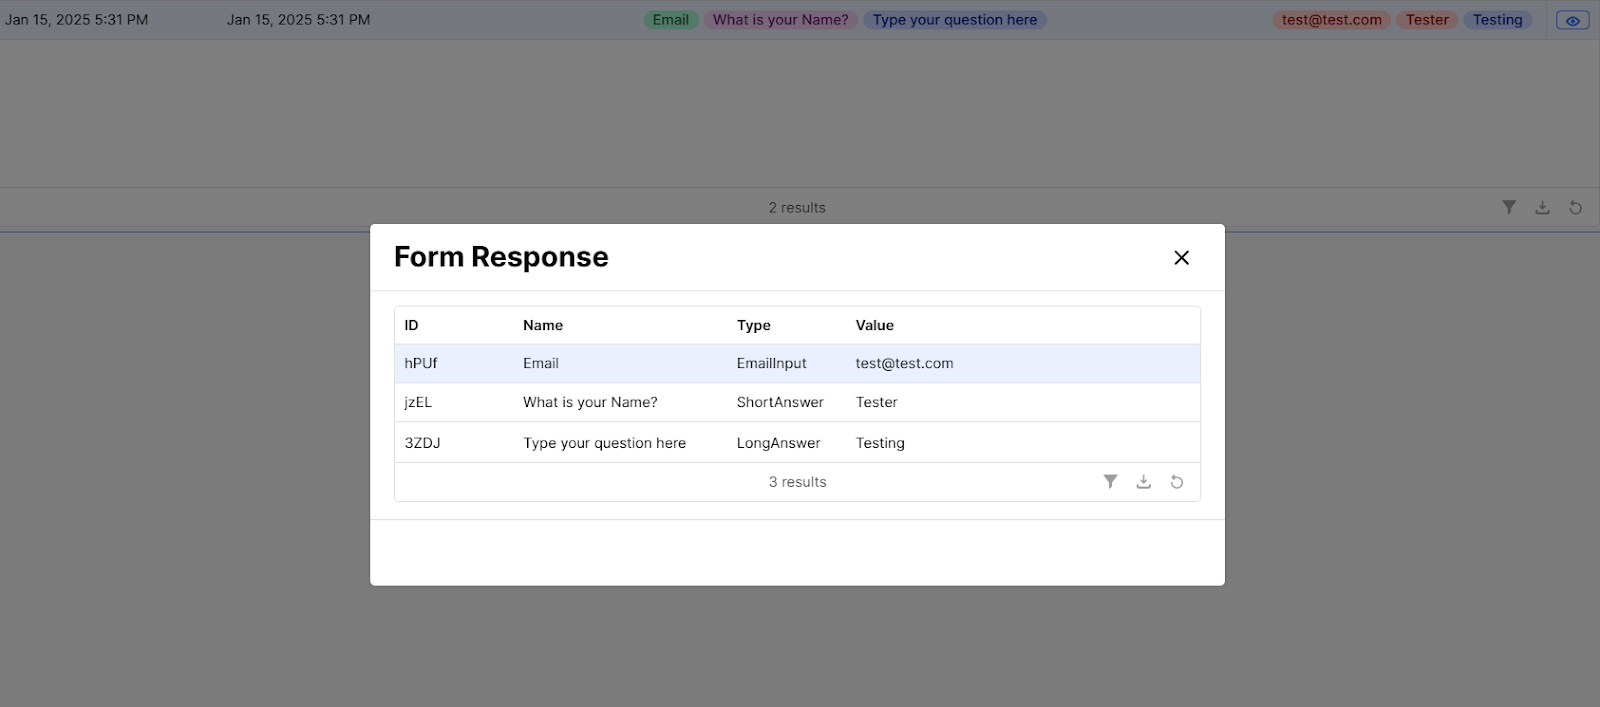
This should auto-populate your table with the individual questions and responses.
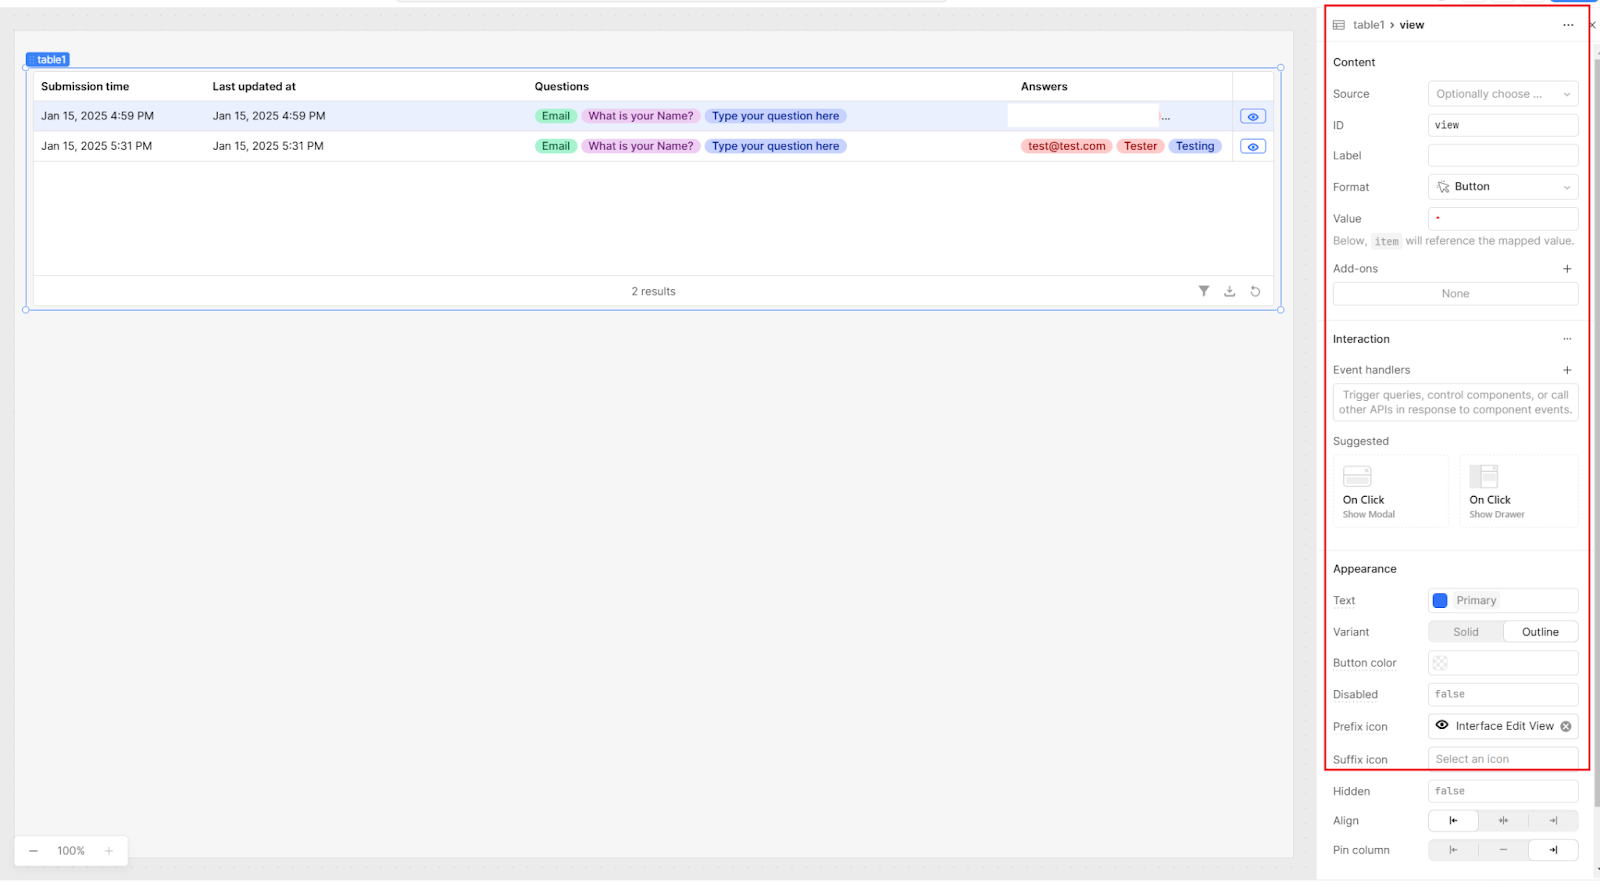
To set up a button to open this modal, add an extra column to your source table. Configure the settings as below:
- Format: Button
- Prefix icon: Interface Edit View
- Pin Column to the left
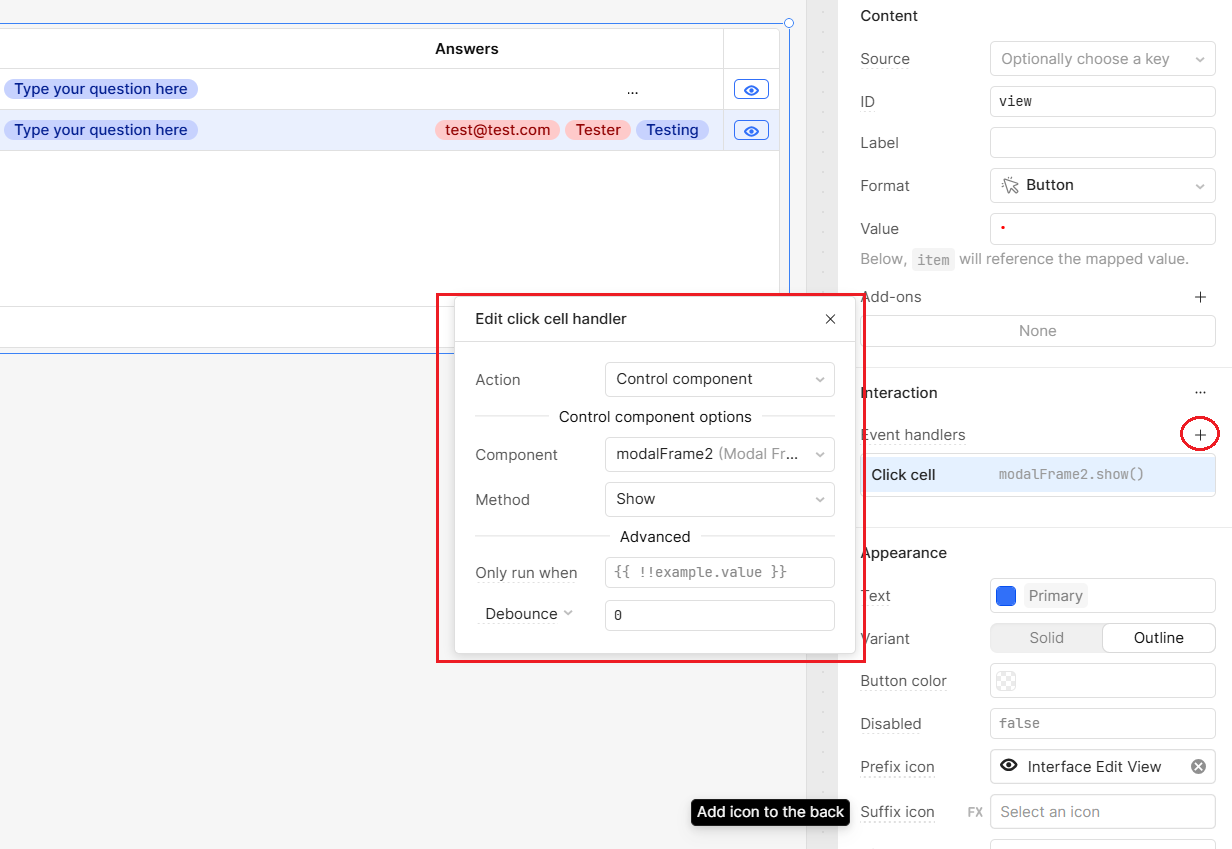
Next, add an Event handler so onClick the button will open the modal with the selected row’s response.
With this app, you can now easily integrate your Fillout form responses into Retool. This is a great use case for building website submissions, onboarding clients and user feedback into your Retool workflows so that more users can access the data from within their apps.
Want to learn more about internal tools and how to build them? Check out our sections on low-code tools like Notion and Airtable, or developer tools like Retool and Windmill.

