


Most Bold Tech clients run their Retool environment on-prem, and not just for the obvious security benefits. Self-hosted deployments allow for the stability of quarterly releases, faster app load times, and the kind of granular configuration control that cloud deployments don’t get.
If you’re looking to set up your on-prem deployment on AWS, Retool's official deployment guide is there to get you running inside your VPC, and their Terraform module and CloudFormation stack make AWS deployments pretty straightforward. But if you've actually tried setting this up in production, you might already know that the guide leaves some critical gaps, particularly when it comes to those final security controls.
In this guide, we’ll address those additional critical points the Retool docs miss.
We'll walk through:
- Custom domain configuration
- AWS Secrets Manager integration
- Multi-space deployments
- Audit log resources
- Okta SSO
- Automated PostgreSQL setup
These are all the real-world pieces you need to get your AWS On-Prem deployment into production, securely, and in a way that scales. Before we start, you will need:
- Of course, for this deployment, you’ll need an AWS account. You’ll also need to generate an AWS Access Key to allow Terraform to create all the resources in your environment.
- Note: the generated AWS access key must be linked with an IAM that has permission to create all the resources for the deployment. You can grant Administrator access to the IAM (less secure) or grant custom permissions for all resources that will be created (more secure).
- For Terraform usage, you will need to install Terraform locally, on your computer, as well as git.
- To store Terraform history, we recommend creating an S3 bucket manually on your AWS account.
- A domain registered on any third-party tool, for example, hostinger - ideally one specifically for your Retool environment.
- Finally, you’ll need to be on a paid Retool Plan to have access to all necessary features, and you may need an Enterprise plan depending on your needs.
Initial deployment: Cloning the repo and running Terraform
Let's get started. To make things easier, you can download the Terraform code you'll need - you can find the code file at the bottom of this article.
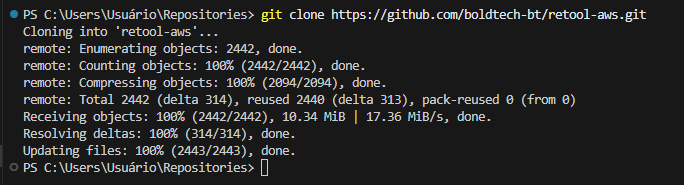
Next, navigate to the retool-aws directory and make a few quick configuration changes:
First, configure your backend and network settings. To do this, open backend.tf and update two parameters:
- Bucket: your S3 bucket name (the one you created earlier for Terraform state)
- Region: your preferred AWS region
By default, Terraform will provision a new VPC and subnets for your Retool deployment. If you'd rather use an existing VPC, just add those VPC and subnet IDs to terraform.auto.tfvars instead.
Next, set up your AWS credentials. Export your AWS Access Key as an environment variable so Terraform can create resources on your behalf:
export AWS_ACCESS_KEY_ID="your_access_key_here"
export AWS_SECRET_ACCESS_KEY="your_secret_key_here"
Now, run the deployment. You're ready to initialize and apply the Terraform code:
terraform init
terraform apply
Grab some lunch! This deployment takes about an hour. Most of that time is just waiting for AWS Certificate Manager to validate your SSL certificate, which is completely normal.
Quick heads-up: During the apply process, Terraform will prompt you for your Retool license key, which you can obtain from the Retool Self-hosted Portal or your Retool account manager
Troubleshooting the Retool Terraform Module: Temporal, HTTPS, and Networking
Our deployment code is built on top of Retool's official Terraform module (you can see the base module reference in this file). While this offers a solid starting point, we've hit a few snags during set-up that are worth knowing about - and here’s how we solved them. Below you can see the module block that provisions your Retool instance:
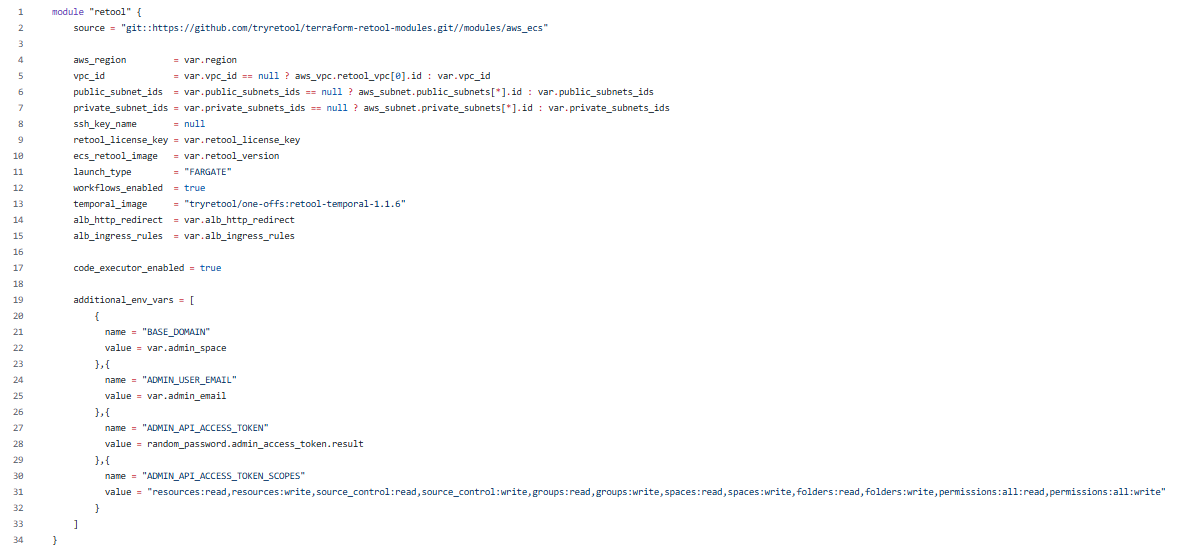
Temporal image version issues
The module defaults to retool-temporal-1.1.5, which has a critical bug: the temporal application fails to create the database user, and your entire deployment crashes.
The fix is simple: bump the temporal image to retool-temporal-1.1.6 in your configuration.
Missing BASE_DOMAIN variable
Here's a gotcha that'll bite you: the BASE_DOMAIN environment variable is required for deployment, but Retool doesn't include it by default. Without it, your deployment will fail. Make sure you add this variable to your terraform.auto.tfvars file before running apply.
Enabling HTTPS on your load balancer
By default, Retool's Terraform module exposes your application through an Application Load Balancer on HTTP, which isn't what you want for production. To enable HTTPS, you'll need to update two parameters in your terraform.auto.tfvars file:
- alb_https_enabled = true
- alb_ingress_rules - set this to the ingress rules we've defined in the code (this opens port 443 for HTTPS traffic)
Once you've made those changes, run terraform apply again to update your load balancer configuration. Check out the video below to see exactly where these settings go.
Getting your subnet configuration right:
Retool requires a specific network setup: two public subnets and two private subnets. The architecture matters here - if you get it wrong, your deployment will fail.
Here's what each subnet needs:
- Public subnets - must have route tables pointing to an internet gateway
- Private subnets - must be associated with a NAT gateway
Why does this matter? Your ECS tasks need to pull Docker images during deployment. If your public subnets can't reach the internet, those image pulls will fail, and your deployment will crash. You can find the full subnet configuration details in the files attached below.
Connecting your domain and enabling features
Your Retool application is up and running on AWS, but we're not quite done yet. There are a few manual configuration steps left to unlock all the Retool features and get everything working smoothly.
Connecting your custom domain via Route 53
First up: connecting your domain to AWS Route 53. If you registered your domain through a third-party tool (like Hostinger), you'll need to point it to the nameservers AWS created for you.
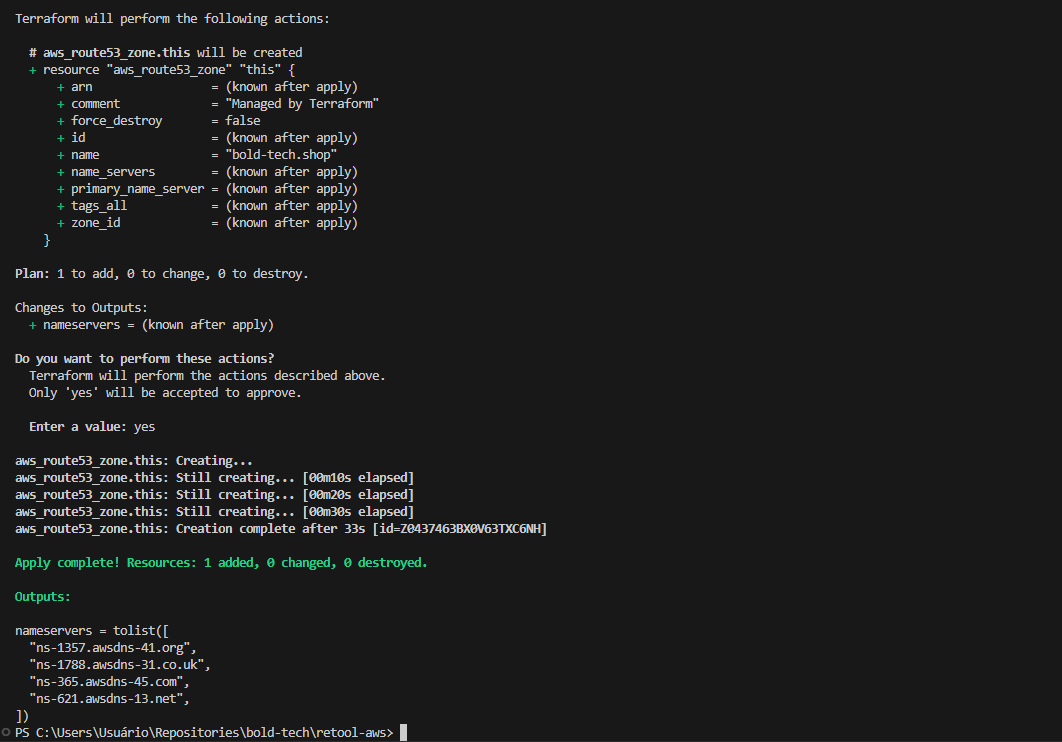
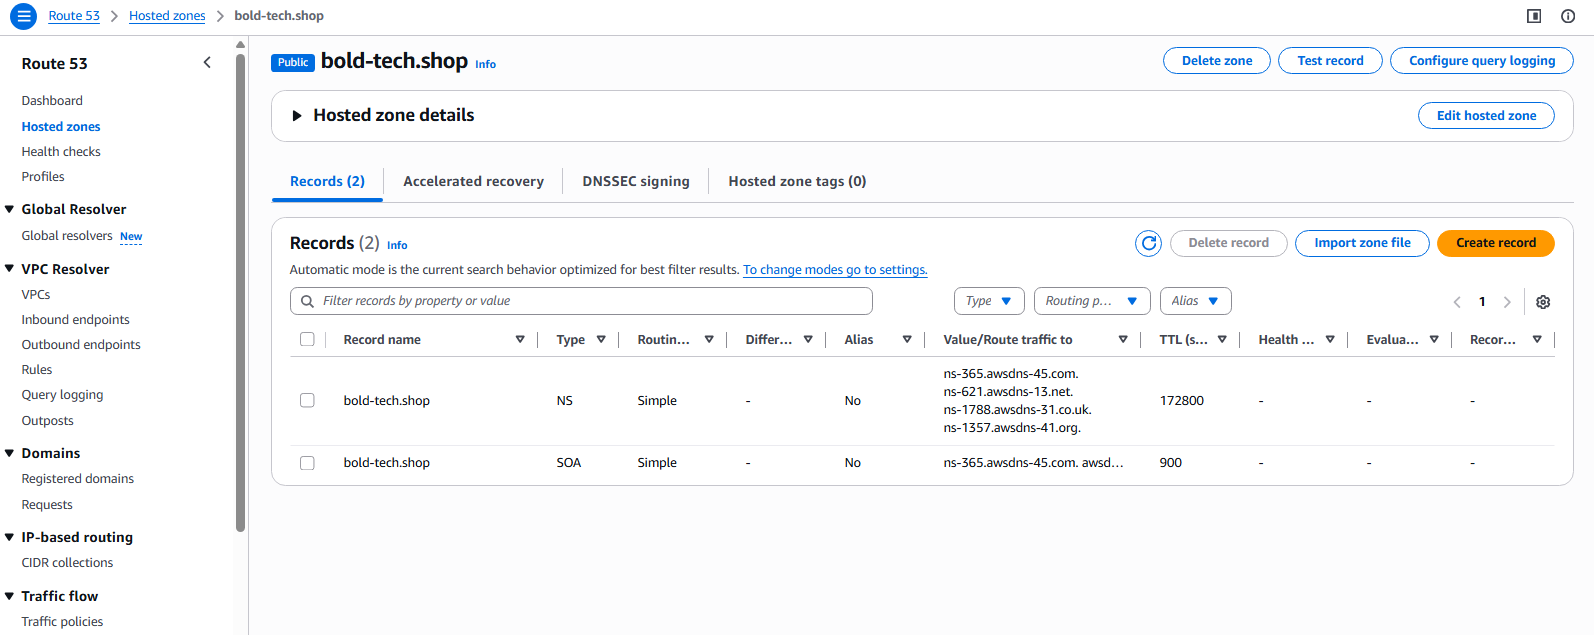
You'll find these nameservers in two places:
- At the end of your Terraform apply output
- In the AWS Route 53 console
Copy those nameservers and paste them into your domain registrar's settings. Then comes the hard part: waiting. DNS propagation typically takes up to 24 hours, so once again, it’s time to put this aside and come back tomorrow.
Check out the images below to see exactly where to find these nameservers:
Creating your admin account and API token
Okay, it’s a new day, and hopefully your domain is all set up! Now, head over to your Retool application and create your organization. You'll need to set up an email address as the master account - this is your main admin login with full admin access.
Once that's done, jump back into your terraform.auto.tfvars file and set the admin_email variable to match the email you just used.
Run Terraform apply one more time, and Retool will automatically generate an admin API token for you.
Once again, it’s a game of patience here: the token might take a few minutes to show up in the Retool API, so don't panic if it's not instant.
Configuring additional Spaces and ALB redirects
Now's a good time to set up any additional Retool spaces you'll need and enable automatic HTTP-to-HTTPS redirects on your load balancer.
In your terraform.auto.tfvars file, you can configure:
- retool_additional_spaces - add any extra workspaces beyond your default space
- ALB redirect settings - automatically redirect HTTP traffic to HTTPS
Once you've added these variables, run terraform apply to create your spaces and enable the redirects.
Sample:

Running the Lambda function: secrets manager, audit logs, and database setup
With your admin token created and spaces all configured, it's time to run the Lambda function that AWS created during your Terraform deployment. This function handles the heavy lifting for several enterprise features:
- AWS Secrets Manager integration - securely store and rotate your Retool secrets
- Audit log access - enable the audit logs resource for compliance tracking
- Space creation - automatically provision the additional spaces you defined
- Database configuration - set up the PostgreSQL connection to Retool's internal database
Head to the AWS Lambda console, find the Retool configuration function, and execute it. The video below walks through the entire process.
Troubleshooting database connections: If your database resource fails to connect after the Lambda runs, don't worry, it's usually a quick fix. Go into the database resource settings in Retool, switch the SSL verification mode (i.e.: Skip CA Certificate verification), and test the connection again. That typically resolves it.
Adding Okta SSO and user group sync (optional)
The Retool Self-Hosted Authentication also allows integration with SAML providers, like Okta.
To configure Okta as a provider for Retool, follow the steps below:
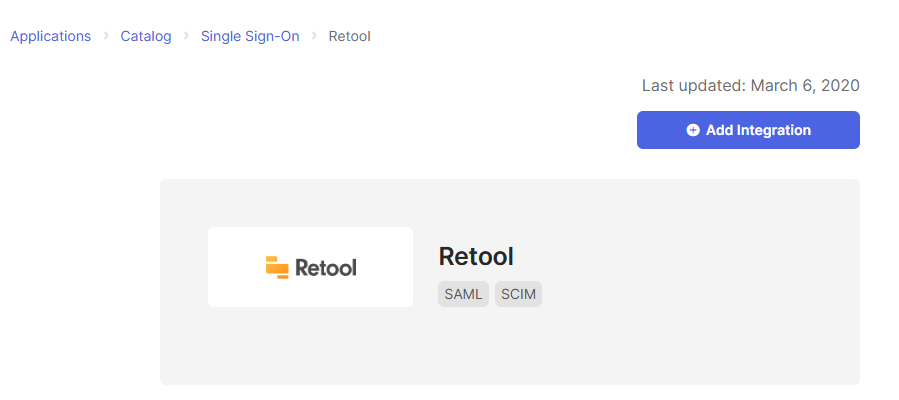
- In Okta, in Applications, choose to Browse App Catalog
- Search for Retool, and click on Add Integration
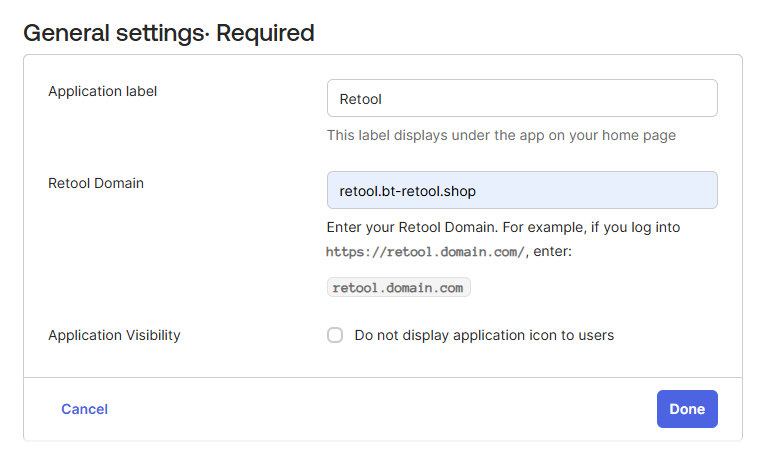
- Fill out the domain field and click on Done
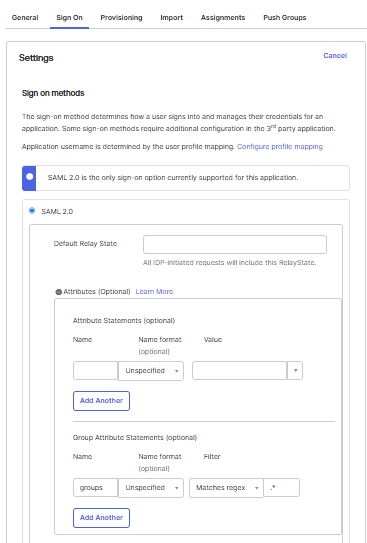
With the Application created on Okta, access it, choose the option Sign On, click on Edit, and create the Group Attribute, as in the image below:
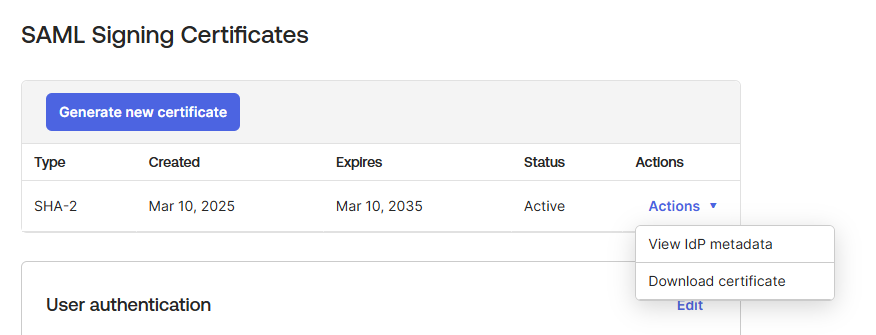
Still on the Sign On option, scroll down to the section SAML Signing Certificates, click on Actions and click on View IdP metadata. Save the xml file provided by IdP metadata. This content must be provided as the value for the input okta_saml_idp_metadata on the file terraform.auto.tfvars when deploying the cluster.
Note: the xml content should be converted into one-line text (you can use free online tools for this, though be mindful they expose the data) and should escape the double quotes so that the Terraform code can compile properly as an environment variable.
Sample xml metadata value:
okta_saml_idp_metadata = "<md:EntityDescriptor xmlns:md=\\\"urn:oasis:names:tc:SAML:2.0:metadata\\\" entityID=\\\"http://www.okta.com/exkpj9vm6tU5EFyoA697\\\"><md:IDPSSODescriptor WantAuthnRequestsSigned=\\\"false\\\" protocolSupportEnumeration=\\\"urn:oasis:names:tc:SAML:2.0:protocol\\\"><md:KeyDescriptor use=\\\"signing\\\"><ds:KeyInfo xmlns:ds=\\\"http://www.w3.org/2000/09/xmldsig#\\\"><ds:X509Data><ds:X509Certificate>MIIDqjCCApKgAwIBAgIGAZWAGMtwMA0GCSqGSIb3DQEBCwUAMIGVMQswCQYDVQQGEwJVUzETMBEG A1UECAwKQ2FsaWZvcm5pYTEWMBQGA1UEBwwNU2FuIEZyYW5jaXNjbzENMAsGA1UECgwET2t0YTEU MBIGA1UECwwLU1NPUHJvdmlkZXIxFjAUBgNVBAMMDXRyaWFsLTg4MzA2NzgxHDAaBgkqhkiG9w0B CQEWDWluZm9Ab2t0YS5jb20wHhcNMjUwMzEwMTI0NjQzWhcNMzUwMzEwMTI0NzQzWjCBlTELMAkG A1UEBhMCVVMxEzARBgNVBAgMCkNhbGlmb3JuaWExFjAUBgNVBAcMDVNhbiBGcmFuY2lzY28xDTAL BgNVBAoMBE9rdGExFDASBgNVBAsMC1NTT1Byb3ZpZGVyMRYwFAYDVQQDDA10cmlhbC04ODMwNjc4 MRwwGgYJKoZIhvcNAQkBFg1pbmZvQG9rdGEuY29tMIIBIjANBgkqhkiG9w0BAQEFAAOCAQ8AMIIB CgKCAQEAmp62k8dhZwrS5P4GWc0gFKSKwkI2IXlGLeRo+y8Gilg67su6YCmgIaxCmzm68IRbeJIj TBXVsZ10imJrAfKersVoPQ2xVwFrFQ4lf7Ir6I/B3jpPQMasJgPdVlD304/LYe7f7Zc2liHR8wYy Yd9QN8BC0sDlopm3Cf1Fu8NwYnrvy5QxavtMSfwo/jiYvWQ8PVdai2etVdqAM1MrGWQiCqV1YqML 7wCpM5z2L4p2L0UxtLB4AGyiL6T4B/qgxaMgTDgWL75O/f3j+5OJmP2wMLAQCaVEJyXmOQqe4Gvl xVSnn8jkF4qwlnCwABre9vJLagqeWHX3PfVNNVxT3CqNsQIDAQABMA0GCSqGSIb3DQEBCwUAA4IB AQBB697ASKzGOMSiMZ3fqzs1zroWSHojp7tLGxts9aPuvD+08Rbs5hvCVvvYhjddhFEv2bRDZuXj RMnvHl/EBF+7zCgVH/ib/YUqvMMrm/g40IexI9LqWrG/Z1BqjjMwifJCRQNScTMmtxkTp6wSdY1R knHWJD0176IW24AgY5R2fgsi9z9zt1oAH/wiM/uzj15lv4NoFQSSlMaVxyi8BNCmZ7YL4BO9itZg 4hF8mrs2bxk/Z1rXiWWvXB7s43d7q/sSWfT6GiD9emh/kEcrTaouqFMUQ4dJXA66ZagqYM4L90iD U6P7N+SZIt4WRDZyYpM4Cpbrqo9rQc4hBzZnjYeF</ds:X509Certificate></ds:X509Data></ds:KeyInfo></md:KeyDescriptor><md:NameIDFormat>urn:oasis:names:tc:SAML:1.1:nameid-format:emailAddress</md:NameIDFormat><md:SingleSignOnService Binding=\\\"urn:oasis:names:tc:SAML:2.0:bindings:HTTP-POST\\\" Location=\\\"https://trial-8830678.okta.com/app/retool/exkpj9vm6tU5EFyoA697/sso/saml\\\"/><md:SingleSignOnService Binding=\\\"urn:oasis:names:tc:SAML:2.0:bindings:HTTP-Redirect\\\" Location=\\\"https://trial-8830678.okta.com/app/retool/exkpj9vm6tU5EFyoA697/sso/saml\\\"/></md:IDPSSODescriptor></md:EntityDescriptor>" Syncing Okta users and groups to Retool
Now that you have the Okta metadata file, you need to set up two-way synchronization between Okta and Retool. This allows Okta to automatically push users and groups into your Retool deployment.
Step 1: Generate the Retool API token for Okta
First, enable Okta integration on the Retool side:
- Open terraform.auto.tfvars and set enable_okta_integration = true
- Run terraform apply
- Execute the Lambda function again
The Lambda function will create an API token in Retool that Okta will use to push users and groups.
Step 2: Configure provisioning in Okta
Head back to your Okta admin console:
- Navigate to your Retool application
- Go to the Provisioning tab
- Click Enable API Integration
- Paste in the Retool API token that was just generated (you'll find this in your Retool settings under API tokens)
- Save
Step 3: Create Okta groups for role mapping
Finally, create these groups in Okta to control user permissions in Retool:
- retool-users — users in this group will be synced to Retool as Viewers
- retool-admin — users in this group will be synced to Retool as Admins
Once you create these groups and assign users to them, Okta will automatically push them to your Retool deployment with the appropriate permissions.
Next steps: Your production-ready Retool environment on AWS
You've made it. Your Retool instance is running on AWS with enterprise-grade security, custom domain configuration, SSO integration, and all the bells and whistles that make self-hosted deployments worth the effort.
The best part? This setup is fully customizable. The Lambda function we configured handles the core integrations, but you can extend it for your specific needs - whether that's custom workspace automation, additional AWS service integrations, or your own provisioning logic.
Happy building!
