


Softr is a front-end, no-code tool that works on top of your existing database platforms - it complements, rather than replaces, platforms such as Airtable or Google Sheets. Softr enables you to set up a front-end UI that connects to your back-end data source (such as Airtable) and build out with web apps, internal tools, client portals, and directories, without needing to write code.
Softr was originally built as a kind of ‘plug-in’ for Airtable - the platform offered a means of creating responsive, powerful interfaces, while maintaining Airtable as the exclusive datasource. Today, Softr can integrate with many other data platforms (you can find more information in our ‘What is Softr’ article), though many users still focus on using it for the Airtable integration.
Why use Softr over Airtable interfaces?
Airtable provides a straightforward, spreadsheet-like grid or list view that allows for flexible manipulation of the data. Nevertheless, this flexibility of Airtable’s bases can leave it more vulnerable to breakage, as anyone can accidentally edit a record. Softr helps builders transform data into interactive desktop and mobile applications that maintain data integrity and control functionality. What’s more, it does so at a price-per-user that can be cost-effective for teams of all sizes.
If you’re familiar with Airtable, you might be thinking: doesn’t Airtable already have its own solution for front-end interfaces? In fact, a lot of builders are likely to come to Softr for interfacing as an alternative to Airtable Interfaces but pricing is a primary differentiator between Softr and Airtable’s own Interfaces. The price of Airtable’s built-in version comes in at $24/person on the least expensive plan. This can get costly when adding up internal staff and external clients at $24+ a pop. Softr offers a plan for $49 per month for 20 users, a much more affordable starting point for smaller teams.
When it comes to cost-efficiency for SMBs, Softr provides a pathway to build internal business software (and even portals) that can save time and money along the way.
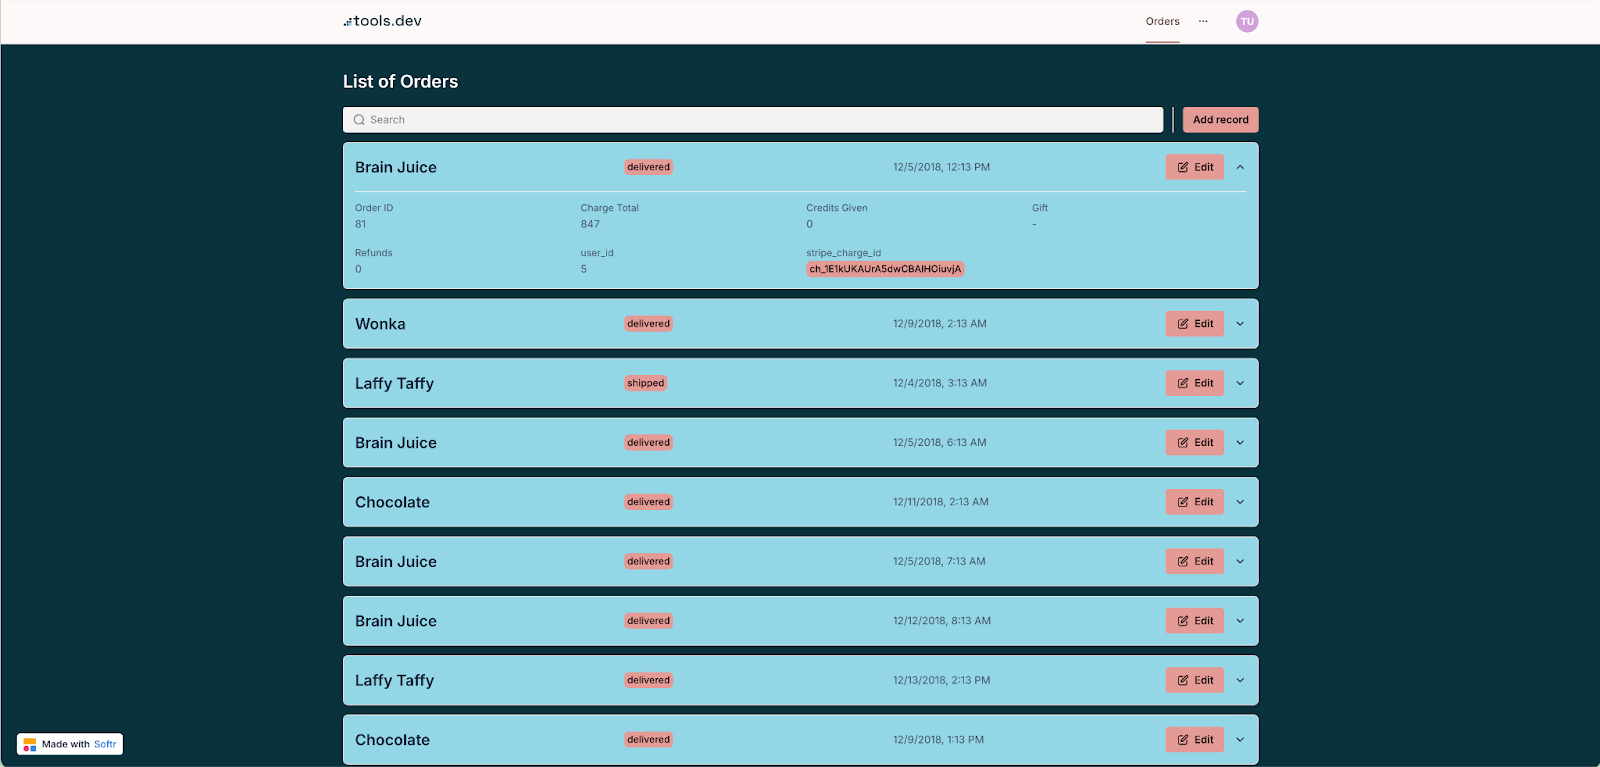
So, in this tutorial, we’ll walk you through how to use Softr to build an app on top of your Airtable data. With this app you can:
- View orders and their details, and filter and search this information,
- Create new orders,
- Edit orders...
- ...And delete them.
This is known as creating a CRUD interface.
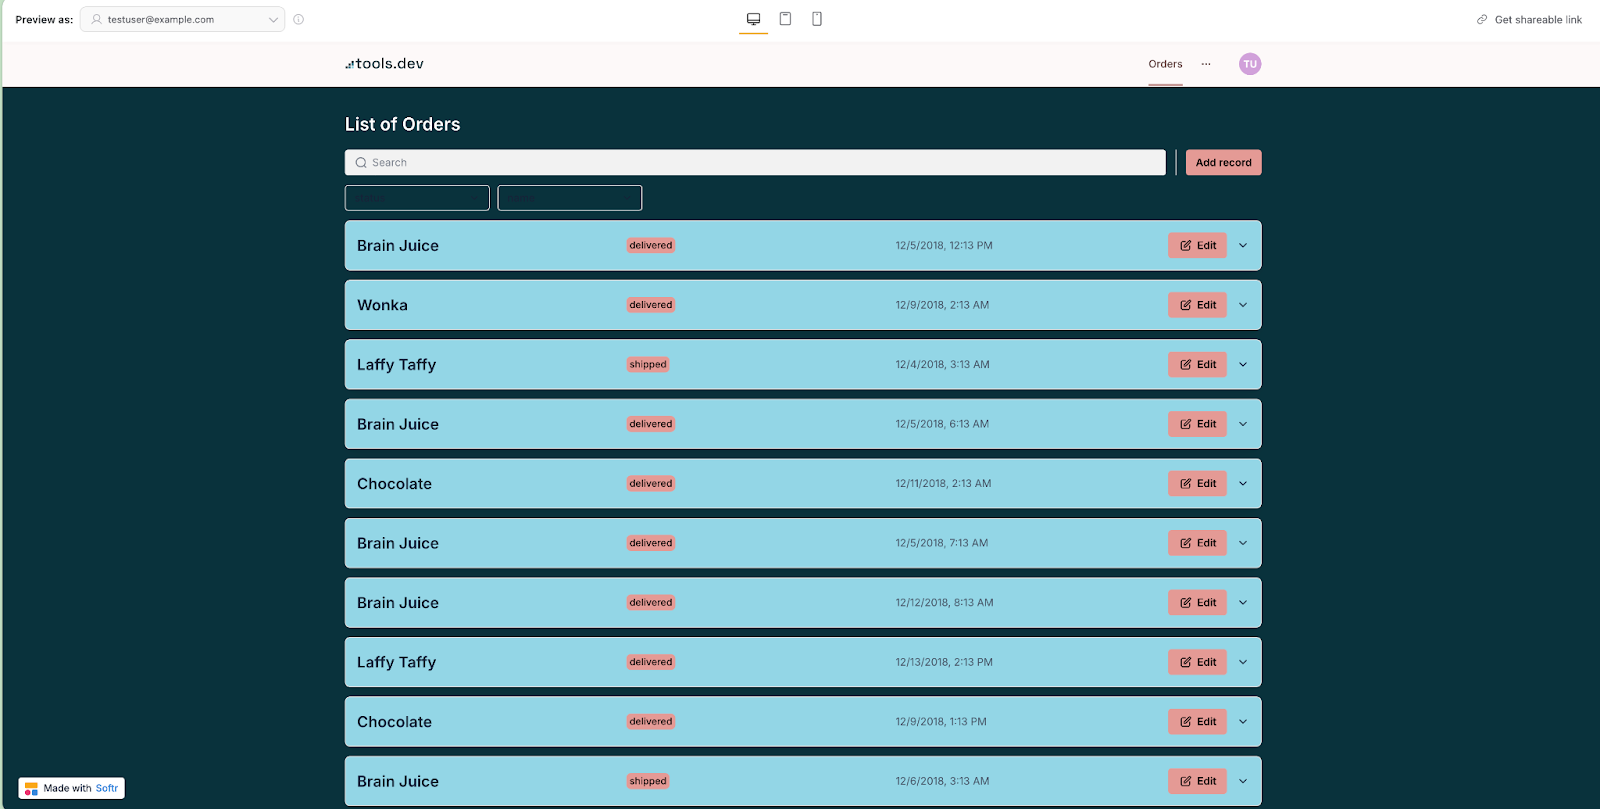
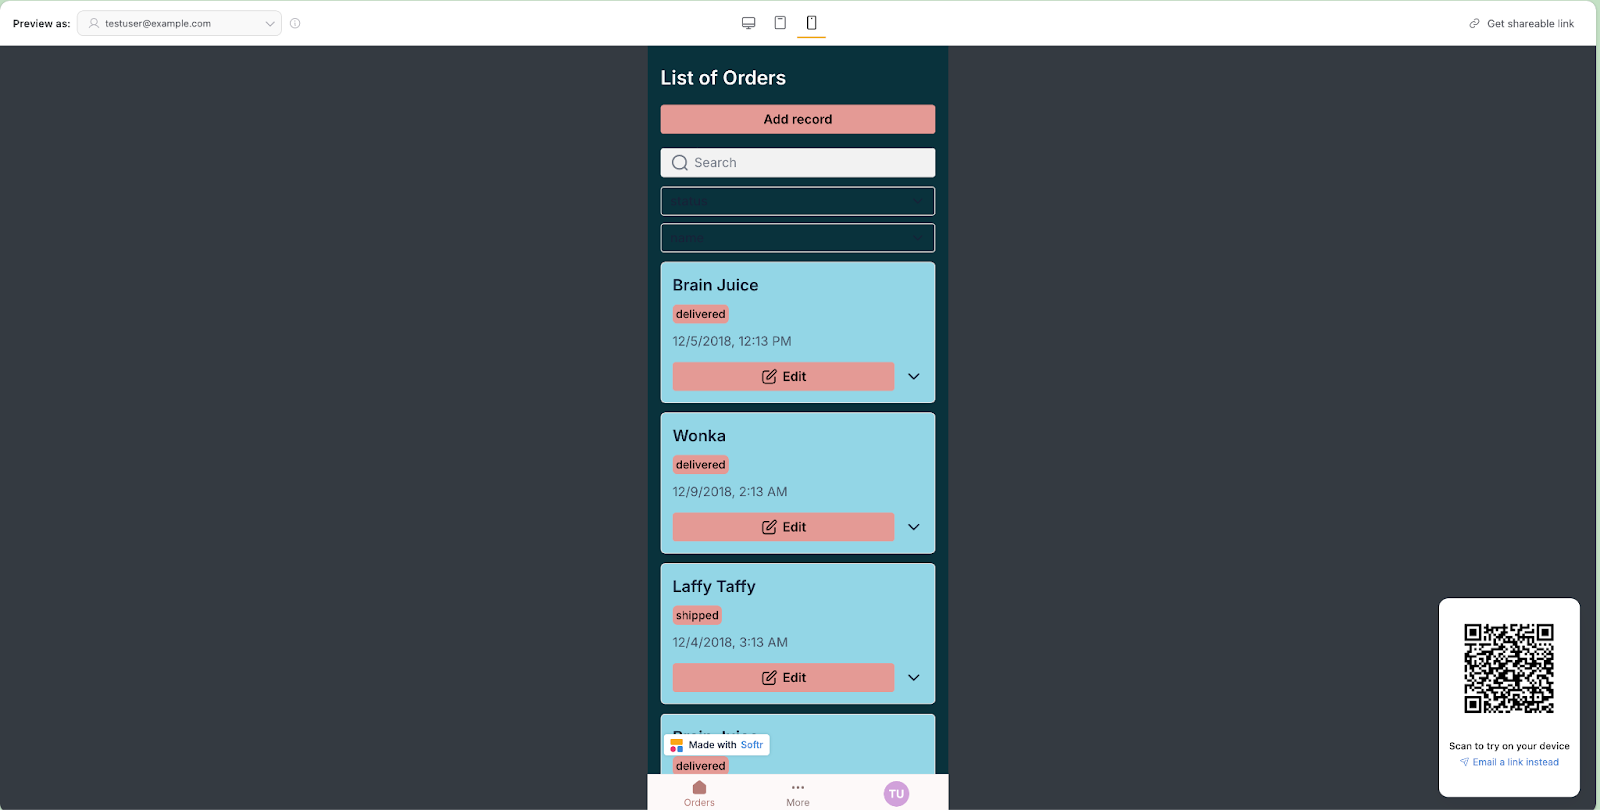
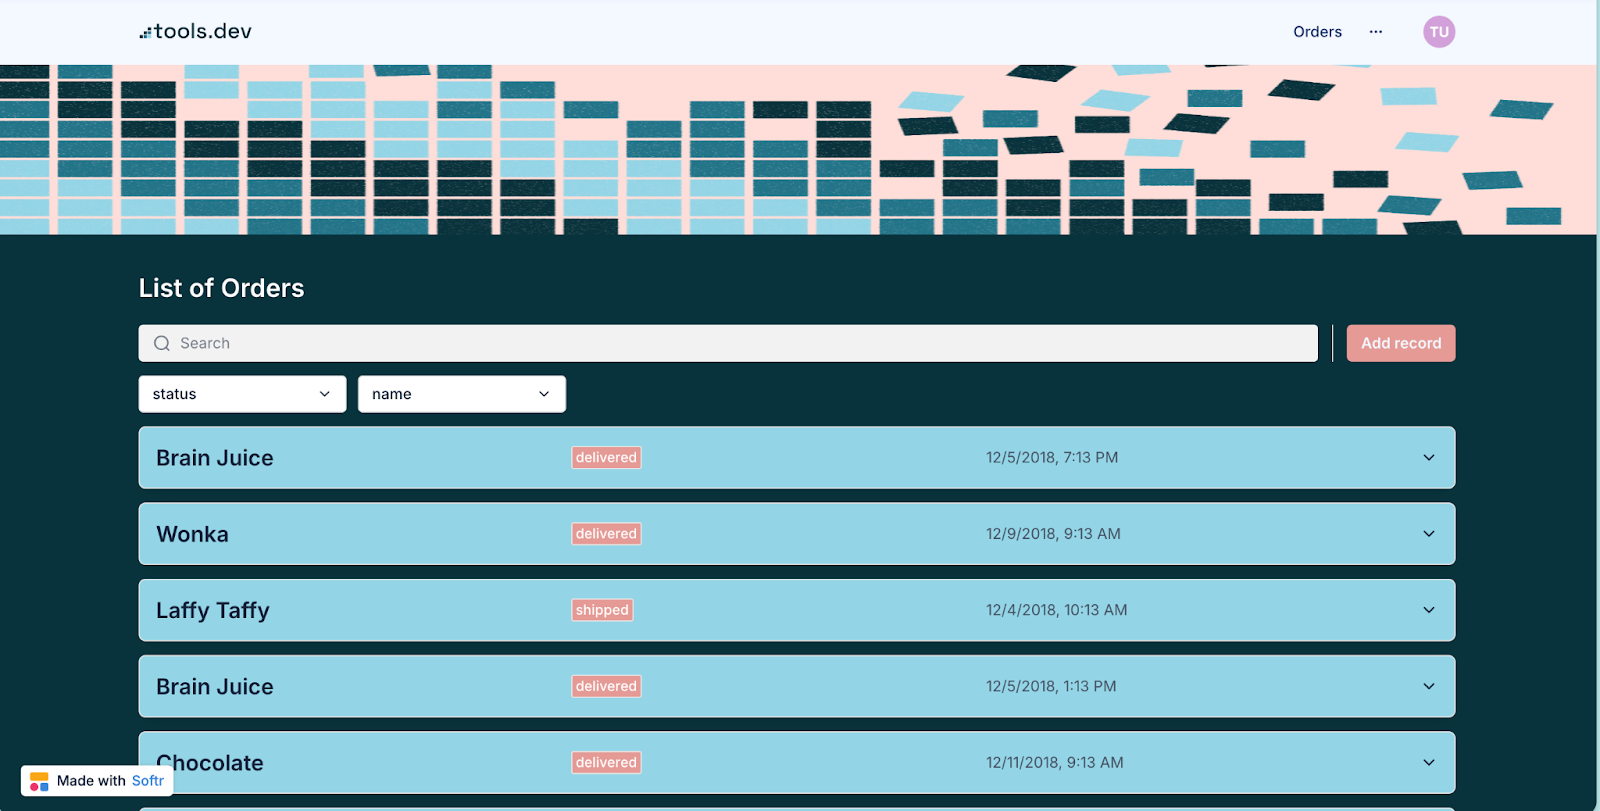
Here’s a preview of what our final app will look like:
Building your app: a step-by-step process
Getting started with Softr is pretty simple. This guide will take you through the process, one step at a time. That said, Softr is so no-code and automated that a lot of the steps are pretty self-explanatory; if you find yourself wondering, ‘that was so easy, did I miss something’ the likelihood is, it really was just that simple!
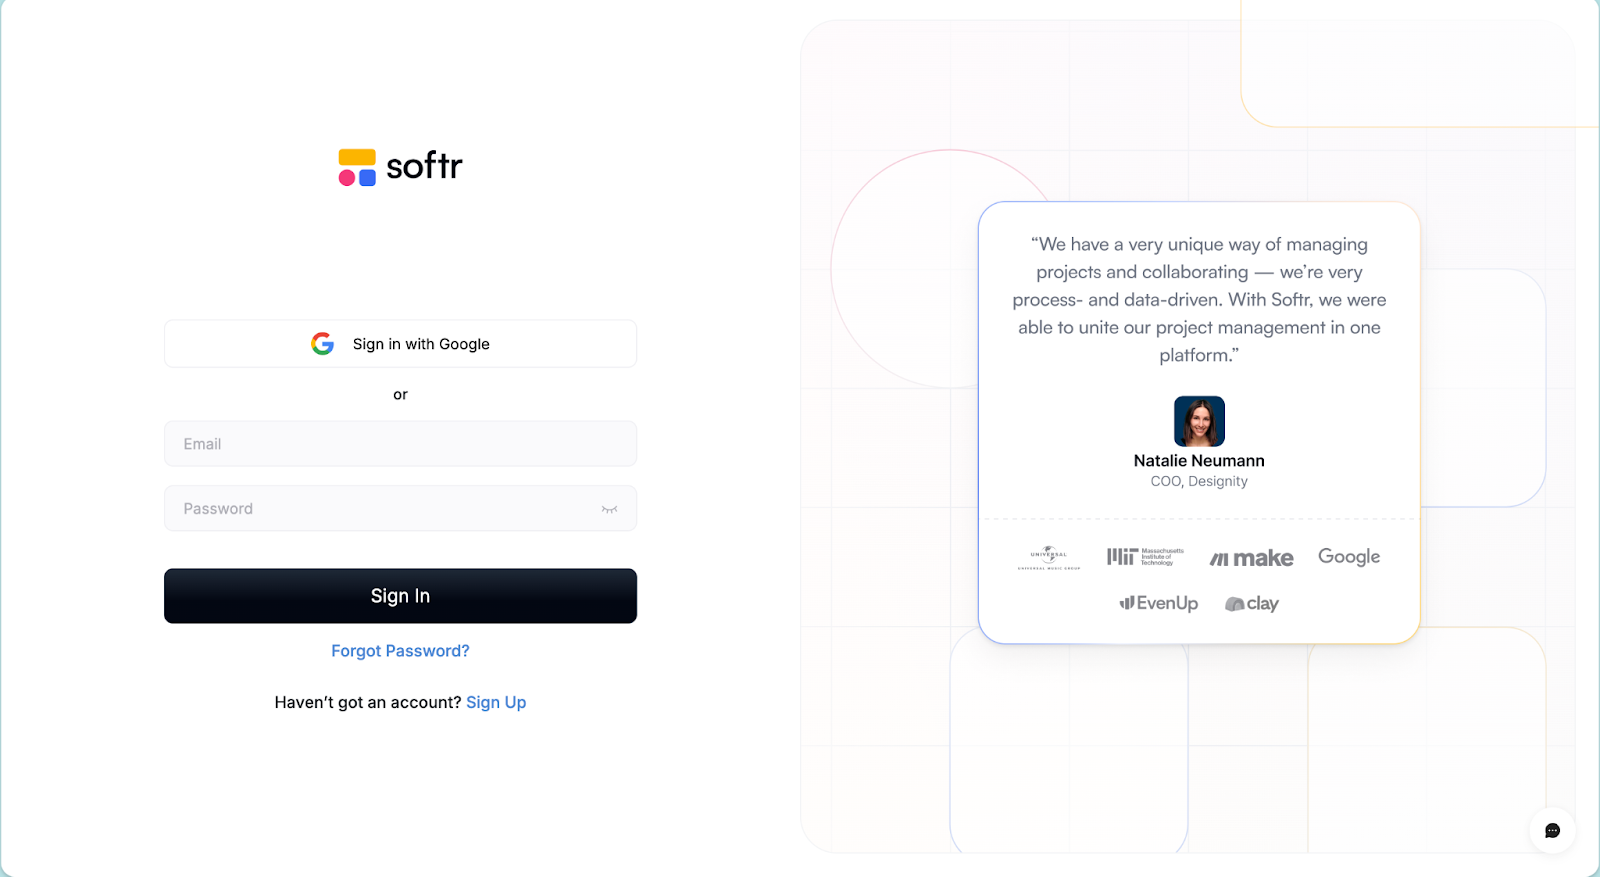
Set up your account with Softr
Begin by signing up for a free account, which includes a personalized onboarding experience tailored to your needs. Once inside, you can choose from a variety of templates to speed up the process, or start from scratch to build an app exactly how you want it.
Connect Softr with your Airtable Base (or another data source)
The perk of a no-code solution is that you don’t have to write code to design your layouts, and you don’t need to write advanced API calls to visualize your data into an application.
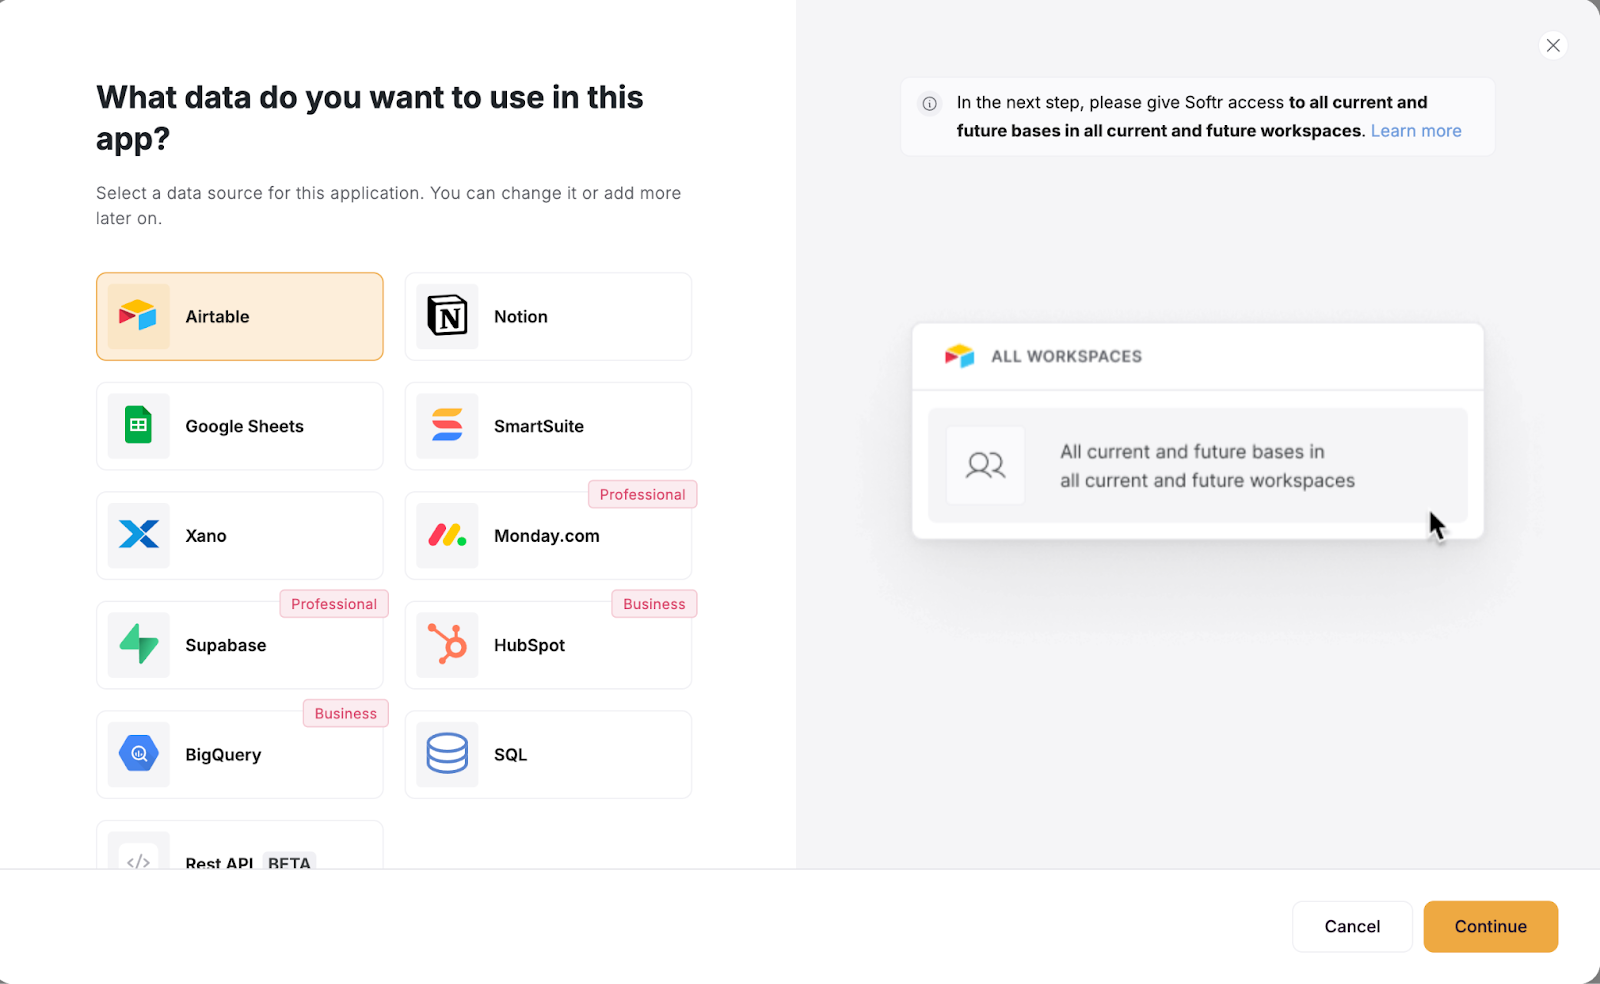
Thankfully, Softr walks you through the data sync process, making it simple to pull in the data you need. All you need to do is click Data on your main studio home screen, select the data source you want to connect, which is Airtable in our case.
Here’s what it looks like to connect to Airtable:
Finally, select the base you want to share, and this will create an OAUTH integration for you:
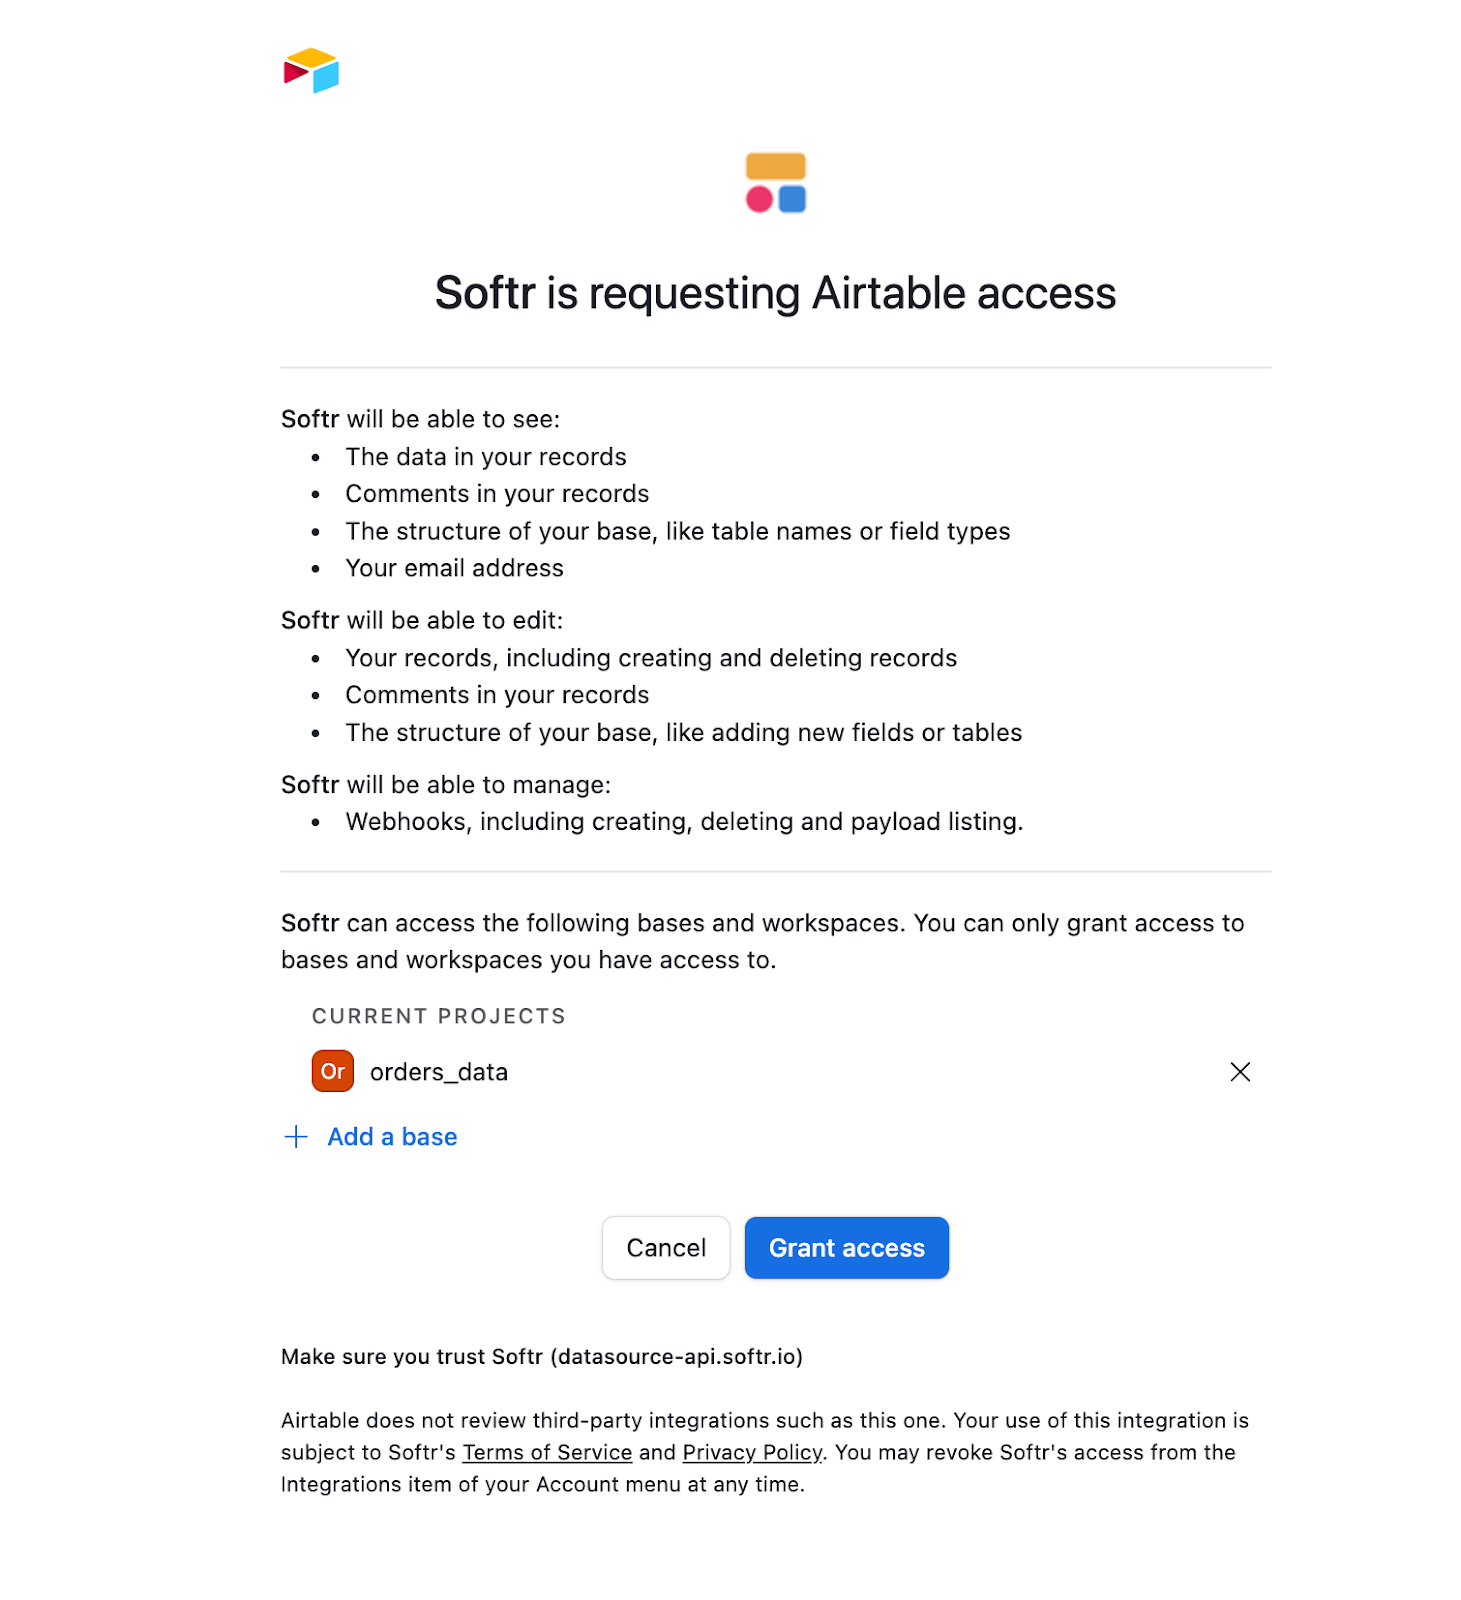
Once you’ve granted access, you’re already done! It’s that simple.
Navigating Softr’s Development Studio
When it comes to the building experience, Softr provides a visual design studio made for beginners, with some custom code options for deeper customization. In the Softr studio, you can customize everything from pages, block layouts, and even style preferences per page.
The platform allows you to tweak individual blocks or apply global changes across your app, this level of customization ensures that the app suits your style and functionality preferences.
Navigating Softr’s development studio is often a simple experience compared to other more technical platforms like Noloco, Glide, or even Figma. Where Softr truly stands out is making it easy for beginners to get started and design applications on their own without needing a lot of advanced technical experience.
Once you’re in the studio, have a play around! You’ll notice the left-hand navigation menu, where you can select the main home page or any other pages you’re working on. The real magic happens in the center of the screen, which serves as your development playground. Here, you can add, move, and customize blocks’, which are sections of content like data visualizations, forms, and other elements. Think of it like stacking toy blocks, where you can arrange them however you’d like in order to create the desired layout for your app.
Customizing your components and actions
To further refine your app, the right-hand menu offers detailed customization options. This menu has five tabs: Source, Content, Actions, Style, and Visibility. The Source tab lets you pull in your data sources, while the Content tab allows for personalization of each block, mapping each field from Airtable to the location it needs to be visualized in Softr.
The Actions tab is where you can add buttons and configure user navigations, while the Style tab gives you control over the visual design, allowing you to tweak the look of individual blocks.
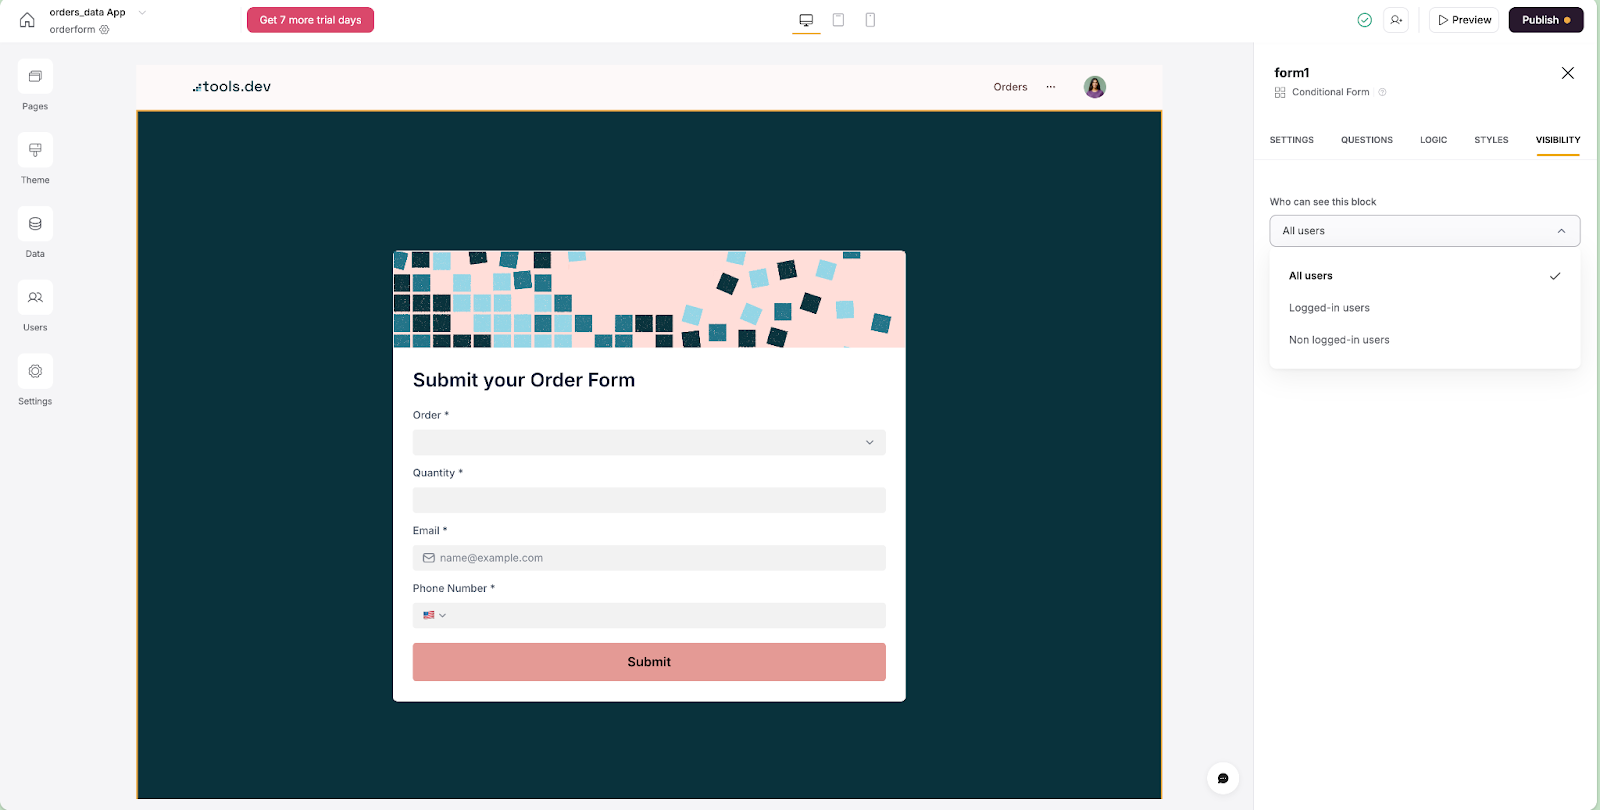
Finally, the Visibility tab controls who can see each block, giving you the flexibility to set permissions based on user groups. As you build, you can preview your app in real-time in the studio or with a more ‘’live’ feel by clicking Preview.
The very top navigation bar in the studio allows you to view and adjust the design for different device sizes, invite collaborators to review or edit the app, and publish any changes to the app. For example, in desktop view:
If you’re on a smartphone, it also automatically adapts your apps for a mobile view:
Read: Set up the Orders list page to view Airtable records
Now that we’re a bit more familiar with the Softr builder, let’s jump into our application and start building out some functionality. We’ll start with the ‘Read’ part of our CRUD, and pull in our Airtable data to be viewed.
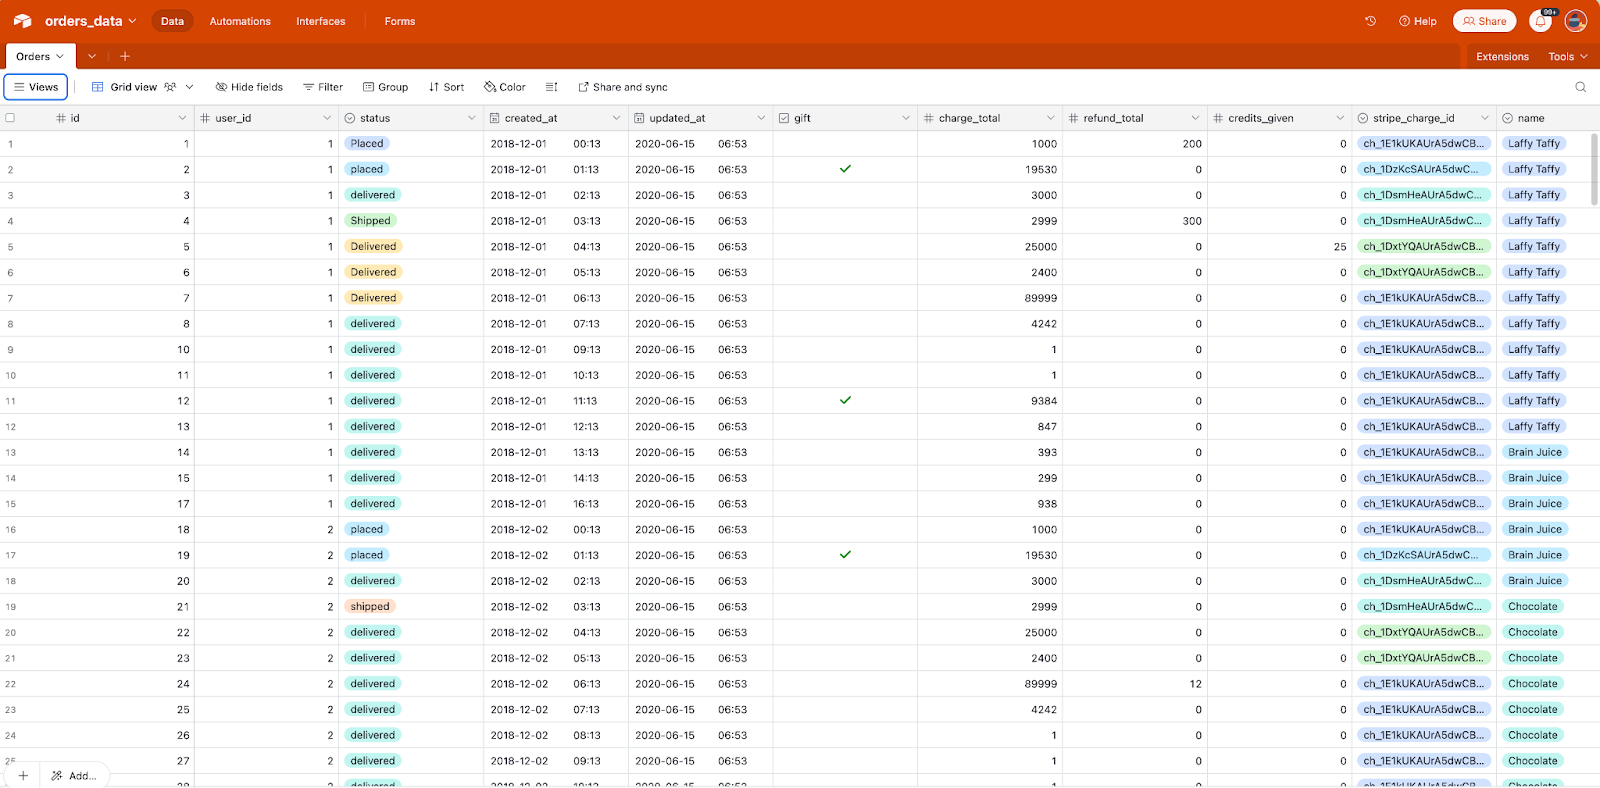
In Airtable we have a ‘Base’ for our list of orders. Instead of a spreadsheet view, we want to visualize our data in a dynamic way that users can interact with from a desktop or mobile device. Here’s what the data looks like when in Airtable:
Now, let’s set this up in Softr so that it’s easier to read and interpret.
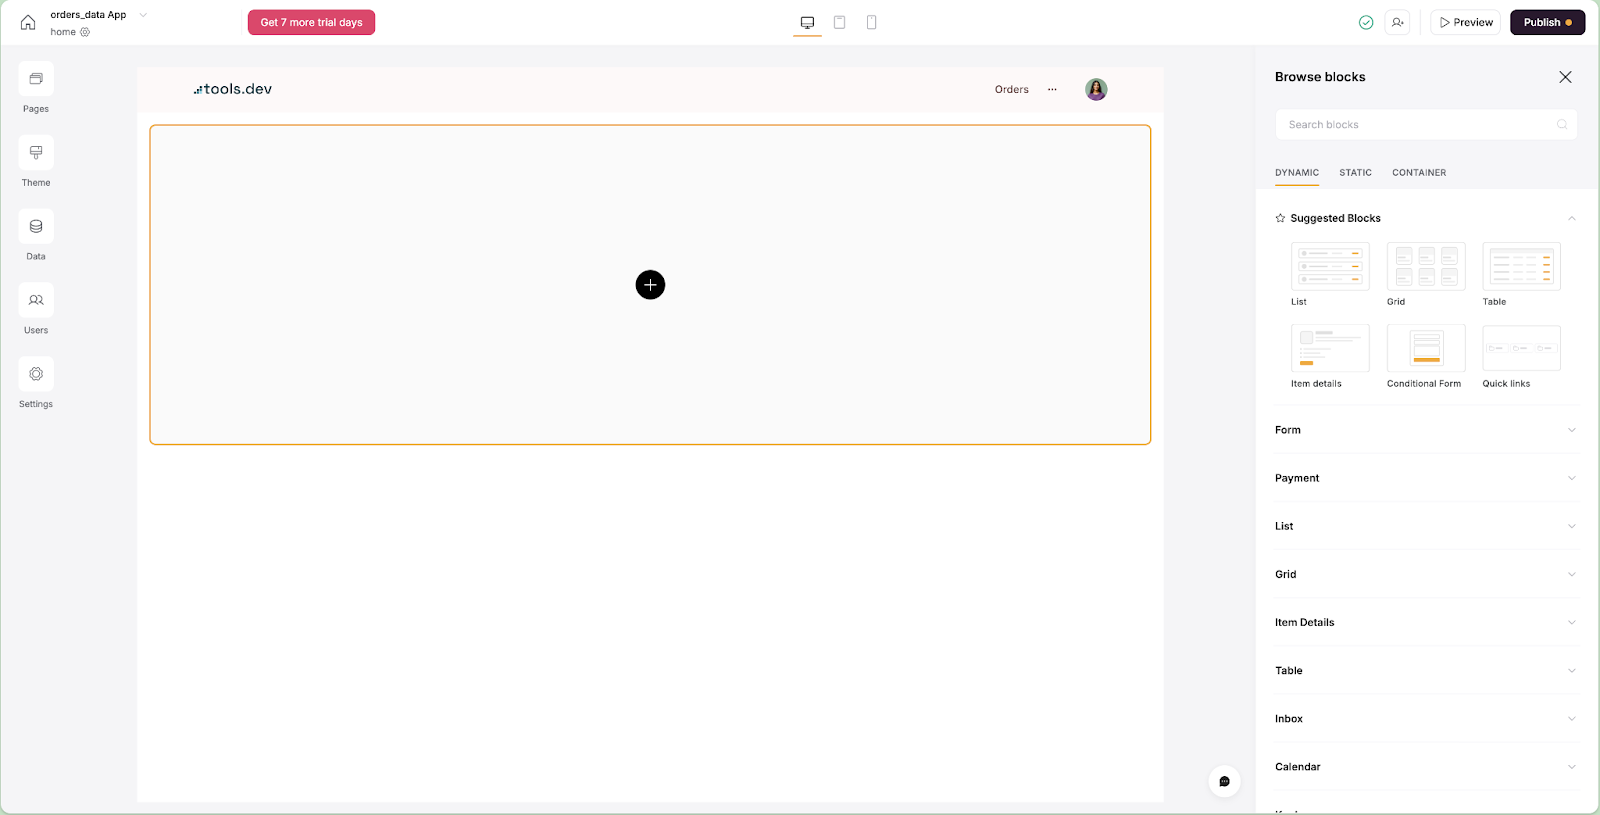
First, click Pages, then click the yellow + button to add a new page. The page will start out empty: you can click into the + section to add in dynamic data from your data sources (or static data that you can type in manually).
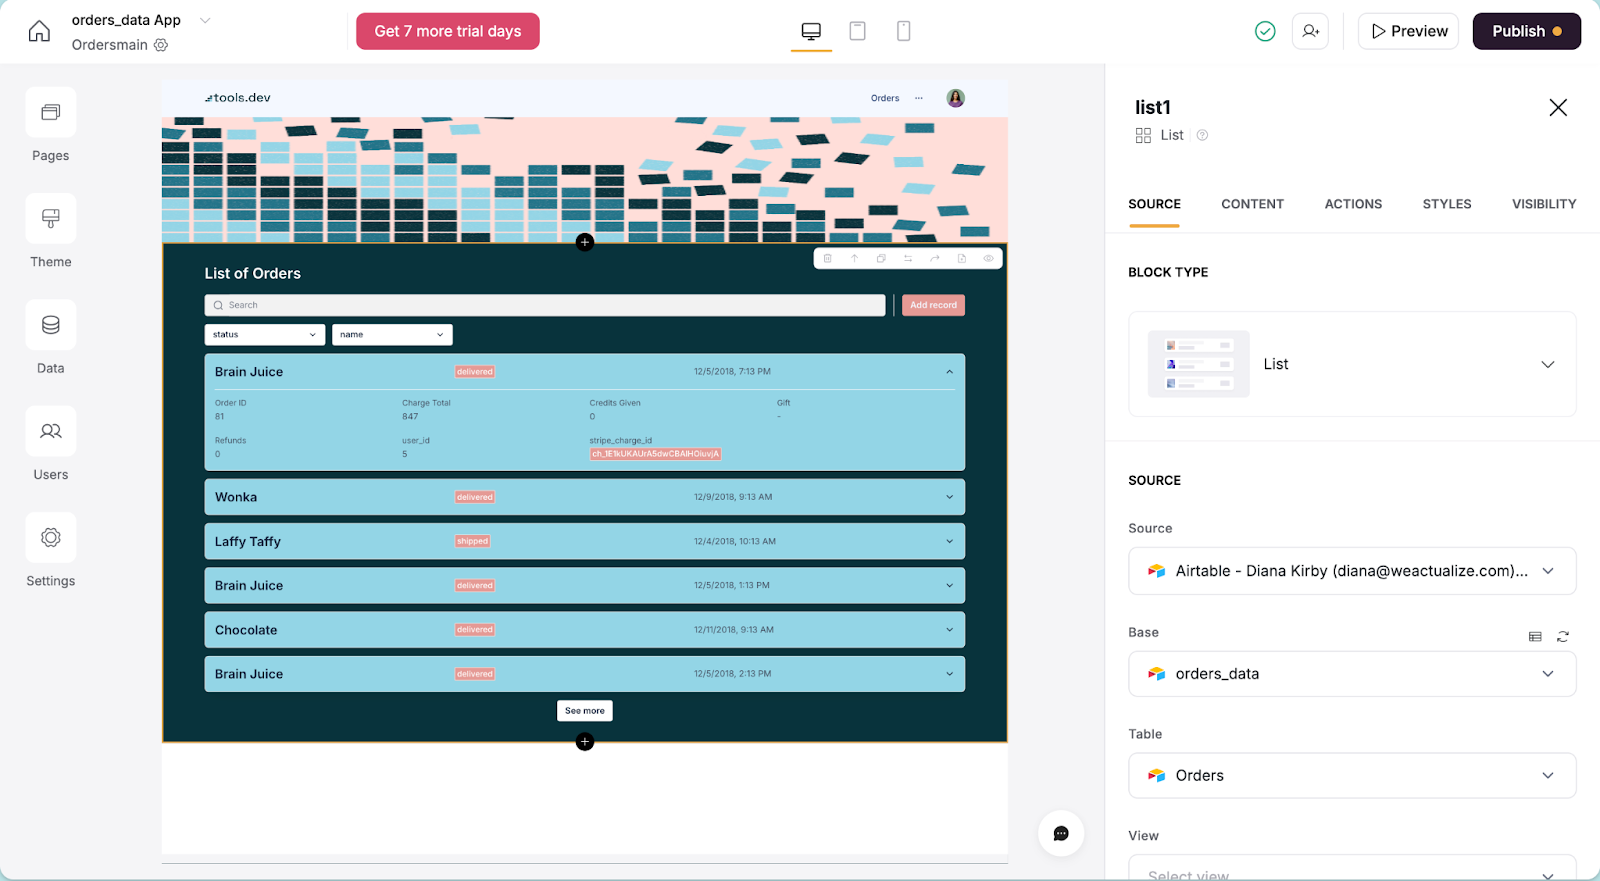
To present our data, we’ll use a List Block. A List Block is one of the most common blocks you’ll see across Softr, alongside the Cards block. The Cards block is best when you have images in your data.
Once you pull in the List Block, you’ll see the settings on the right-hand side that allow you to configure it. We’ll start by opening the Source tab and connecting to our Airtable data.
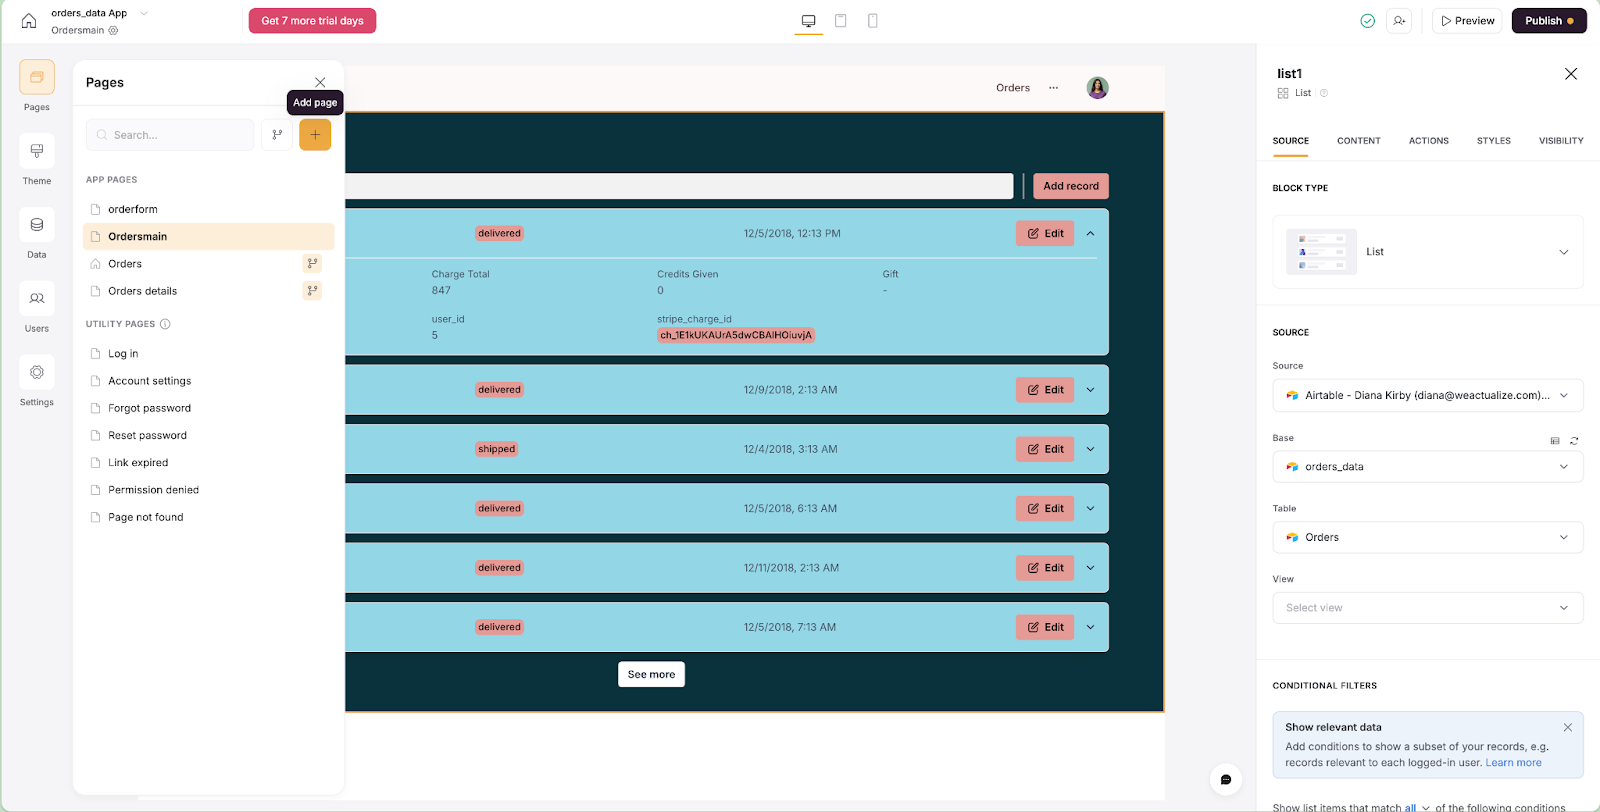
To do this, select the data source from the source tab, including the base and table from Airtable that your data is coming from. Softr will then auto-select the fields it assumes that you want to display, which you can then further configure under the Content tab.
You can change the fields that were mapped automatically by clicking on them and changing the mapped field, the field type (text, number, dropdown), or both. To add new fields, that process is now as simple as clicking add then toggling on or off as many fields as you want.
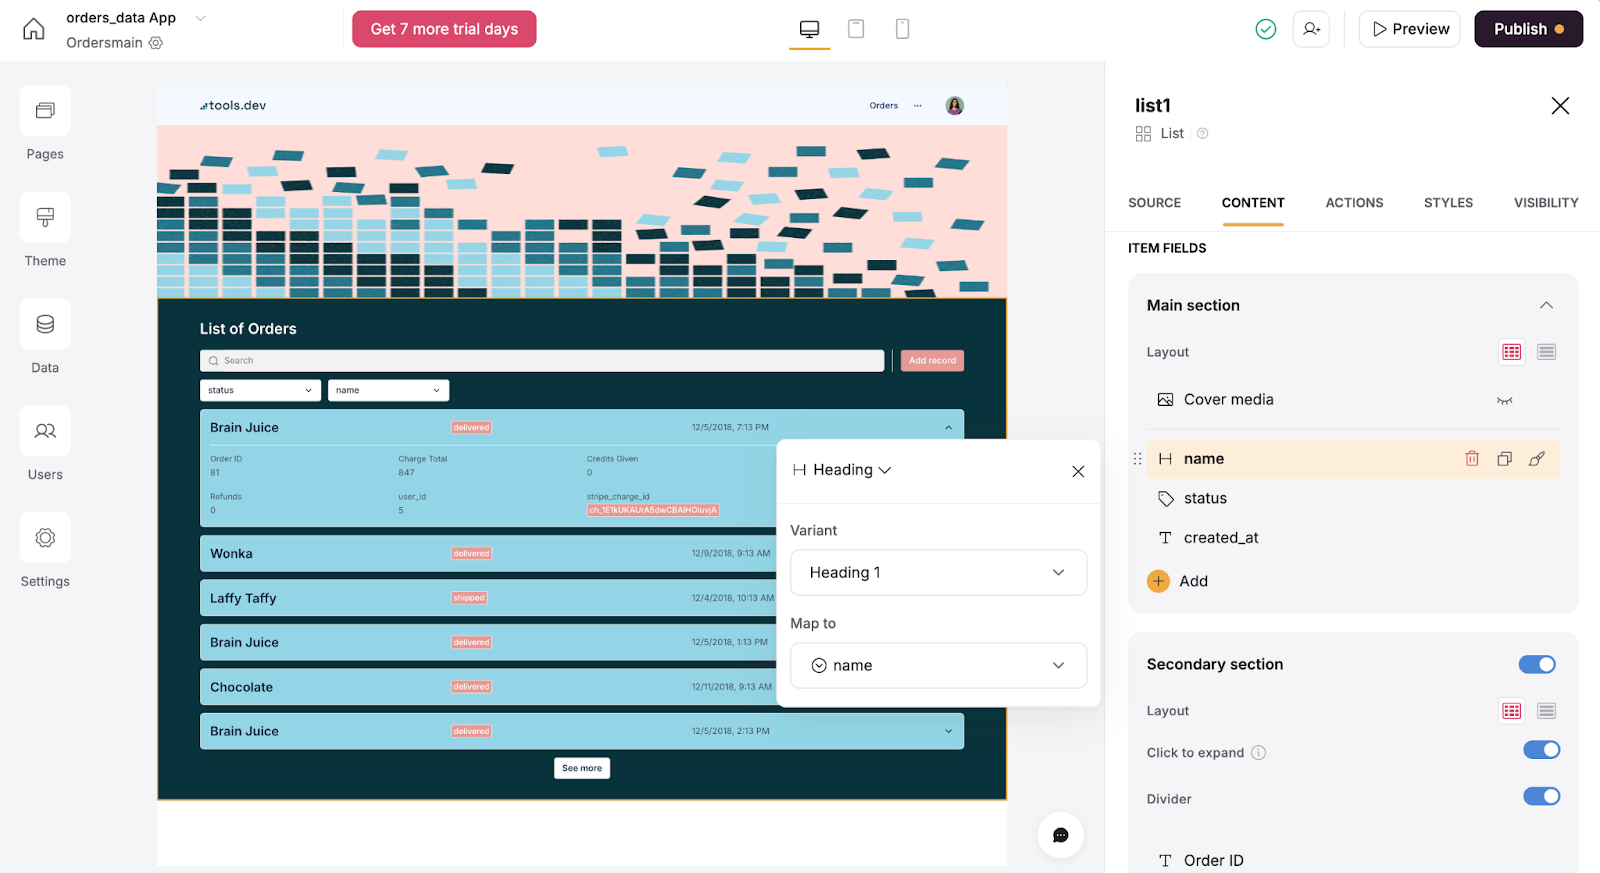
The List Block also has additional useful features, like the ability to have a collapsible details section or links to ‘details’ pages. Content can be stacked vertically or in condensed columns with the click of a button.
For our example, we’ve opted for the collapsible details format, so we can see a simple list of orders and can expand the information when needed.
Create: Setup a Create Order Form for different user types
So that our users can add an order, we need to create an order form.
You can do so as an individual block on an existing page, by clicking on the black + icon above or below an existing block and choosing a Form Block, or by adding a brand new page just like we did above.
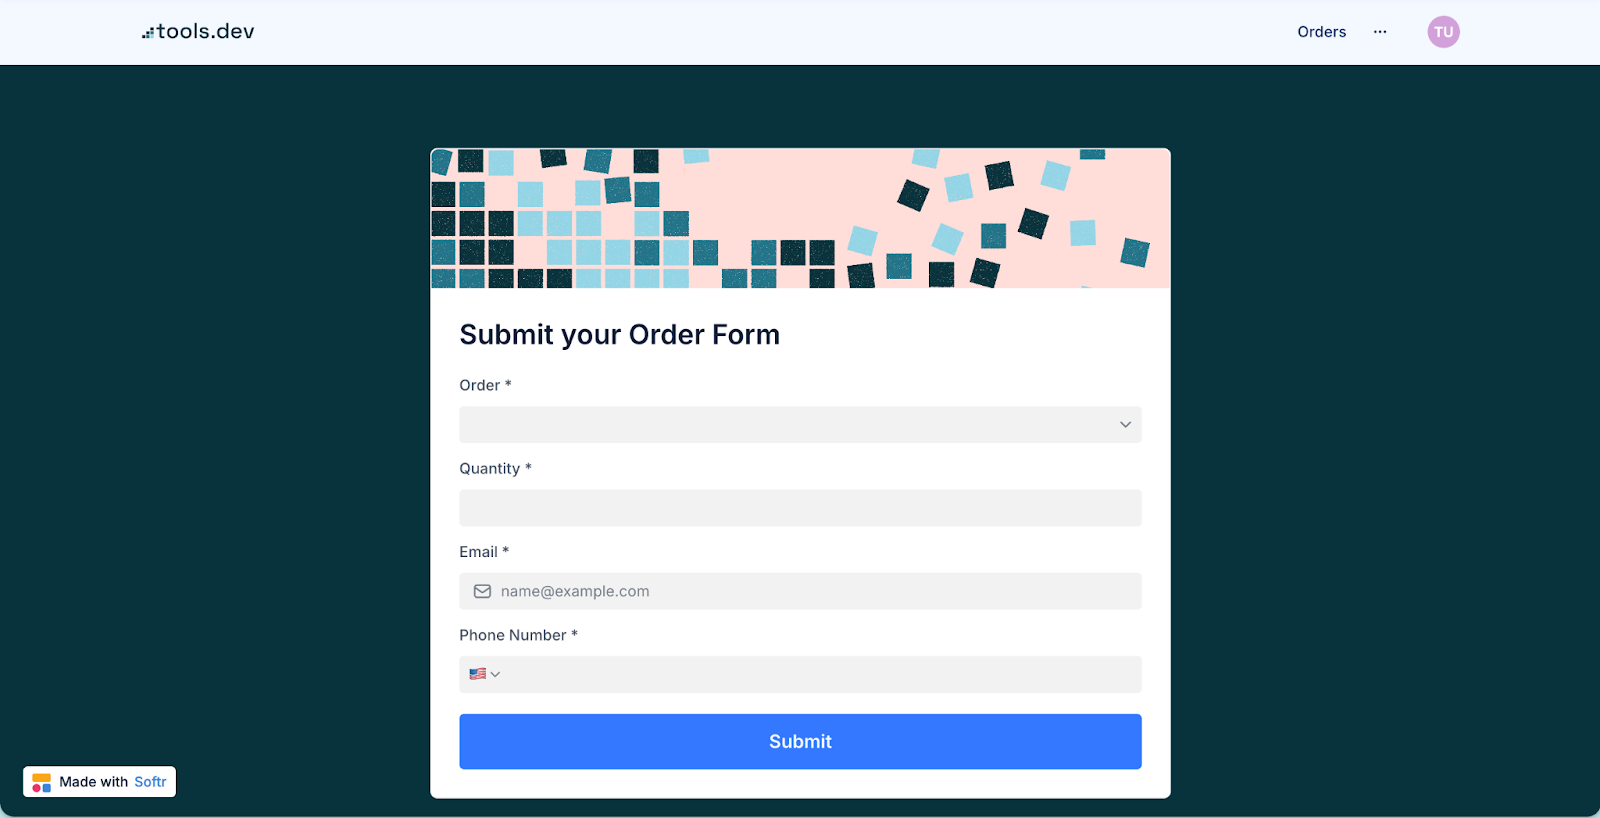
Let’s set up our form on its own page: this means we can link it out publicly so that we can share it directly with our customers.
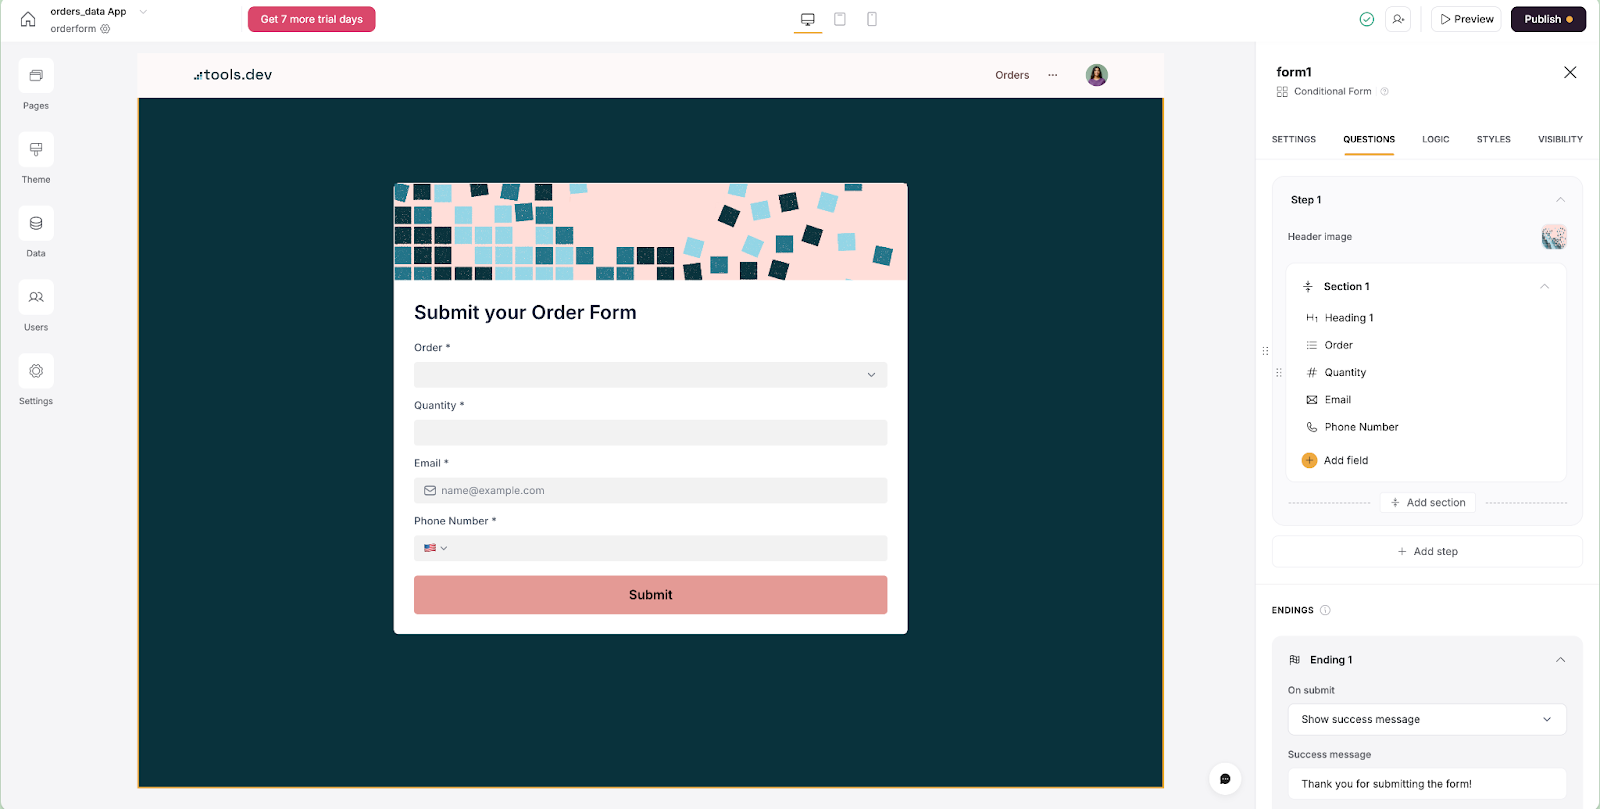
Softr’s forms have several design options, including a centered form, a form with a large image to either side, or a form that progresses one question at a time.
The first decision you need to make is where to send the form responses. Since we are storing our data in Airtable, we can select Data Source, then our Airtable base and table.

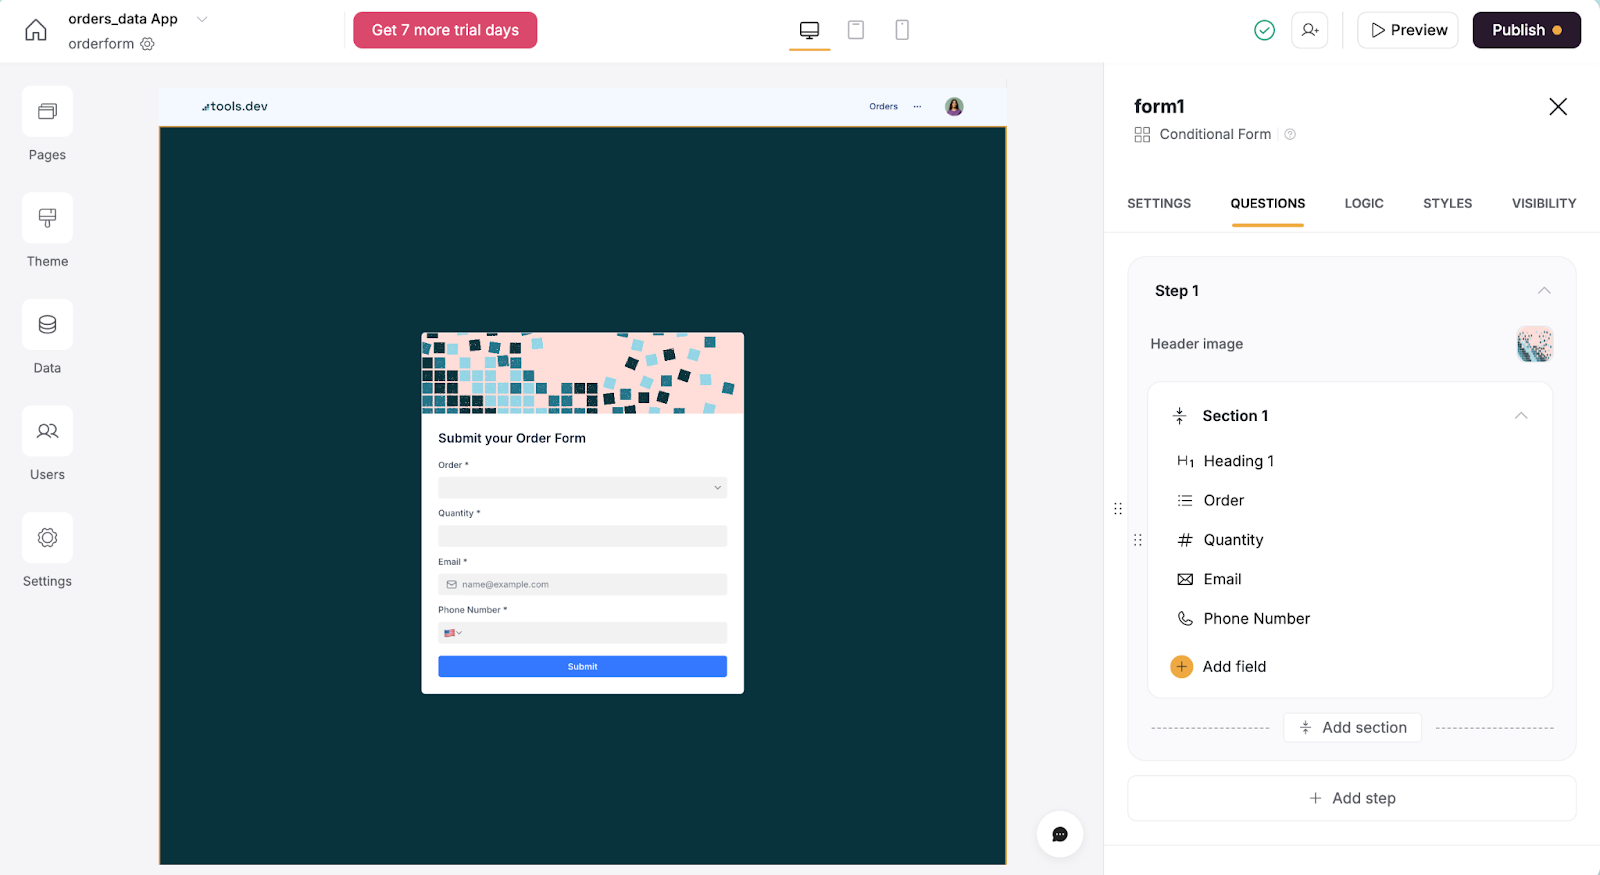
Next, we can set our general form settings, such as a header image, heading, and sub-heading.
Luckily for us, Softr will auto-add the questions it assumes we need based on our Airtable fields, and we can edit those in the same way we did for the orders list, by clicking on them and mapping to a different field, or clicking Add field and toggling on and off other fields from our Airtable database.
As simply as that, we’ve set up our create form. Softr has even taken care of the connection back to Airtable, so any information filled out and submitted in this form will automatically be sent back to your Airtable base.
We can now share this form with external users by using the form’s URL link, just make sure the page is set to 'All users' or 'Non logged-In Users' so the form can be viewed publicly.
Top tip: Within your form build, you can also choose multiple pathways for your users to proceed through the form based on their responses or user groups, so that it works more like a wizard. You can also set different end screens, which determine how the user navigates away from the form once it has been submitted. This kind of functionality goes way beyond what a simple spreadsheet or basic Airtable base can offer, and is great for building better UX/UI.
Open the form for our app
Now, we also need to be able to access this form from our app. To do this, we’ll add a button above our order list.
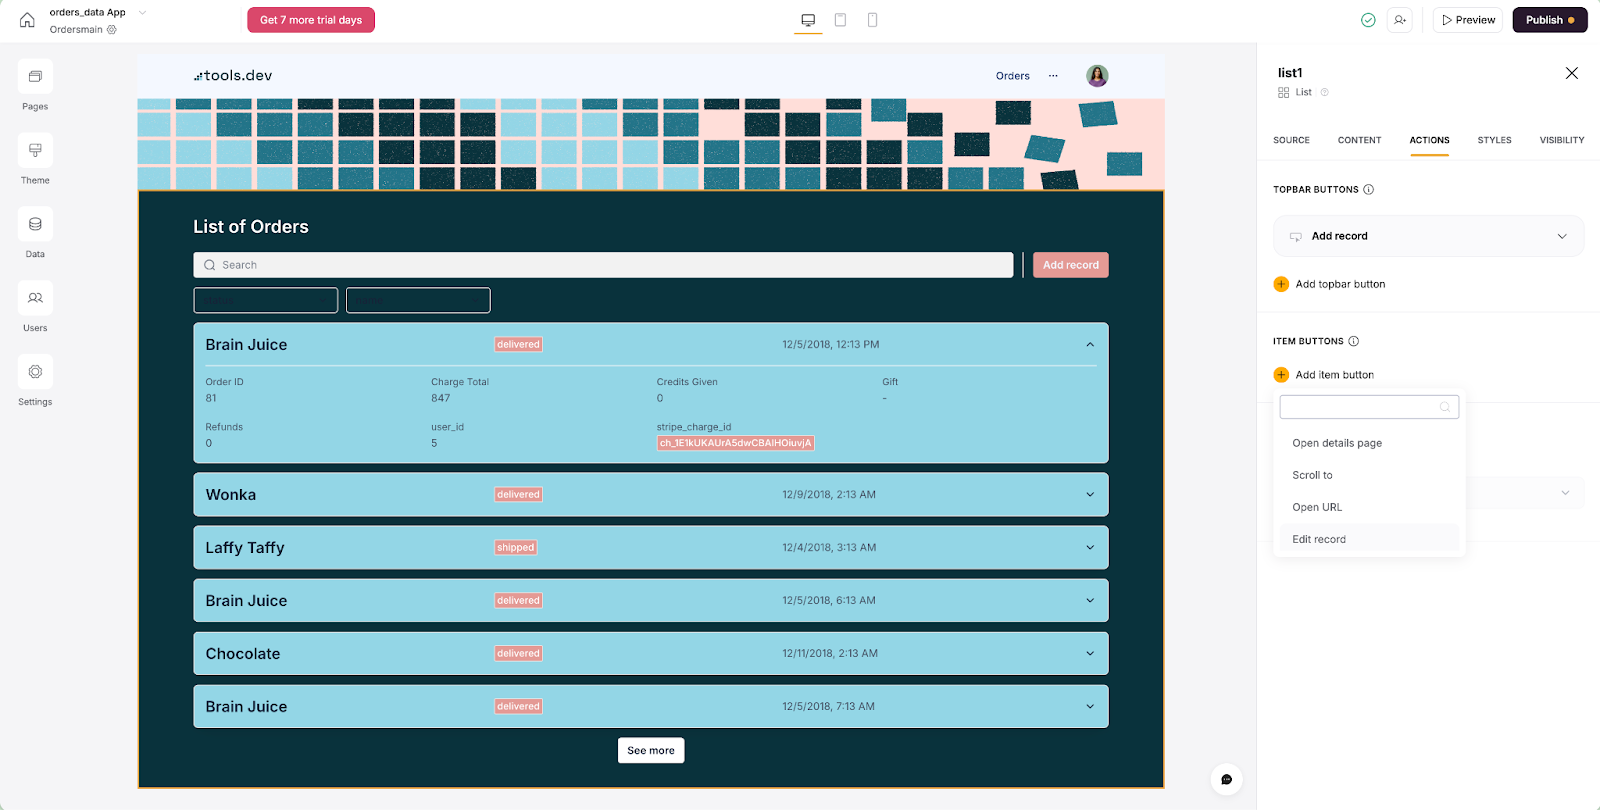
When you pull in Softr’s list blocks to your canvas, they will automatically start out with an Add Record button. Since we built our form out on a separate page, we can remove this button and add a button to navigate the user to the form page instead.
If you’d like for your users to stay on the same page, you can have the form open up as a pop-up modal, or keep the initial Add Record button, which also opens up as a modal. We’ll go over how to set up form fields from an action button later on in this tutorial when we show how to edit an existing order.

Now, when somebody submits a new order in the form, the responses will be saved to our Airtable base, which will then appear in our Orders page in our Softr app!
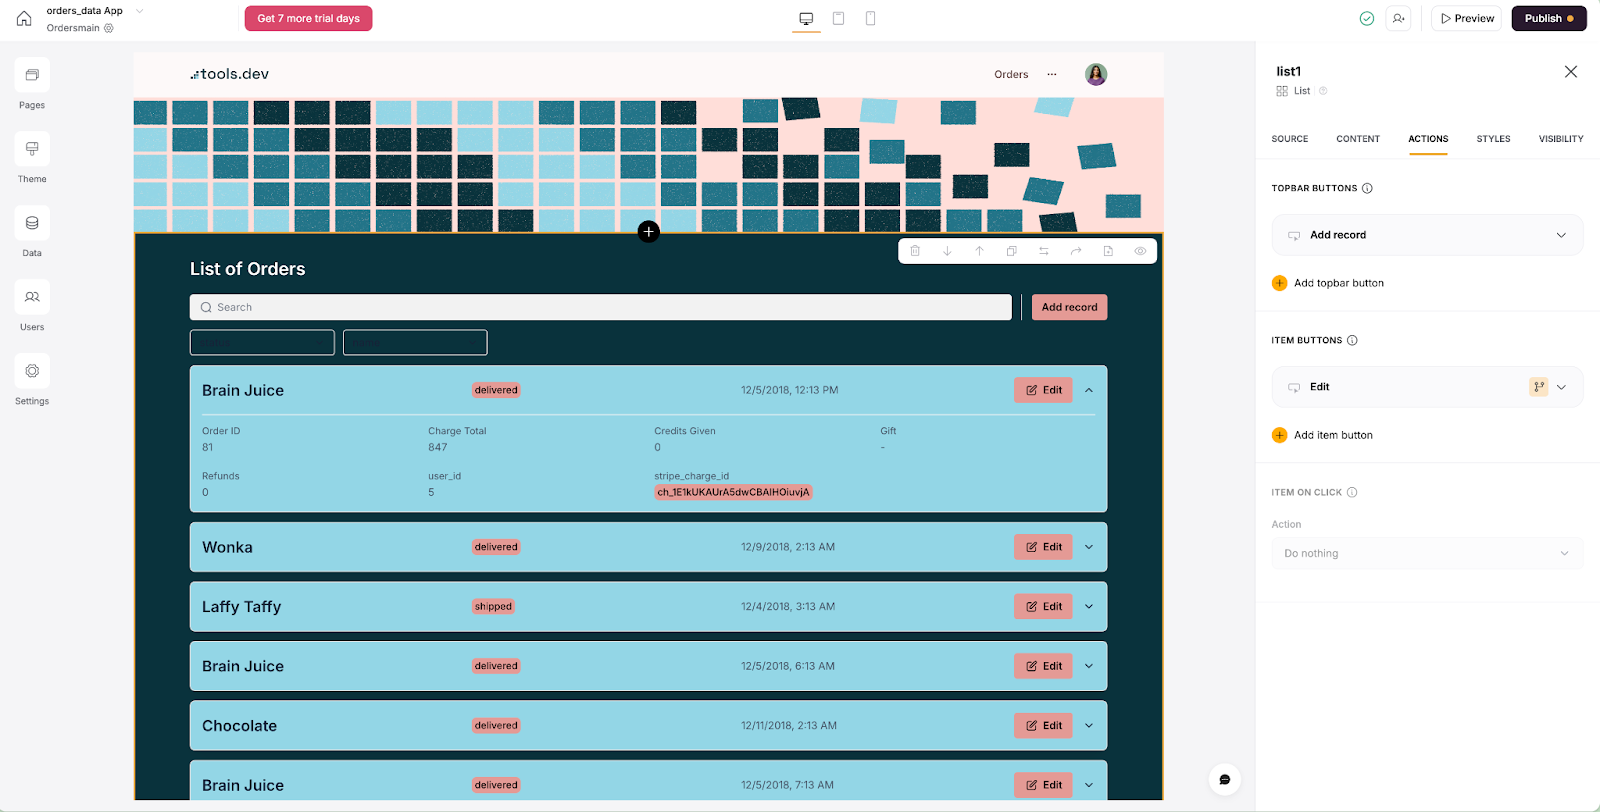
Edit: Add an option to edit existing Orders
Next, we want to ensure we can edit our orders if needed. To do this, you can add an ‘editing’ feature to the form submissions.
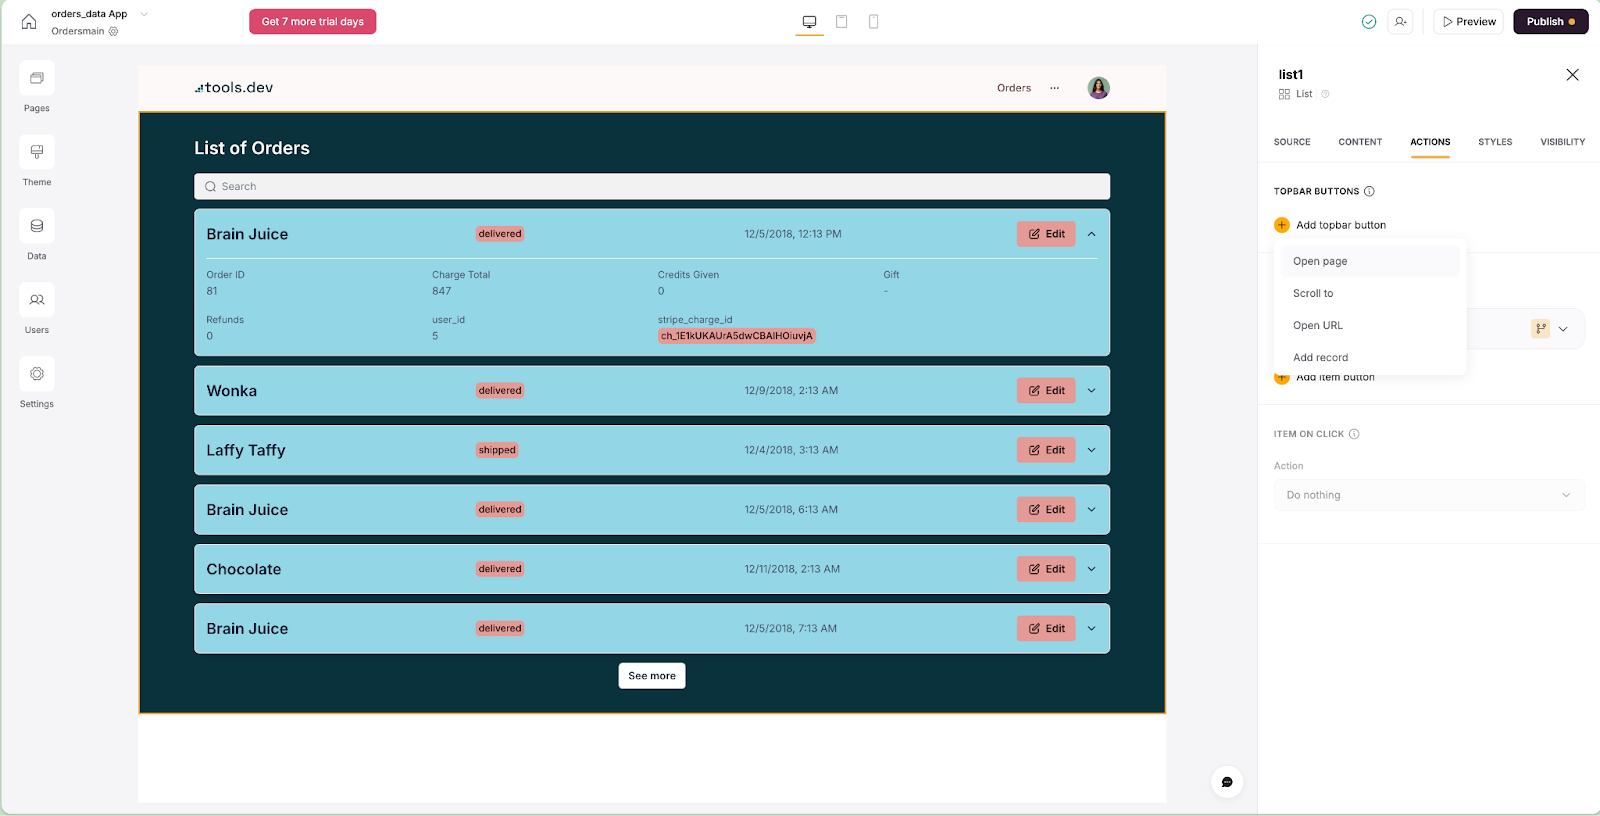
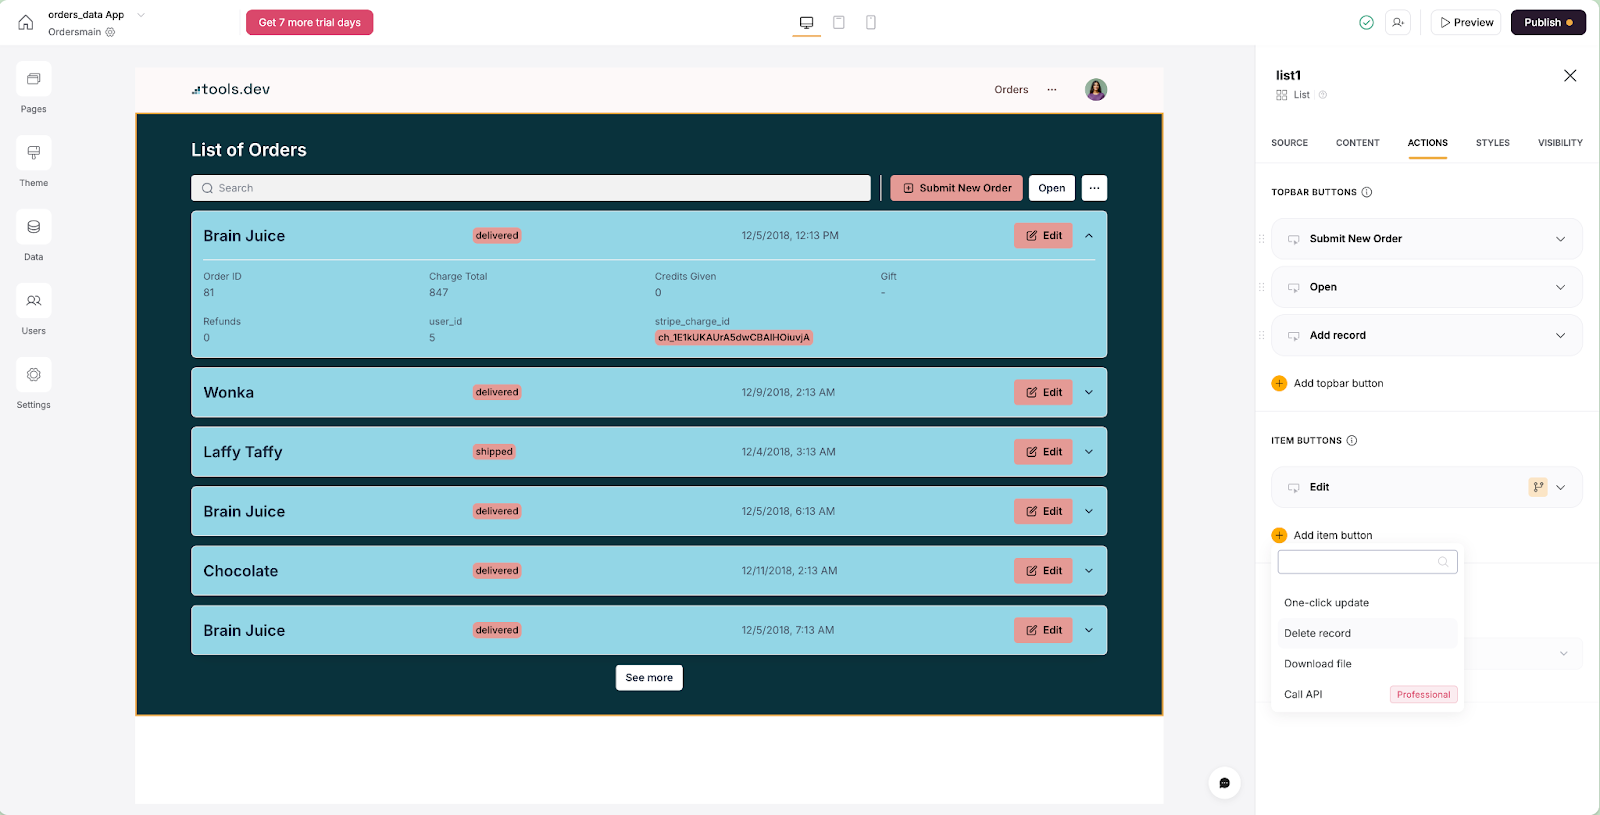
Head to the 'Actions' tab of your List. Underneath Actions, you can set ‘top-bar’ actions.
‘Top-bar’ actions always appear on the top of the block whether the block is in list or card view.
With 'top-bar' actions you can also Scroll to another block on the existing page, navigate to a different page, open an external URL or add a new record. If you’re on the professional plan, you can even export your data from a top-bar action.
To set up your edit functionality, all you need to do is select ‘Edit record’ and map the fields in a similar manner as we did for our New record form.
However, one key difference is that the fields won’t be auto-mapped or automatically added for you. To allow users to edit the record, you must manually toggle individual fields on or off from the start. This step is a bit hidden if you’re not used to the platform. Above the header Update Record Modal Settings, there is a tiny section where you’ll find another yellow plus icon. Here’s where you’ll click Add field and map the items to your respective Airtable data.
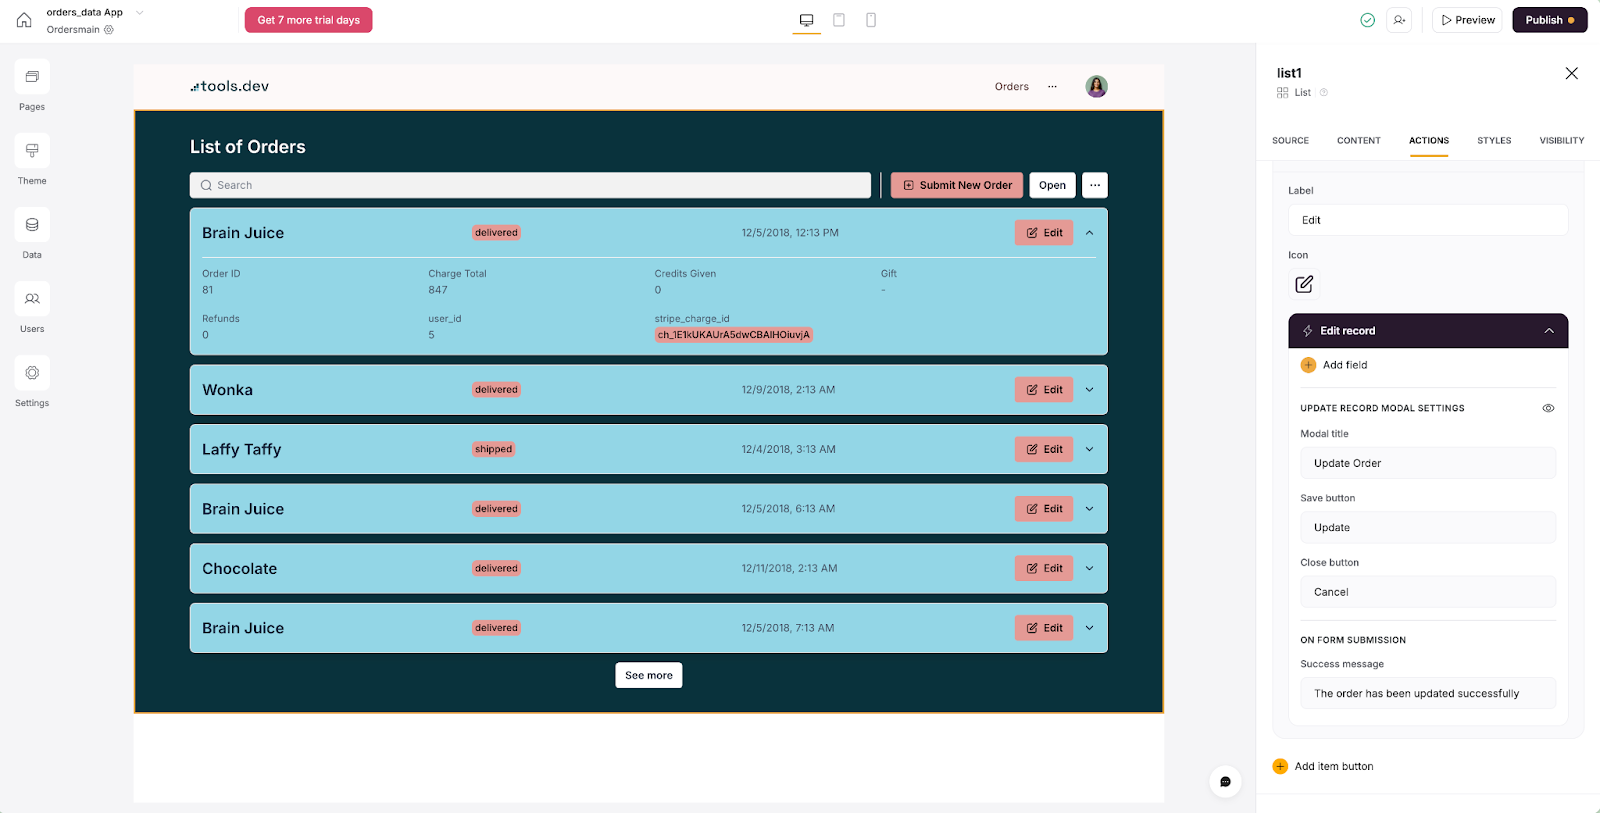
When you click Add field, you can choose which values to include in your form.

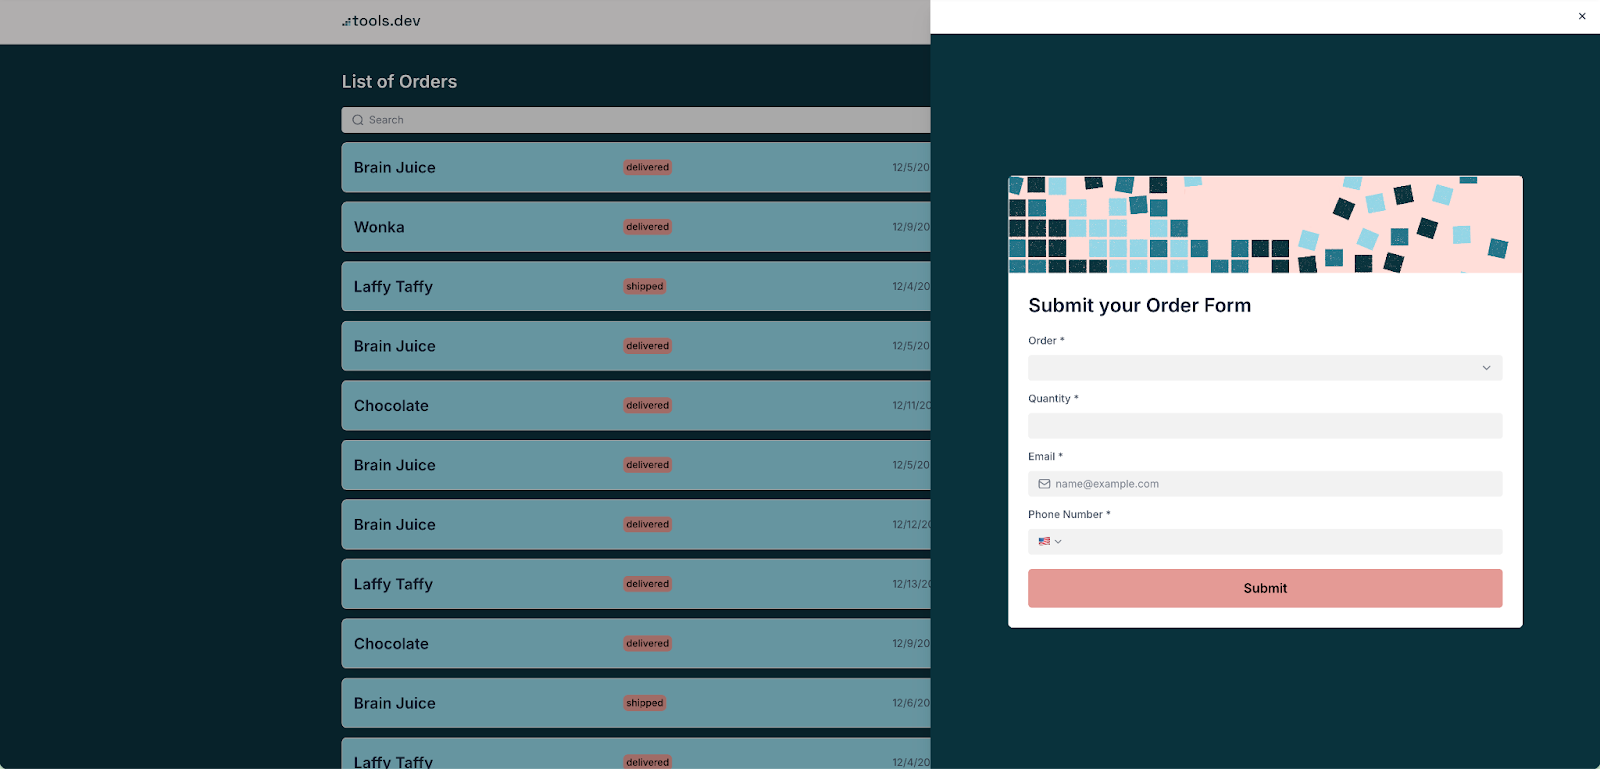
This form is currently only allowed as a modal pop-up, so your users will see a darkened background of their orders and a pop-up modal when they click this item button.
The form is automatically pre-filled with the data from the table row we clicked, so the user can easily update the fields you made editable.
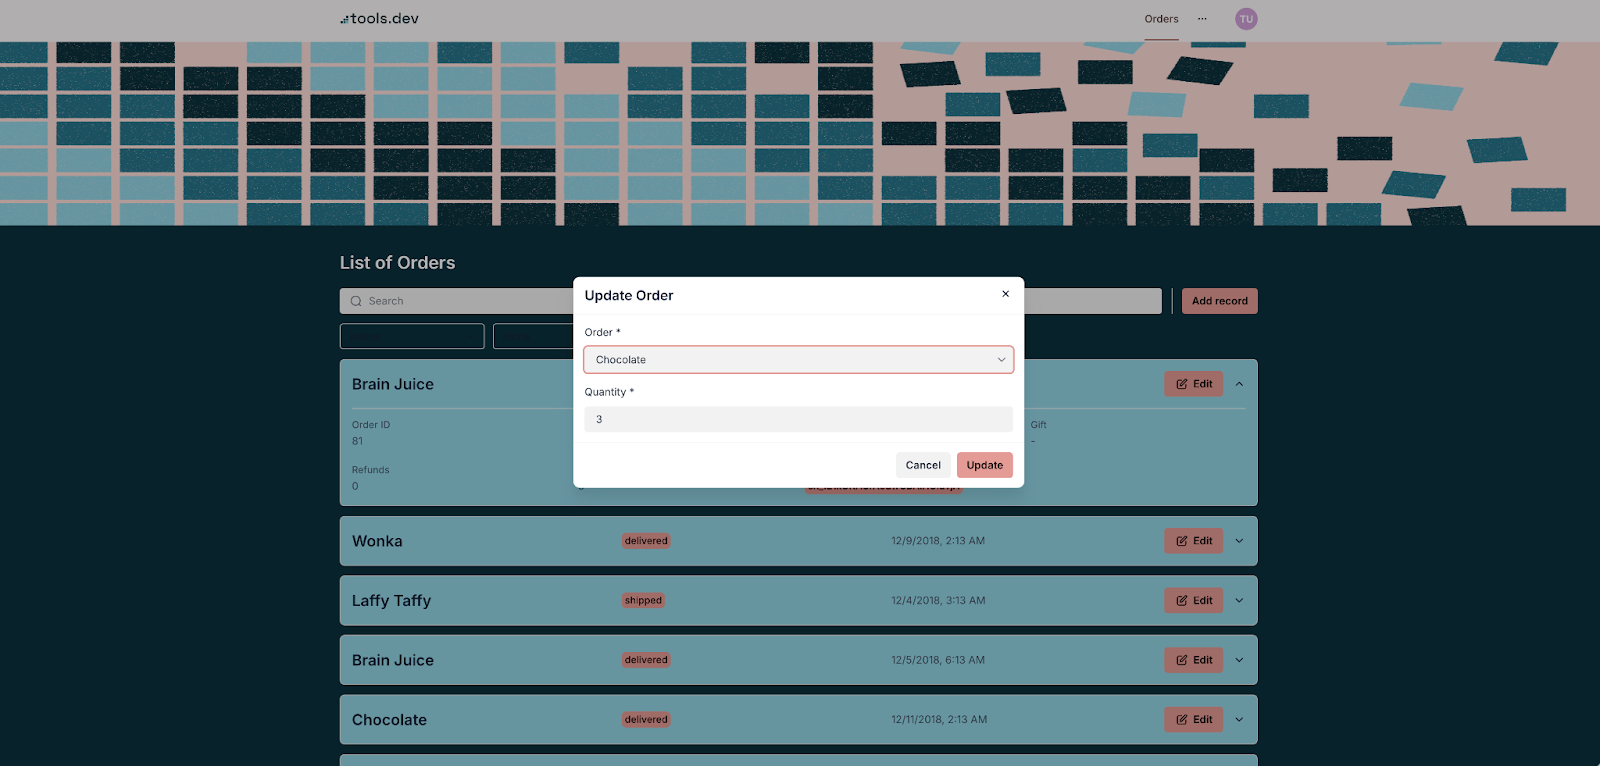
And once again, with just a few clicks we’re all done! Now your users can edit the records using a simple form when needed.
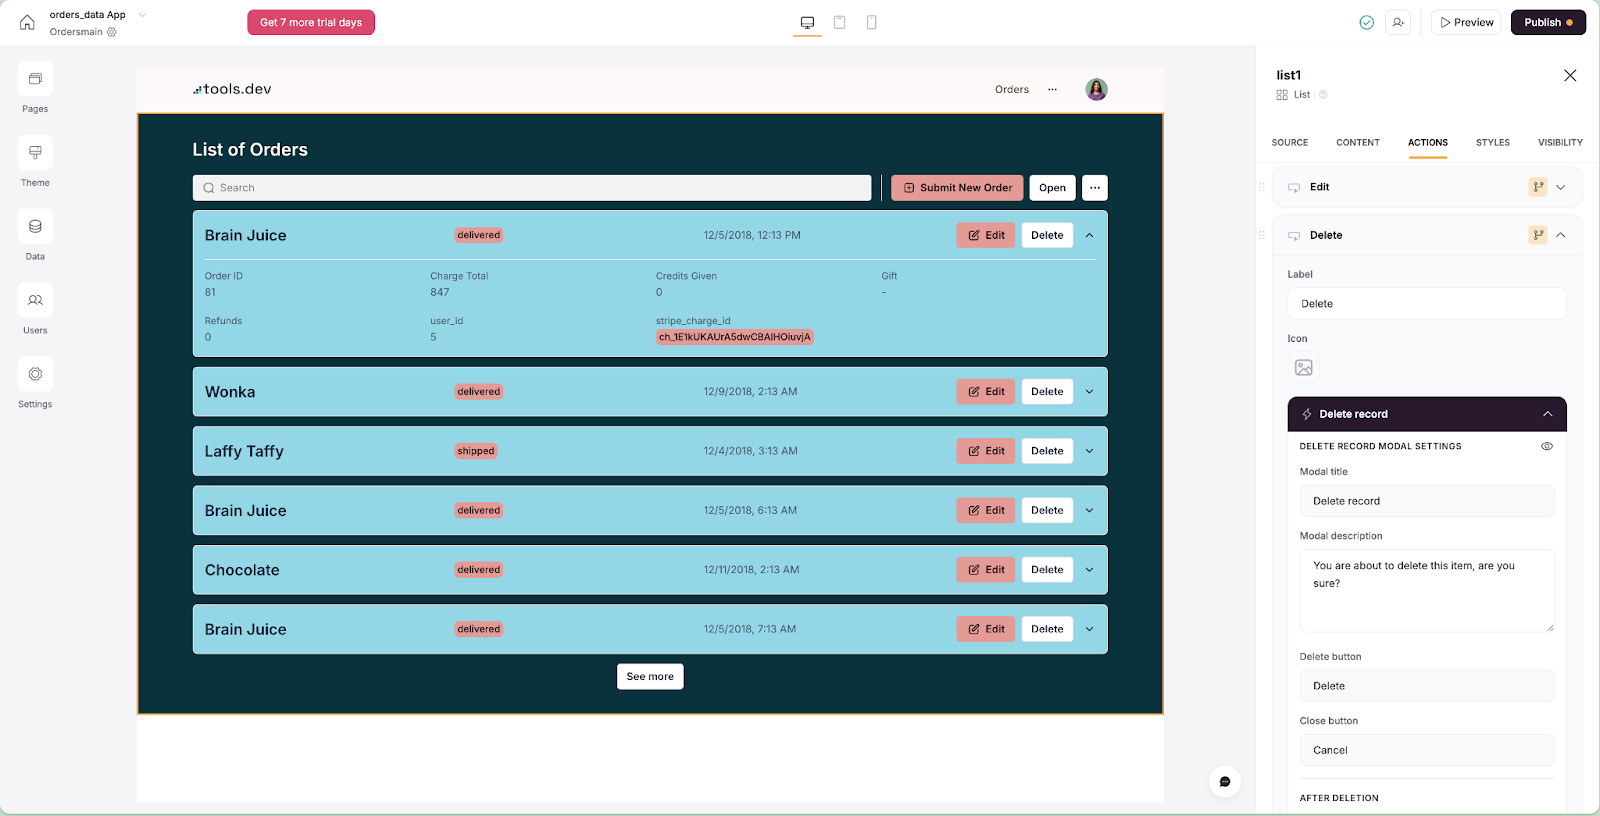
Delete a record
Deleting from an item or record-level is even simpler, as Softr provides a pre-built action you can choose to include.
We’ll set this up in the same space as adding a new record or editing a new record, from the List component settings.
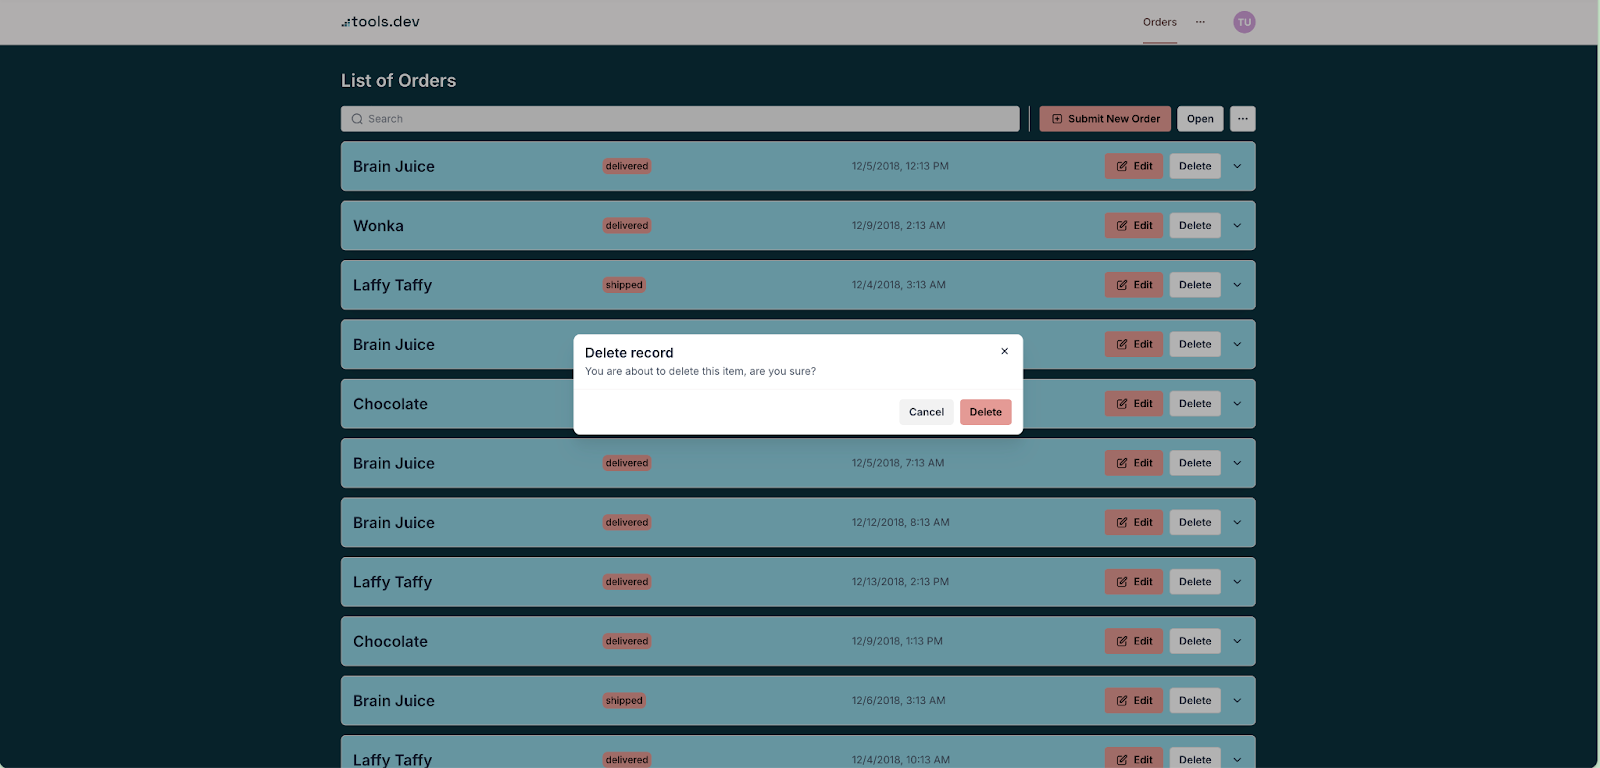
To delete a record, an individual order in our instance, you click Add item button under Actions, just as we did in the Edit section of our tutorial. Now, you select the Delete Record action.
Finally, customize the error message you want users to see before they fully delete the item.
With that, you already have all four CRUD actions covered, in just a short space of time!
Customize and publish the app
Before we launch, let’s add some additional design customization to our app.
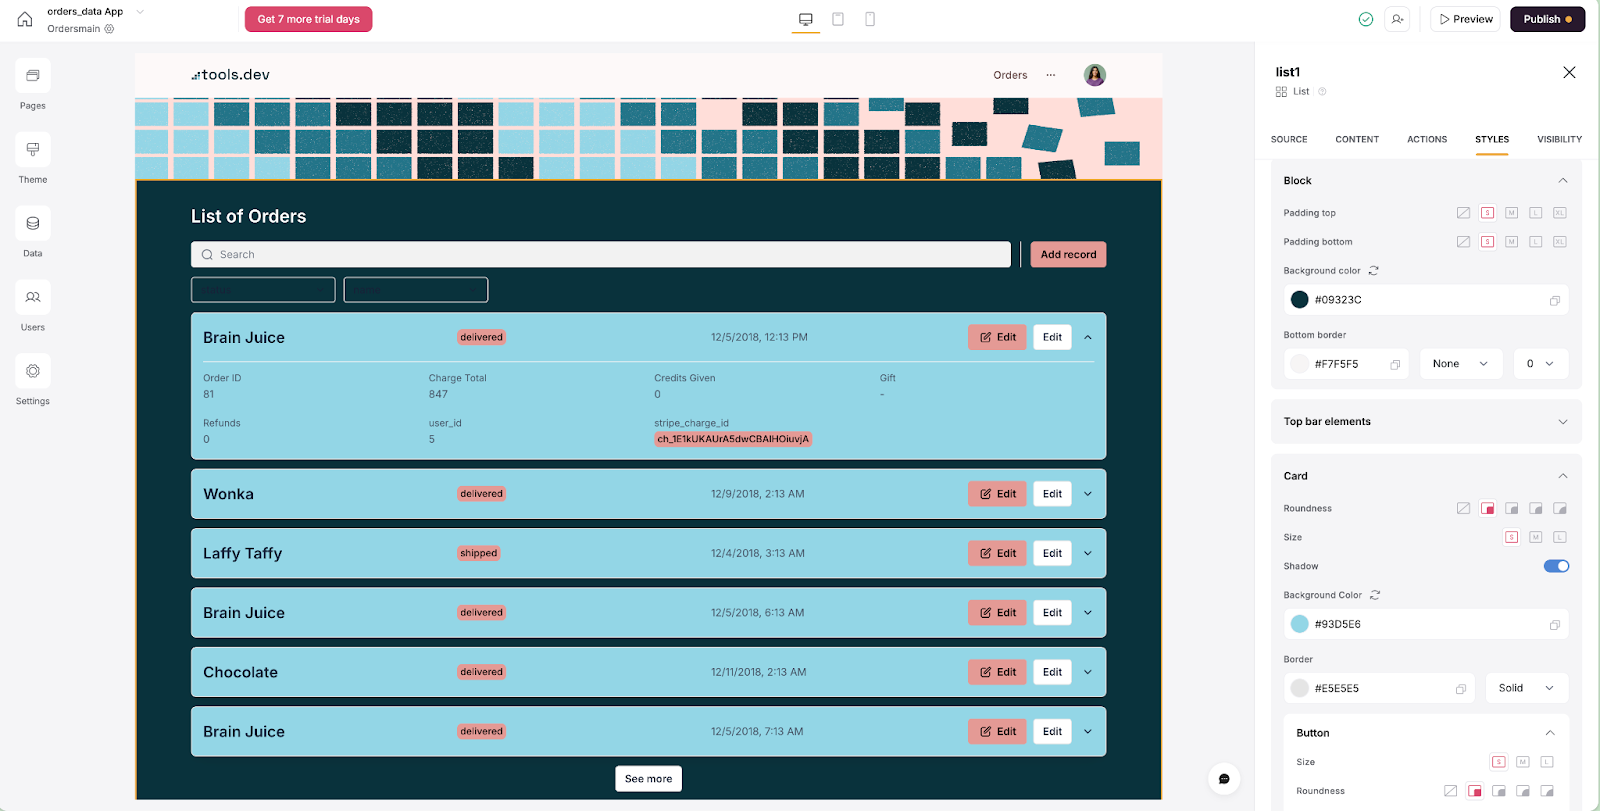
You can change all styling elements at the block level or at the individual field level. To change styling levels for the entire block, navigate to the Styles tab and expand the various sections to make changes to that block’s style.
You can change overall padding on the top and bottom of the block, background colors, list or ‘card’ colors, button colors, Title sizes and alignment and text weight.
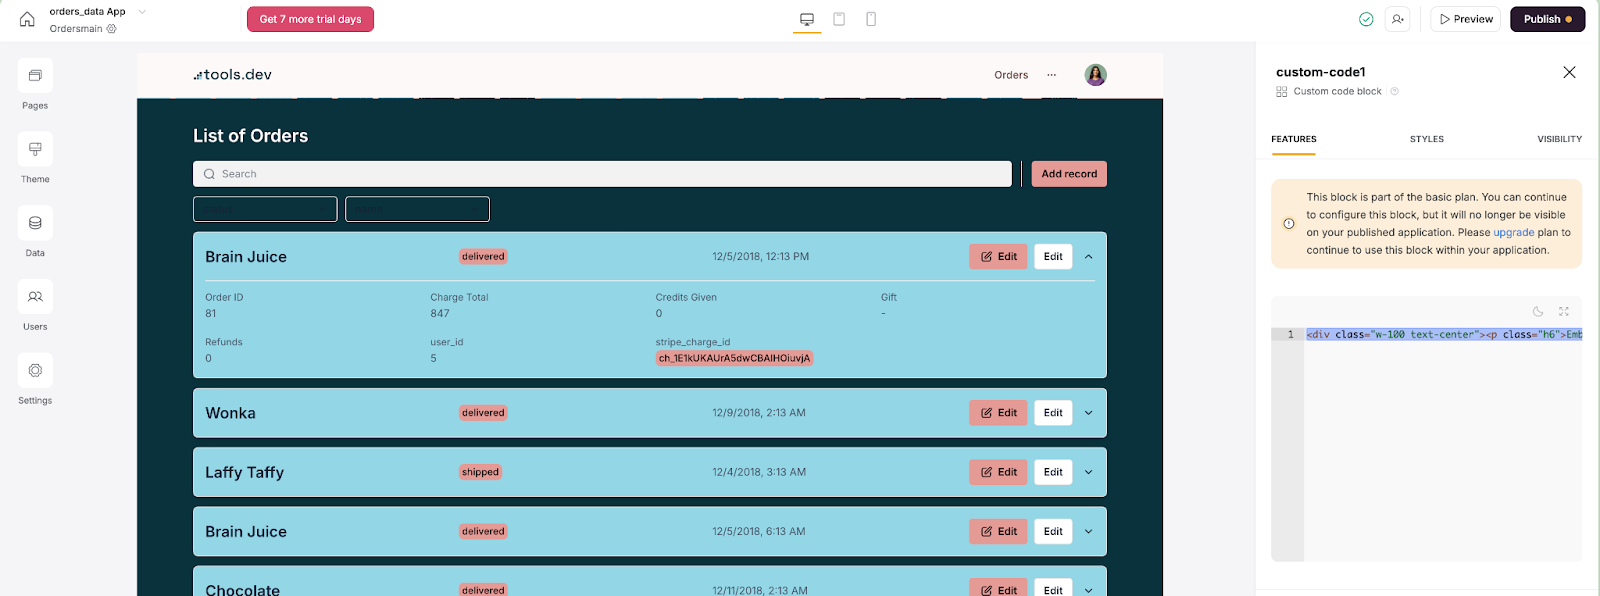
If these customization features are not enough to suit your fancy, advanced developers can further customize their applications through HTML, CSS, and JavaScript. For access to this level of customization, you will need to upgrade to at least the Basic Plan.
Sync your users and create user groups
Now our app is ready to deploy, let’s add our users.
Users are always stored in Softr’s user page, under the left-hand navigation panel. Whether you sync your users from an Airtable database table, or add users to Softr directly, anyone who needs to login to your application will need to be added to the Softr user page.
To sync users from Airtable, or another data source, click Sync with data source on the Users page. Softr’s prompts will guide you through selecting your data source, as well as the table and fields that your user data is stored in.
To add users manually into Softr click Add Users and either include an individual user by typing in their email and name, or import a bulk set of users by adding a csv file and selecting which columns include the email addresses and names.
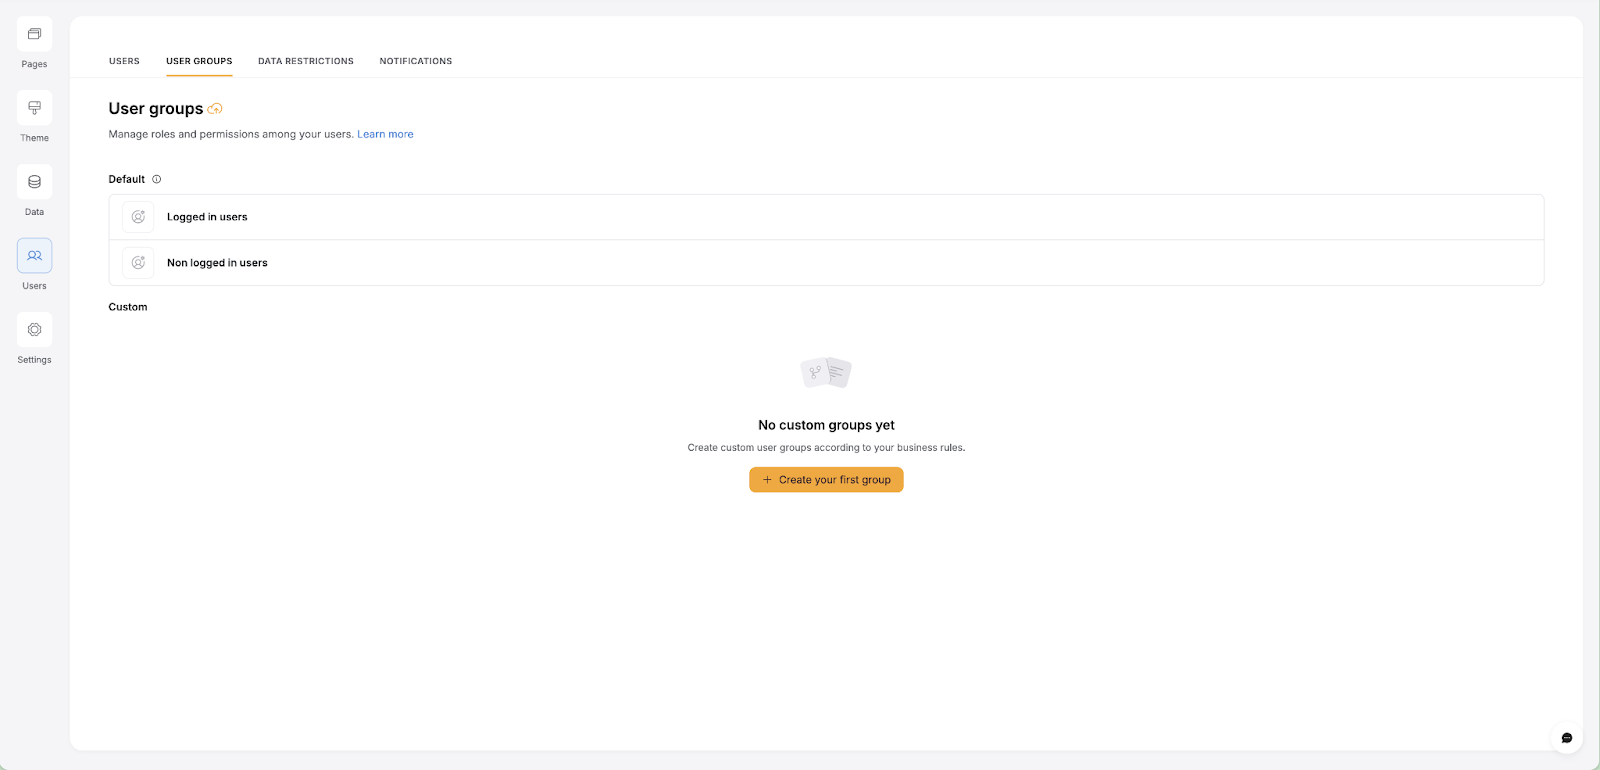
User groups are managed on the Users page as well. Having custom user groups is available only on Softr’s paid plans, with more user group numbers available on the highest plans.
User groups allow you to customize the application pages or blocks based on which user group needs to see the information, for example hiding staff salaries on staff group blocks, while making them visible on their manager or administrator’s blocks, for example.
Conclusion
Now that you’ve made an Orders List page, an Orders Form and an Editing Orders feature, your Orders application is ready to go live! When you’re ready to publish your app, it’s as simple as clicking the black Publish button on the top right of your Softr studio.
This app will now provide a log-in portal for customers to place, review, edit and delete their orders.
If you’re interested in comparing the Softr platform with Airtable’s own interface building tool, check out our article here.
Want to learn more about internal tools and how to build them? Check out our sections on low-code tools like Notion and Airtable, or developer tools like Retool and Windmill.

