

The built-in filter for Retool’s table component can be a fast way to search for data in your table using conditional logic, however for quick searches it can end up taking a bit too much time, only filters the frontend and requires a bit too much clicking. Using Retool’s “Query JSON with SQL” query, and a couple Retool components, we can create a filter panel that streamlines the experience for the end user and allows for customization to better fit the tool’s needs. This UI session will focus on setting up a filter container with a bespoke UI to help your users sort and find data in tables more effectively and with fewer clicks - a perfect exercise for beginners trying their hand at Retool!
For those just starting out with SQL and looking to get an explanation written for non-software engineers, we highly recommend that you read Technically’s overview.
In this tutorial we will take you through a detailed step-by-step process of creating an advanced filter container (particularly aimed at non-developers), using the following Retool components:
- A text-based search,
- Multi-select,
- Dropdown,
- Value range slider
- Checkbox
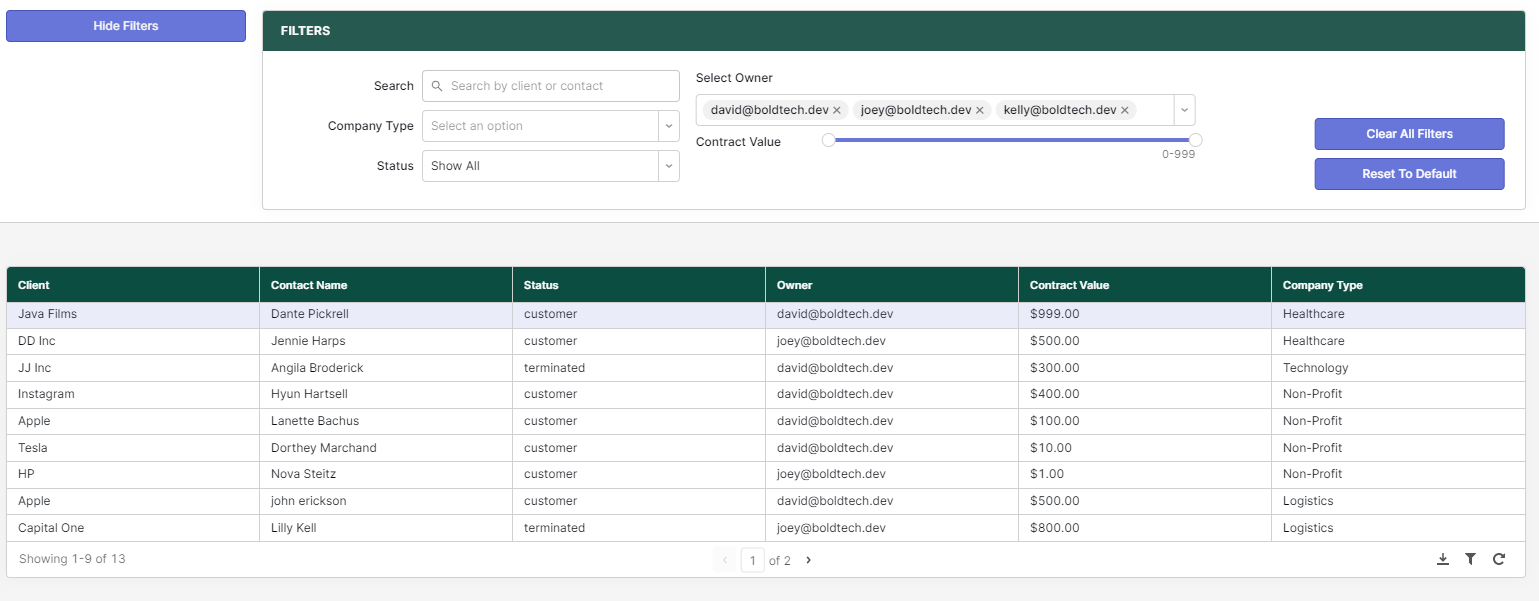
Hopefully, your end product will look a little something like this, allowing users to quickly search through different columns and categories using dropdowns, a value range slider, multi-select component and the text input search bar, as well as a checkbox for any boolean values:
Note: This tutorial uses a small dataset - if you are using server-side pagination, you will need to apply these filters in the query data itself, and this depends on the resource you are using and whether it uses SQL or not (which is unfortunately outside of the scope of this tutorial!).
Getting Started
To get started, pull a container into your app. You can design this as a side panel or even a modal if this suits the layout of your app, but we prefer to create a bar across the top of the table for clarity and ease of use. We’ve opted to include it in the app header, but you can also place it above the table, so that we can create a dynamic show/hide function (we’ll explain this later!). But wherever you decide to put it, this is a super intuitive user interface for all types of users.
For this tutorial, we have a search input bar that searches the ‘client’ and ‘company name’ columns of a database for similar strings of text, a multi-select to give the option to select one or multiple owners for this client, a dropdown to select a single company type or status, a checkbox, and a range slider to select a range of contract values. This is what our filter container looks like, as a good basis of design for you to work from:

Before getting going, you will also need to connect to a resource, using Google sheets, MongoDB or the like. You can read up how to do this in the Retool documentation. Note, depending on the database type that you use, you may need to format data as an array for the Query JSON with SQL filter, or if you have nested values, you may need to drill down further than .data to get to your attributes.
Query JSON with SQL: The Basics
Using your data resource, create a query to pull data into your application. In the bottom panel select “+ New” and select your resource. Create a query specific to your resource that returns the data you’d like to display in your table when there aren’t any filters applied. You can find out how to do this in the Retool documentation if you are unsure.
NOTE: For this tutorial, we are using the ‘Query JSON with SQL’ query for a Google Sheets DB, which uses AlaSQL; if you are using Postgres, Snowflake or other databases, you may find the SQL syntax changes slightly for your query - make sure to check out the exact code in their respective documentation. You can find out more AlaSQL specifics in their GitHub wiki.
Once you’ve placed the components of your filter bar into the container, create your “Query JSON with SQL” query.
In our query we are first going to select everything from our original query.

SELECT * FROM {{crmData.data}}
NOTE: With SQL, it can get a little tricky to read a long query and it can be confusing when you come back to edit it later, so best practise is to capitalize any keywords and commands, such as SELECT, WHERE, AND, OR etc.
Now that you’ve selected all (SELECT *) your data from your query, you want to look for data that fulfils your filter conditions. For this you need to start with ‘WHERE’, before starting your first condition.

SELECT * FROM {{crmData.data}} WHERE
And with that - you’re ready to start building your first filter!
A sneak peak at the final product: what we’re looking to achieve
In the next sections, we’ve broken down the different component types and the corresponding SQL code so that you can build your own SQL query.
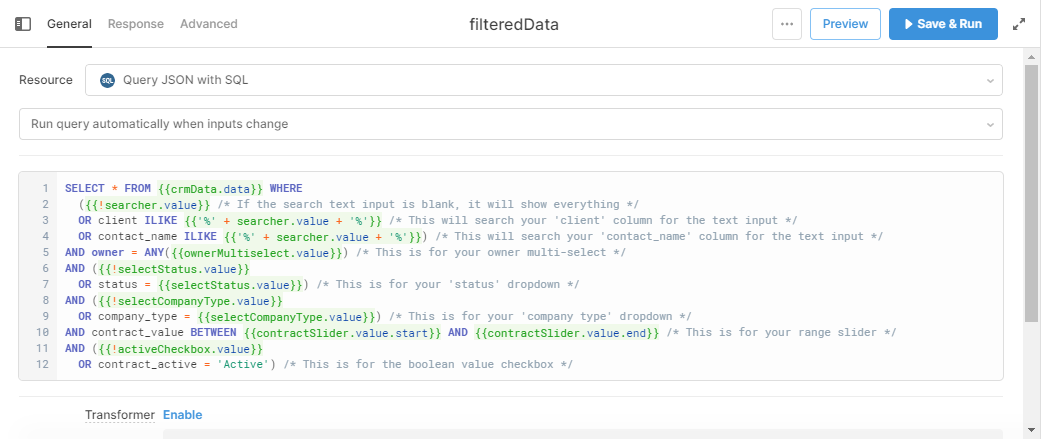
But, just so you have a clearer understanding of the SQL structure we explain below, here is what our query looked like in the end:
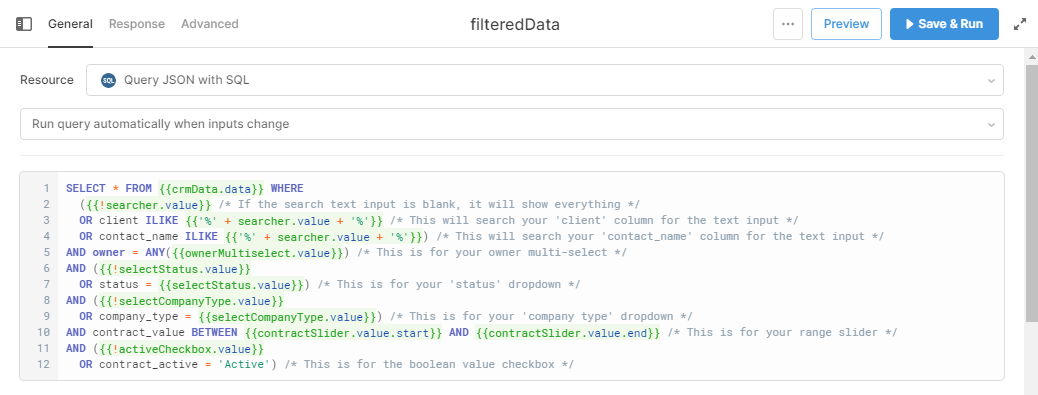
Note how bookending text with ‘/*’ and ‘*/’ allows you to make comments that won’t be read by the code - useful for team projects and future notes to self!
If you are familiar with SQL, this should look fairly straightforward for you, but if not, don’t worry! In the next sections, we are going to break down each part of this query to explain exactly how it all fits together.
TEXT INPUT SEARCH (e.g. by name, keyword etc)
When searching your data for text by using a text input component, you will mostly use the LIKE or ILIKE function in SQL. This will use the string input you have entered into your text input component to filter the data for results similar to the keyword searched.
This is what our query is going to look like. Note that we have two elements of the WHERE clause: one to handle a scenario where the text input is empty, and one to handle when it has a value.

SELECT * FROM {{crmData.data}}
WHERE {{!searcher.value}}OR client ILIKE {{‘%’ + searcher.value + ‘%’}}
OR contact_name ILIKE {{‘%’ + searcher.value + ‘%’}}
Let’s break this down:
The first line of the WHERE clause is looking to see whether the text input box returns a false value, which means it is empty. If the value is false and the text input component is empty, we want the query to return all the data. By putting the ‘!’ in front of the text input (here: ‘searcher’) it inverts the value of the component (which is true by default), and shows all results from the data when empty.

SELECT * FROM {{crmData.data}}
WHERE ({{!searcher.value}}
If the text input is not blank, the query skips onto the next part of the clause. So, the next two lines are searching the ‘client’ and ‘contact_name’ columns in the database for the search term in the text input.
NOTE: Depending on the flavor of SQL you are using, you may or may not need to use quotation marks for column headers in your backend, but they will still need to match the column headers in your database exactly to work.
You will then follow these column names with the SQL term ‘ILIKE’ (or ‘LIKE’ or ‘=’, see below section for details) and open your curly brackets to insert your reference to your text input using JavaScript. We’ve added two wildcards (‘%’), one before and one after, to your value reference, and we’ll explain why in the next sections.
Here’s how this should look:

OR client ILIKE {{‘%’ + searcher.value + ‘%’}}
OR contact_name ILIKE {{‘%’ + searcher.value + ‘%’}}
Important in SQL: Clauses (using parentheses)
You may have noticed that there are parentheses around the entire section, from just after the WHERE to the end of the second search line. These parentheses are transforming 3 independent clauses into a single one, which you need when asking the query to consider several possibilities for the same search condition, before returning the results.
In this case, first the query checks whether the text input is blank, then if not, whether it can find the search term in either of those two column headers.

Important for text searches: The ‘%’ Wildcard
Now, if you were to do all of the above, and simply use {{searcher.value}} as your reference, you might have a slight problem, and this problem would be that the query is only searching for that entered text from the beginning of a data entry point. This means it will only return matches if the first word matches, and won’t search within a word or string for this term. This is rarely of any use to anyone, so to fix this, we use something called a ‘wildcard’.
A wildcard tells the SQL query to search any and all characters within a string or piece of data for a match. In SQL, this looks like: ‘%’, and you want to bookend your string with these wildcards in order to search anywhere within the data, from beginning to end. This will look something like this:

Let's consider the example that we want to search for anyone with a ‘B’ in their name. If we had only input {{searcher.value}}, it would only return names beginning with ‘B’. This is where we use the ‘%’ wildcard. The ‘%’ represents zero or more characters, so ‘b%’ would find Betty, Beth, and Bob. When we add a ‘%’ to the other side ‘%b%, we now find those same names, but also Abigail, Mable and Rob. So to search anywhere within the string, instead of just at the beginning or end, you can use {{‘%’ + searcher.value + ‘%’}} to accomplish just that.
This is therefore the most complete way of searching a database, but will occasionally return some less exact results. If you are looking for precision in terms of the data your filter returns, you may be better off not using the wildcards, or even using a dropdown menu instead. Note that including wildcards will slow down your query by a good deal as your database needs to run more complex text search algorithms.
A couple of notes on searching by text with SQL
If you are looking for exact matches you can use ‘=’, but LIKE/ILIKE is more generally used for the purpose of text strings and the text input component (if you are looking for a small number of exact matches, it may make more sense to use a dropdown anyway).
Find out more here: https://www.w3schools.com/sql/sql_select.asp
Multiselect Component
The multiselect component is a really simple and a great addition to the filter bar when searching for things by category, item type, or other more limited options.
All you need for the multiselect is something like this:

AND owner = ANY({{ownerMultiselect.value}})
If you already have another condition in your SQL query (like the text search above), you will start this next condition with ‘AND’. Then, add the name of your column (without quotation marks): in this case ‘owner’.
Before you reference your multiselect, use the term ‘ANY()’ and surround your reference with these parentheses, as above. This simply means that the filter will return values with any of the selected values in the ‘owner’ column, and allows for an array of values to be used as a filter, not just a single value.
To set the options for your multiselect component, instead of hard coding the options, you can use the lodash _.uniq function (which selects all unique values in an array to create a multiselect array that automatically updates according to your backend data. This is how it should look:
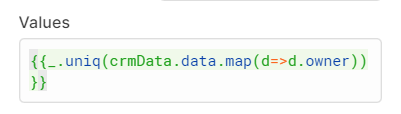
{{_uniq(queryData.data.map(d=>d.columnHeader))}}
And that’s the multiselect done!
Dropdown/SELECT Component
The SQL element of the select component is a very simple clause that first checks to see if the dropdown is blank (using !), and if not, just matches equal elements using ‘=’ and connects it to the component value.
This should look something like this:

AND ({{!selectStatus.value}}
OR status = {{selectStatus.value}})
Once again, as there are already other conditions in the filter search, you need to begin with ‘AND’. You can then open the clause () and check if the dropdown is blank (using the exclamation point).
Then, within the same clause (i.e. in the parentheses) add an ‘OR’ and match the column to the value in the dropdown, using the code ‘OR column_header = {{select.value}}`, and close the parentheses. This will now check if the dropdown is blank, and if so, return all data, and if not, return only the data where the value in the ‘status’ column matches the value selected in the dropdown filter.
As with the multi-select, the extra step here involves connecting the dropdown to the data in your database - if you haven’t already - so that the values available to select dynamically reflect the options available in the backend data.
You can do this using the ‘uniq’ lodash function to map the unique values within a set of data. Your code should look like this, replacing the query name and column header with your own values:
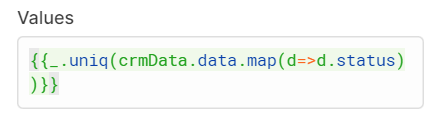
{{_uniq(crmData.data.map(d=>d.status))}}
In this tutorial, we included two dropdowns to allow users to search for specific values from a list, in this case ‘status’ and ‘company type’, and this is how they look together:
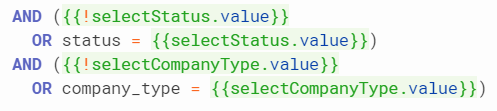
AND ({{!selectStatus.value}}
OR status = {{selectStatus.value}})
AND ({{!selectCompanyType.value}}
OR company_type = {{selectCompanyType.value}})
Range Slider
In our app, users need the ability to filter by the ‘contract_value’ as a range. For this, we are using the range slider component to give up a lower and upper value to search between. The range slider also allows for very simple SQL, which should look something like this:

AND contract_value BETWEEN {{contractSlider.value.start}}
AND {{contractSlider.value.end}}
So this code matches any contract values between the ‘start’ value of the slider and the ‘end’ value. You just need to make sure that the values are set on the slider to encompass the min and max values in the database.
NOTE: There is currently a Retool bug which does not allow for the range slider max to go above 999, so until this is fixed, please bear in mind that higher values don’t show up on the slider properly. Instead, you could use a ‘min’ and ‘max’ value dropdown or text input and input those in the code above, in place of the slider option, or use this workaround.
Boolean or Checkbox
The checkbox follows a similar principle to the dropdown, by first checking whether the checkbox is ‘empty’ (or false) or not, and if not (i.e. the checkbox is ticked), it will filter the ‘contract_active’ column for values that say ‘Active’ only. The same principle can be applied to any true/false or dual value columns.

AND ({{!activeCheckbox.value}}
OR contract_active = ‘Active’)
And with the final addition of your checkbox, you’ve finished off your SQL query! Here is how it should look when it’s all tied together (without the grey text, of course):
Hopefully, this is looking a little less cryptic, and a little more like a digestible chunk of code. Now, you can finish here if you like, or keep following the tutorial for how to create some reset and clear buttons, tidy up your UI and create a dynamic show/hide button to tuck the advanced filters away when not in use.
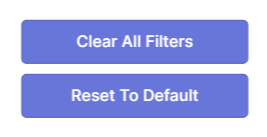
Reset and Clear Buttons
While not strictly necessary for the app, a good UI trick is to include two buttons in this filter bar, one to clear selections and one to reset them to show the original options again. Whether it’s necessary to have both or just one button depends on the data you have: if you are using multiselect components with many tags, you don’t want to expect your users to manually clear or reselect all of these selections, so both would be useful, however if you don’t have any multiselect components, a simple ‘reset to default’ button should suffice.
To set these up, pull in a button or two and then create a javascript query.
To create a ‘Clear All’ button that sets all filters to blank use the following code in the JS query to set the values to null:
componentname.setValue(“”)
And repeat that for each component in the filter. Here is an example of how this might look (note the differences with the multiselect and contract slider):
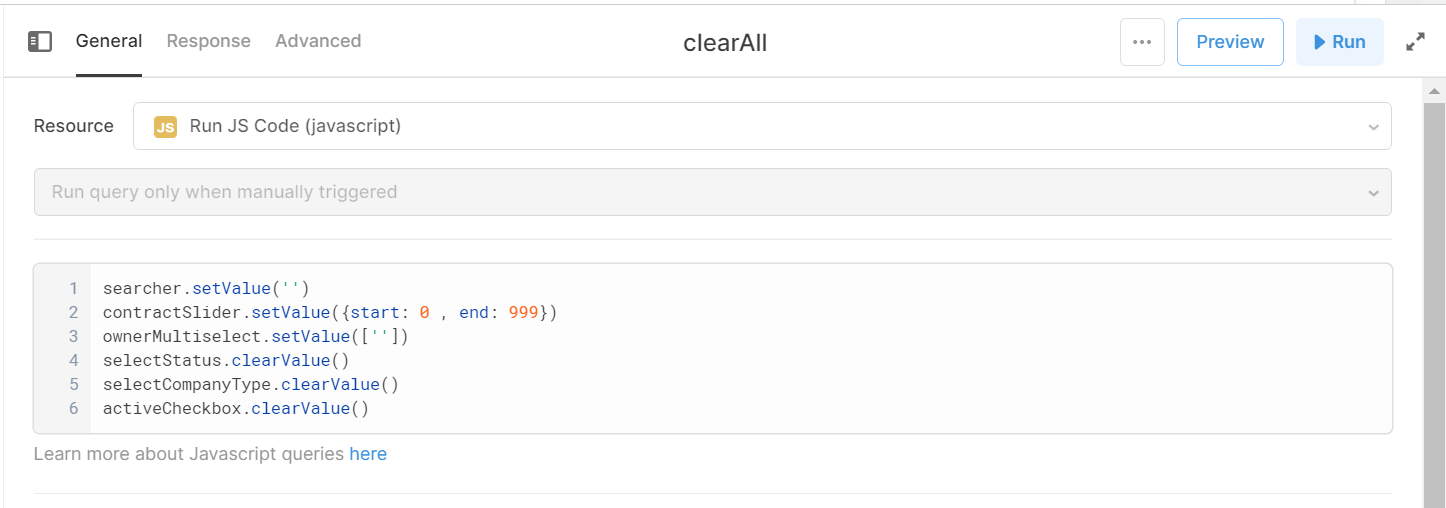
searcher.setValue('')
contractSlider.setValue({start: 0 , end: 999})
ownerMultiselect.setValue([''])
selectStatus.clearValue()
selectCompanyType.clearValue()
activeCheckbox.clearValue()
You can then set this query to trigger on click by adding it to the click handler of the button component, like so:

If you have no multi-selects, then this will be enough to reset the filters to show all data, however if you do have multi-selects, this will clear all selections and therefore most likely all data, leaving your table blank. In this case, you will also need a ‘Reset filters’ button. This JS query is a little more complicated with reference to the multi-select components, and the others will look the same above.
For the multiselects, the ‘reset’ JS will look like this (if you use the _.uniq function to define the values, if not copy the code in your multiselect component’s ‘value’ box):
multiselectcomponent.setValue(_.uniq(DataQuery.data.map(d=>d.columnValue)))
What this code is doing is finding all the unique values in that column, and setting the multi-select component to include all of these values, and is simply mirroring the code you are using to set the values in the multiselect anyway. If you have hard coded these using quotation marks, you can do the same here too, just like so:
multiselectcomponent.setValue([‘Option 1’, ‘Option 2’, ‘Option 3’])
While this works perfectly fine, in general, dynamic values based on backend data is best practice here!
Your final javascript query for this button might look something like this:

searcher.setValue('')
contractSlider.setValue({start: 0 , end: 999})
ownerMultiselect.setValue(_.uniq(crmData.data.map(d=>d.owner)))
selectStatus.clearValue()
selectCompanyType.clearValue()
activeCheckbox.clearValue()
Quick UI Tidy-up
Just because you’ve finished setting the bar up, it doesn’t mean you should end there! Spend some time styling the container, and setting the placeholder text to help guide your user for what to search or select.
Consider whether your users can intuitively understand what is asked of them for each section and think about adding tooltips for any fields that might be less obvious. Another trick is adding small indicative symbols, such as the search icon to search bars, so that users can quickly find the correct input without having to read all the labels, like so:

Creating a dynamic show/hide function
And for our final trick… you may remember that at the beginning of this tutorial we recommended placing the filter container in the header or above the table - well this is why! Retool will collapse any hidden components placed vertically to create a dynamic layout, where your hideable advanced filters tuck away when out of use - this is a great example of good UI.
Here’s how to do this in your own app:
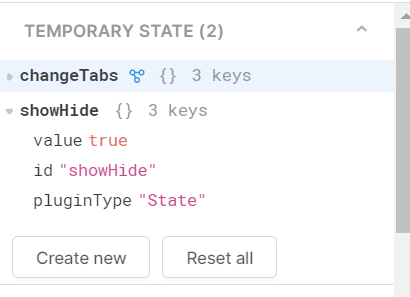
First, like above, create a temp state (by clicking ‘Create New’ under Temporary State in the left panel) and label it for clarity, we’ve chosen ‘showHide’:
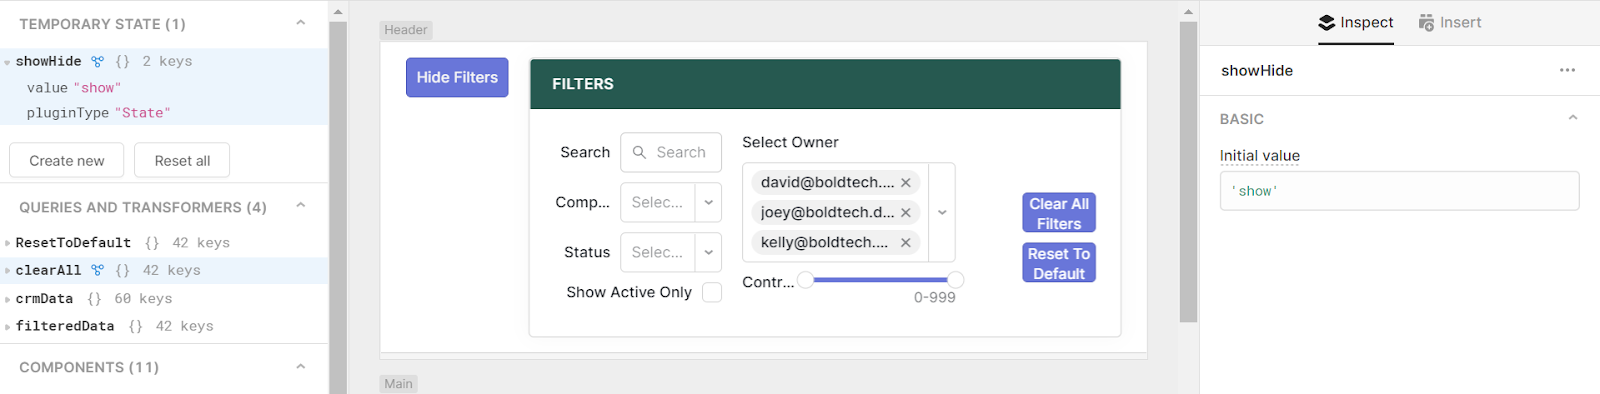
Set the state’s default value by selecting it in the left-hand panel and editing it in the right-hand panel, in our case we wanted it set to ‘show’:
Next to the filter container, add a button. In the button text section add a ternary that changes the button text dynamically according to the value of the temp state:
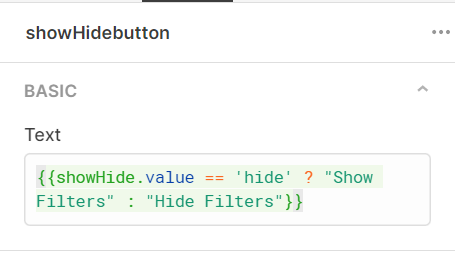
{{showHide.value == ‘hide’ ? “Show Filters” : “Hide Filters”}}
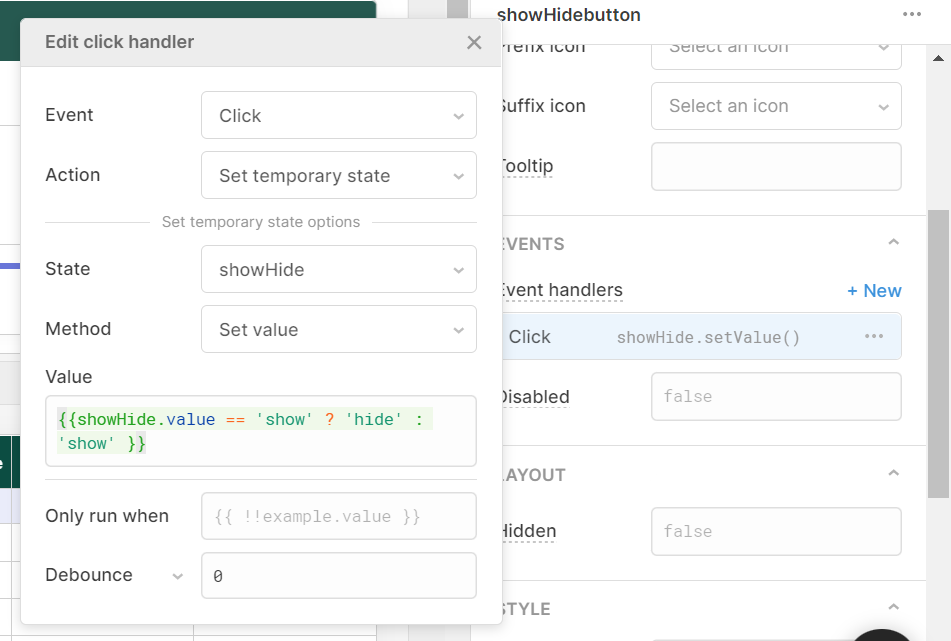
Next, add an Event Handler to the button, with a ternary which sets the value of the temporary state to ‘show’ and ‘hide’, back and forth, by basically completing the opposite action, as below:
Once this is done, you just need to set the filter container to hide, by adding this to your ‘Hidden’ value box (where showHide.value is the temp state):
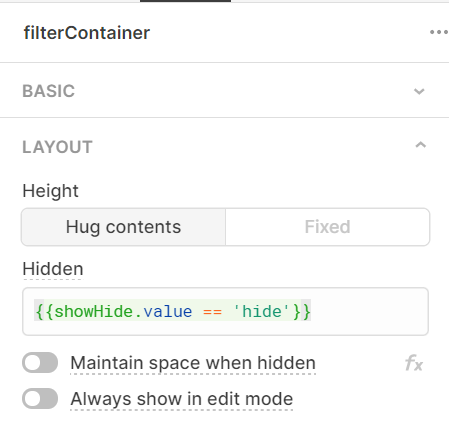
And voila! You should now have a dynamic filter container that can easily be hidden, which will allow your users to easily, and most importantly, intuitively, search the table for the data they need.


