

![Build an inventory-tracking app on Supabase & Retool [pt. 2]](/content/images/size/w2000/format/webp/2025/11/Customer-dashboard.png)
In part I of this Supabase app tutorial, we built an order tracking app that allows users to quickly view the status of purchase orders and see summary statistics. This app\'s functionality focuses on a detailed table, with a UI designed to provide a quick overview of all the important data, as well as the ability to filter by several variables.
In this second part of the tutorial (which can be built on its own too), we\'ll be building out a complementary inventory tracker. This allows users of our order management app to quickly pull up information about product item details and stock level information.
These app UIs are built on Retool and store their data in Supabase.
- Supabase is a PostgreSQL database with all the perks of a reliable relational database structure, as well as a great UI for interacting easily with your data. Set-up is very straightforward and can be done in minutes, and the pricing structure is ideal for scaling companies.
- Retool is a developer tool that helps engineers build internal business software faster, using drag-and-drop components and integrated data resources. Retool is highly customizable with code but simplifies a lot of the repetitive stuff in its developer-focused IDE. It\'s a great place to centralize your company\'s data sources into an optimized system. You can take a database like Supabase, and easily interact with this data, but also easily integrate actions with third-party systems such as Stripe or Salesforce. Building a complex app on Retool takes just hours, not days/weeks/months like traditional code.
The inventory-tracking app we teach you how to build in this tutorial is another example of an app you can set up from end to end in less than an hour. With this app, users can securely create, read, update, and delete data in the database, and see overall summary statistics from them too.
Members also get guides, tutorials, and internal tool tips in 1-2 emails every month.
How do build an inventory tracker app in Retool
This inventory app is set up as a CRUD (create, read, update, delete) for managing products, SKUs, stats and information to help manage the stock.
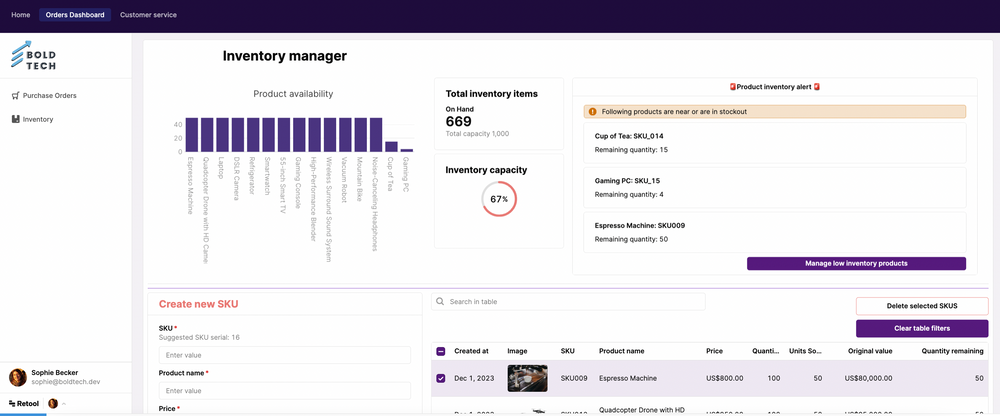
Here’s a snapshot of what the final app could look like:
Connecting to your Supabase data in Retool
Before anything, you\'ve got to connect your Supabase data in Retool. If you haven\'t yet set up a database in Supabase, head to part I of the tutorial to follow the steps there.
If you want to get started with this app quickly, you can import our demo data CSV into Supabase to follow the tutorial even more precisely.
Navigating between apps
We have used two ‘views’ within a container component to switch between the two apps. These apps are effectively separate ‘pages’ now in our toolset, and developers will typically set this up in Retool, with a tabbed container to switch views.
While it\'s possible to use a single Retool app with multiple views inside a tabbed container, this isn\'t the ideal setup in most cases. We recommend creating separate Retool \'apps\' for each distinct purpose or function. Too many queries and excessive data in a single Retool app can slow performance and lead to redundant elements. You can read more about treating Retool apps as separate pages in our guide to multi-page apps.
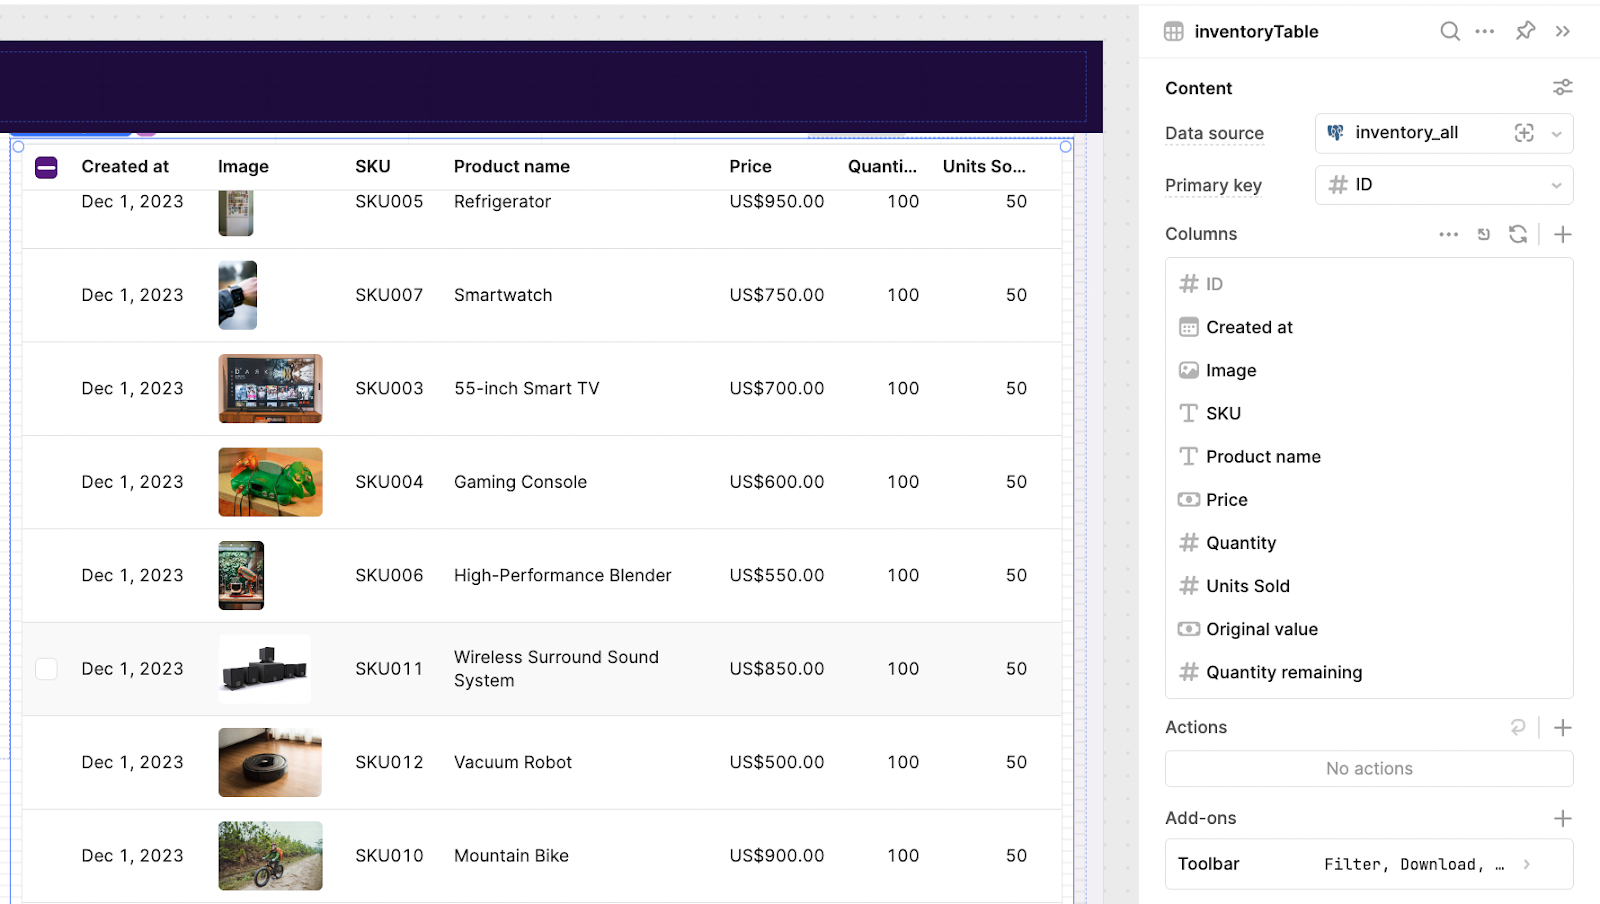
Display data in a table
Like with our first app, we’ll start by adding a table component to display our data. We already created our Inventory GET query for our SKU modal, so we can connect our table quickly to that. But for this use case, we’re going to add two extra elements to our SQL query which will give us some useful calculations of the quantity of each product left and the total value of the original stock:
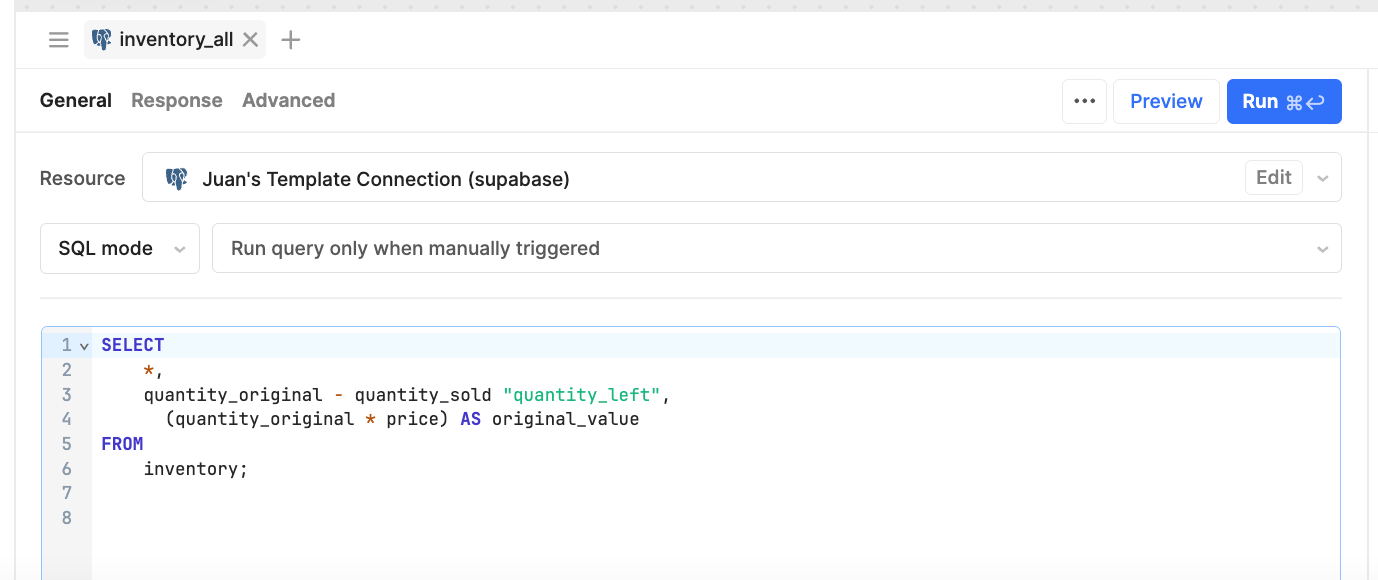
SELECT \n*,\nquantity_original - quantity_sold "quantity_left",\n(quantity_original * price) AS original_value\nFROM\ninventory;\nIn the table, the column types are pretty straightforward, with numbers, currency types, and an image for the product image URL.
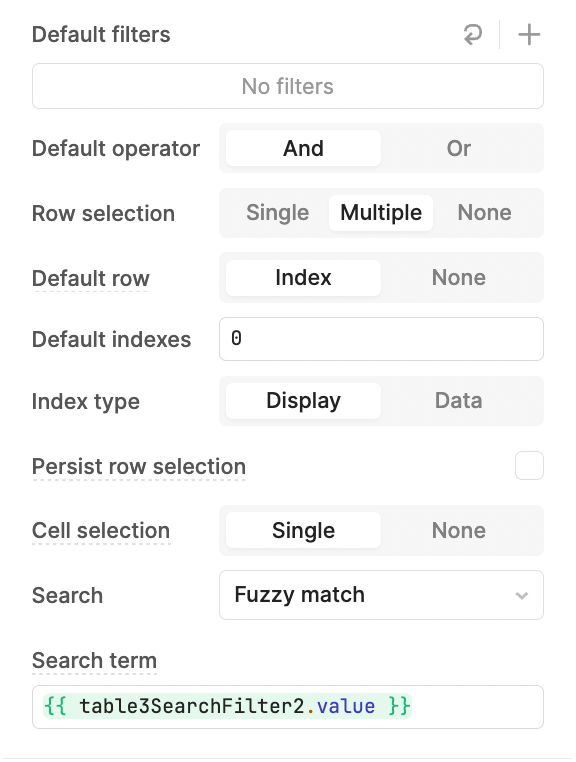
So that later we can bulk delete rows, we\'ll enable multiple row selection in the settings too, under Interactions > Row Selection > Multiple.
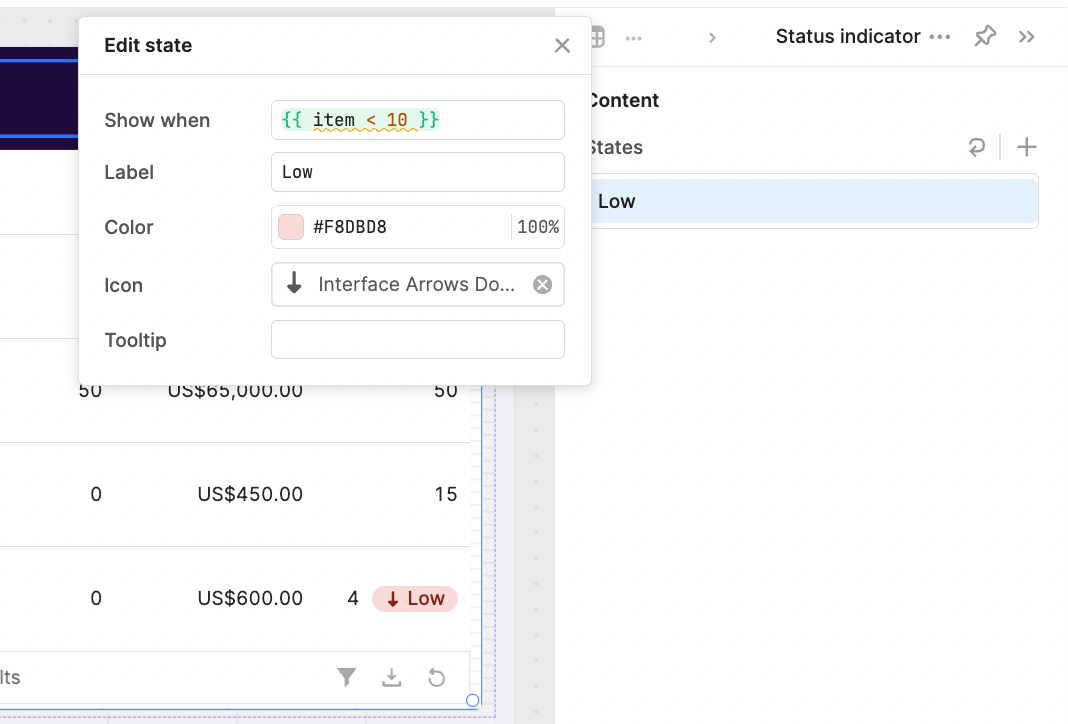
For the ‘Quantity Remaining’ column, we\'ll also set an ‘add-on’ to show low quantities of stock. A ‘low’ tag will appear when the stock drops below 10 items.
To make this table searchable, we can simply use the table component\'s AI features to generate a search component that allows for fuzzy search, by clicking \'Add search filter\'. This sets up a text input component and the search functionality automatically.

The search settings can be further configured in the table settings:
Add new product
Now that our data is all readable in a useful table, for the ‘Create’ part of this app, we’ll add a form just to the side of it.
For this, we’ll pull in a form component and use the form generator feature to set up this form from the database itself.

Within the form generator, you can easily set up data validation to ensure only correct data is inserted back into the inventory database.
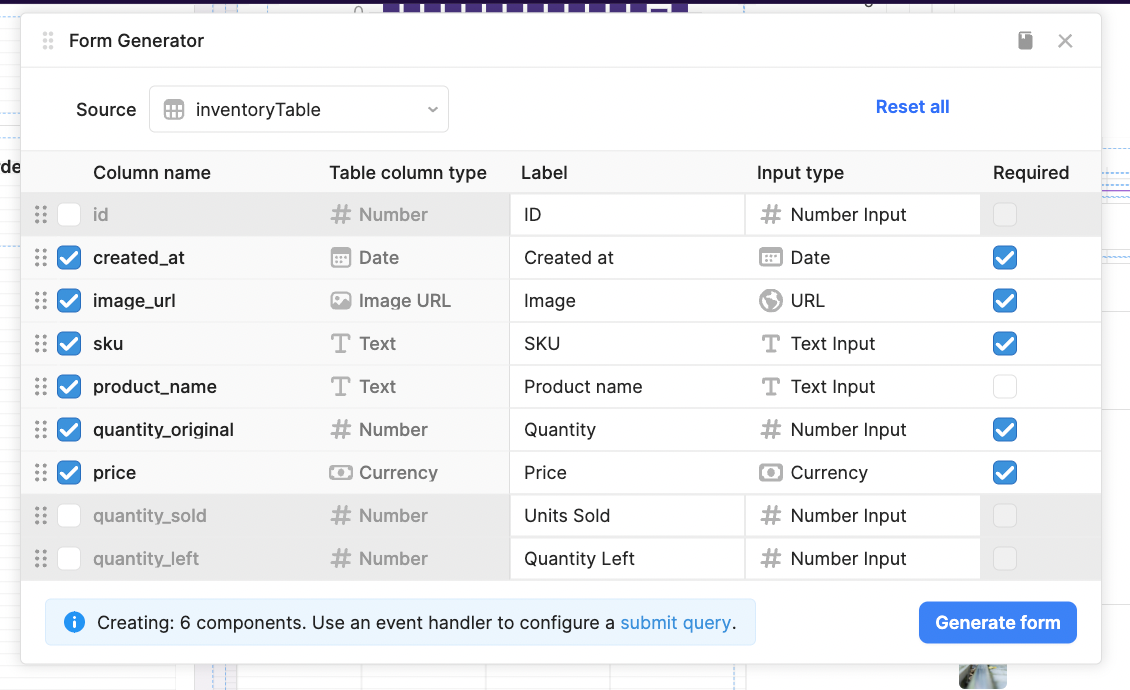
In this form, we also have the suggestion for the SKU, which we generated with this query below. This query simply adds 1 to the number of items in the database. Steps like these ensure correct data in your database and are very fast to set up in Retool with some simple JavaScript.

Once generated, you just need to connect the button to a query that adds your new product to the database.
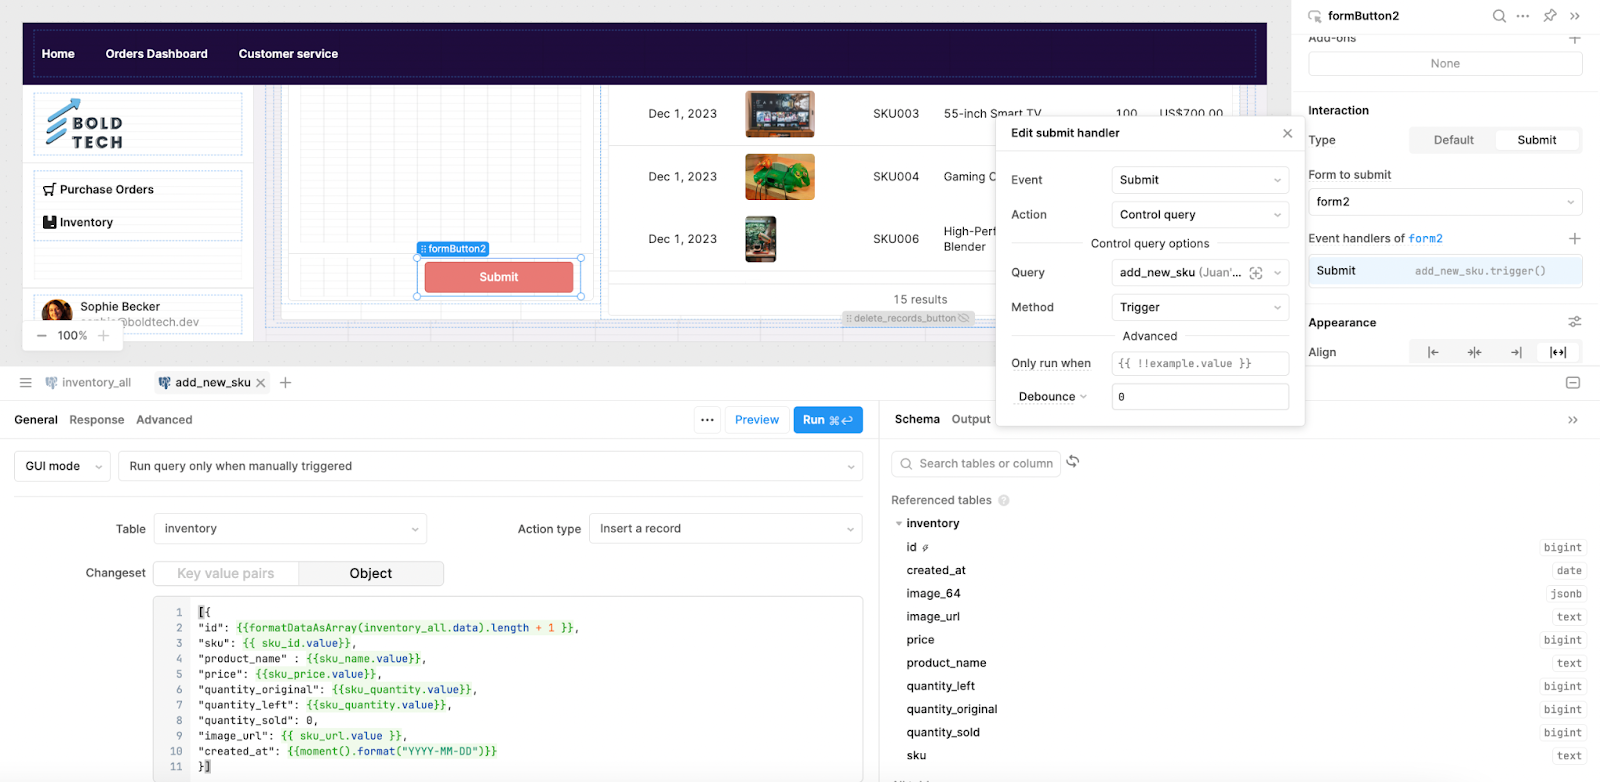
[{\n"id": {{formatDataAsArray(inventory_all.data).length + 1 }},\n"sku": {{ sku_id.value}},\n"product_name" : {{sku_name.value}},\n"price": {{sku_price.value}},\n"quantity_original": {{sku_quantity.value}},\n"quantity_left": {{sku_quantity.value}},\n"quantity_sold": 0,\n"image_url": {{ sku_url.value }},\n"created_at": {{moment().format("YYYY-MM-DD")}}\n}]Add a Delete option
For the ‘Delete’ part of our CRUD, we’ll add a button that supports both a single delete action, but also bulk delete using the multi-select option in the table.
For this, pull in a button and name it "Delete selected SKUs". On click, we’ll set it to trigger the following query:
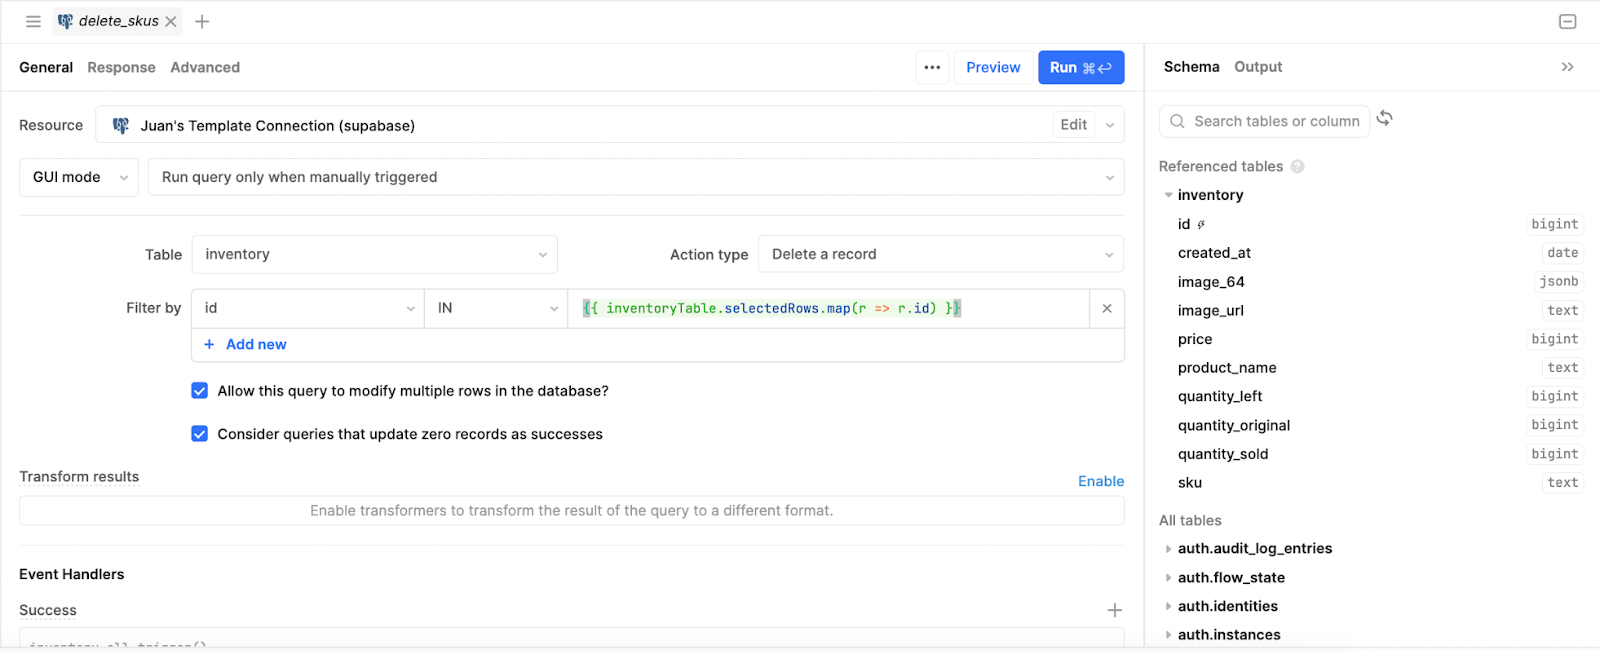
{{ inventoryTable.selectedRows.map(r => r.id) }}This will map the IDs of the selected rows to delete each one. To ensure that someone doesn’t accidentally click this button, you can add a confirmation modal to add an extra UI step.
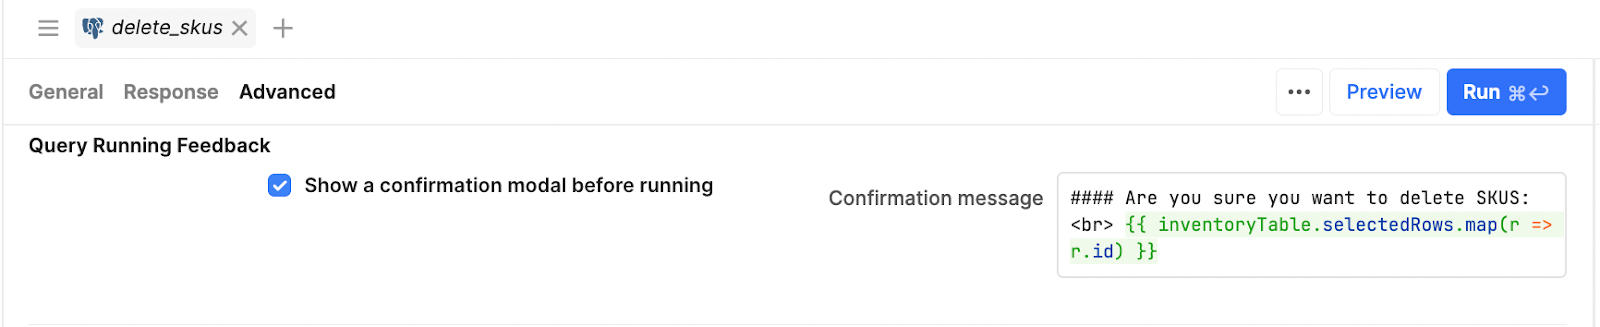
In the message, we include the mapped selected SKUs to display the message to users, like so:

Summary statistics and low stock alert
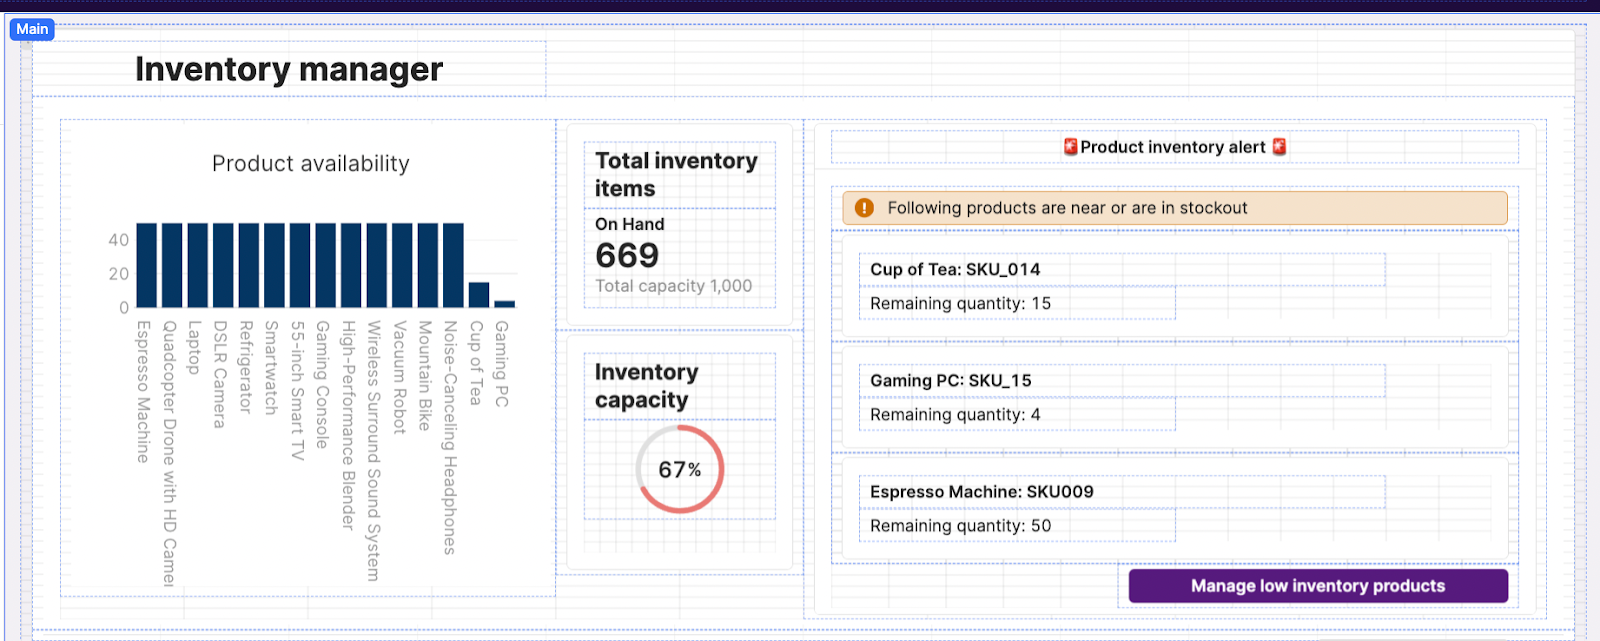
Finally, let’s add some statistics and a low-stock report to help users negotiate the available inventory. Here’s a peek at the final layout:
Summary statistics & charts
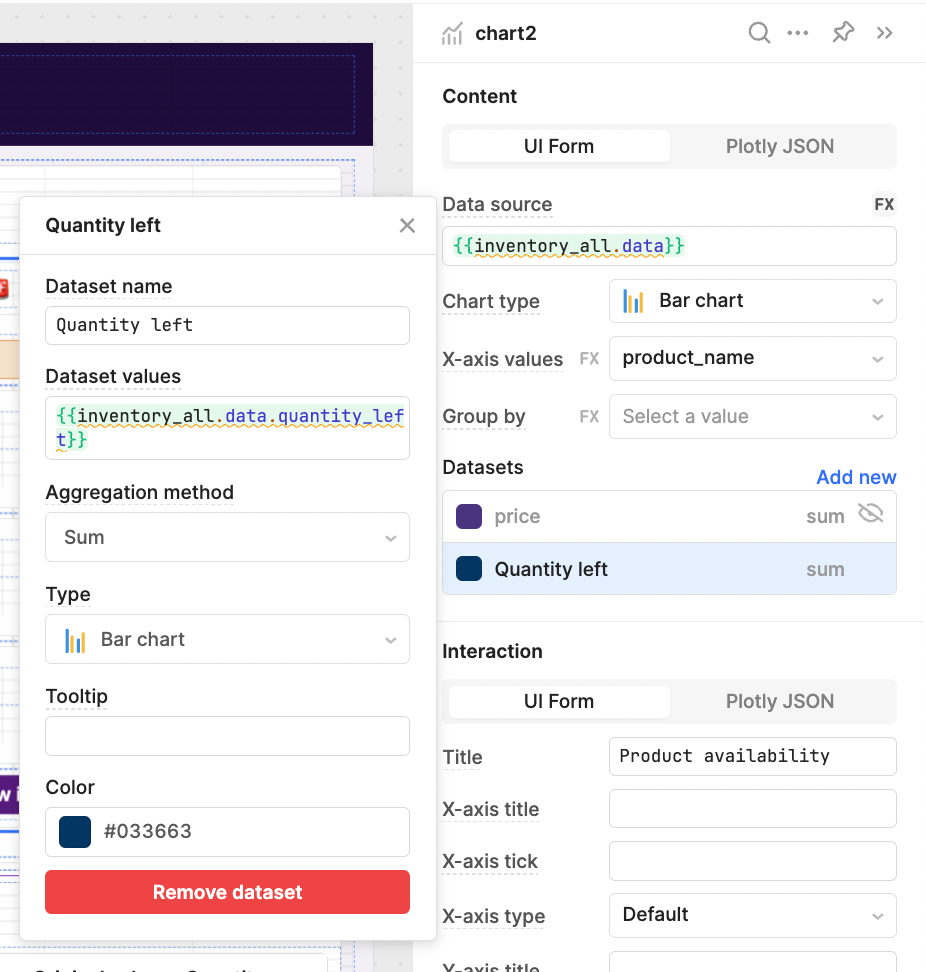
For ‘Product Availability’, we pull in a chart component and connect it to the ‘quantity_left’ value we defined in our SQL query.
For our inventory summary, we added the statistic component and used the following JavaScript to sum the remaining stock from the ‘quantity_left’ value:
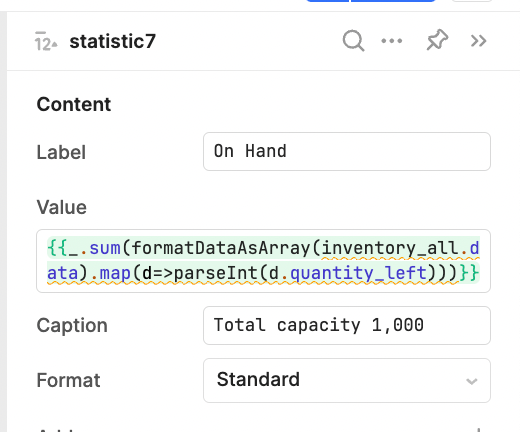
{{_.sum(formatDataAsArray(inventory_all.data).map(d=>parseInt(d.quantity_left)))}}The progress circle takes the same number, and formats it into a percentage of the total:
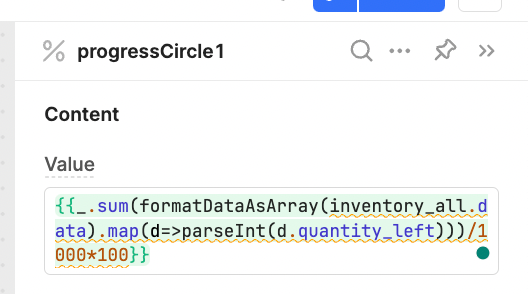
{{_.sum(formatDataAsArray(inventory_all.data).map(d=>parseInt(d.quantity_left)))/1000*100}}(/10 would also work here)
Product stockout warning
Similarly to our top products on the purchase order page, we’ve used a Listview component to display the products nearing stockout. The data source code orders the items by quantity_left, returning just 3 values with the _.take Lodash function.
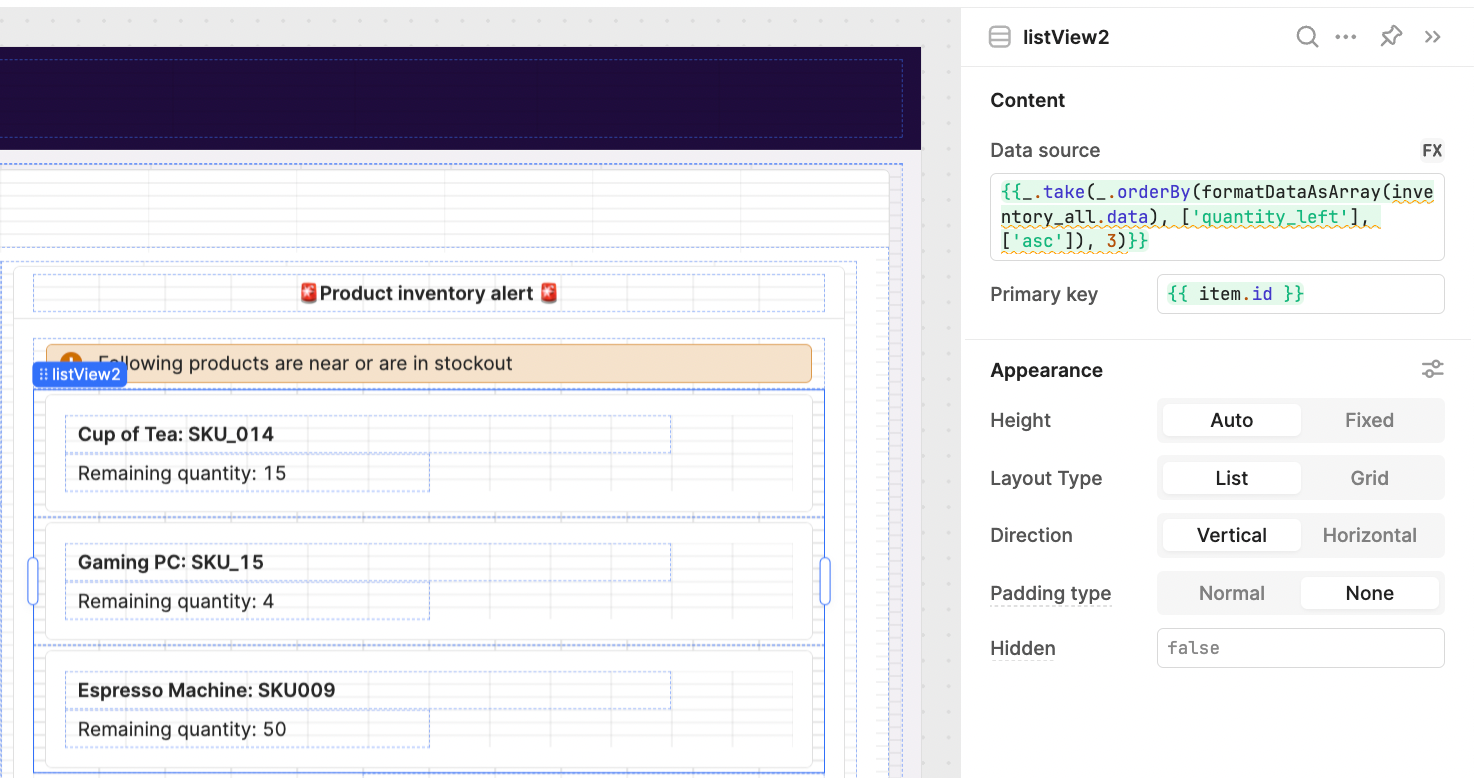
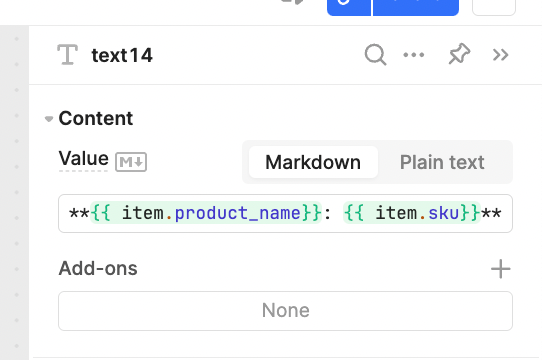
The text boxes in the Listview refer to the returned items\' product name, SKU, and quantity_left using JavaScript:
Finally, we added a button to filter the table by these low-stock items:
{{ (_.take(_.orderBy(formatDataAsArray(inventory_all.data), [\'quantity_left\'], [\'asc\']), 3)).map(r => r.sku)}}The second event handler sets a ‘Clear filters’ button to show, which we will set up below:
Clear filters button
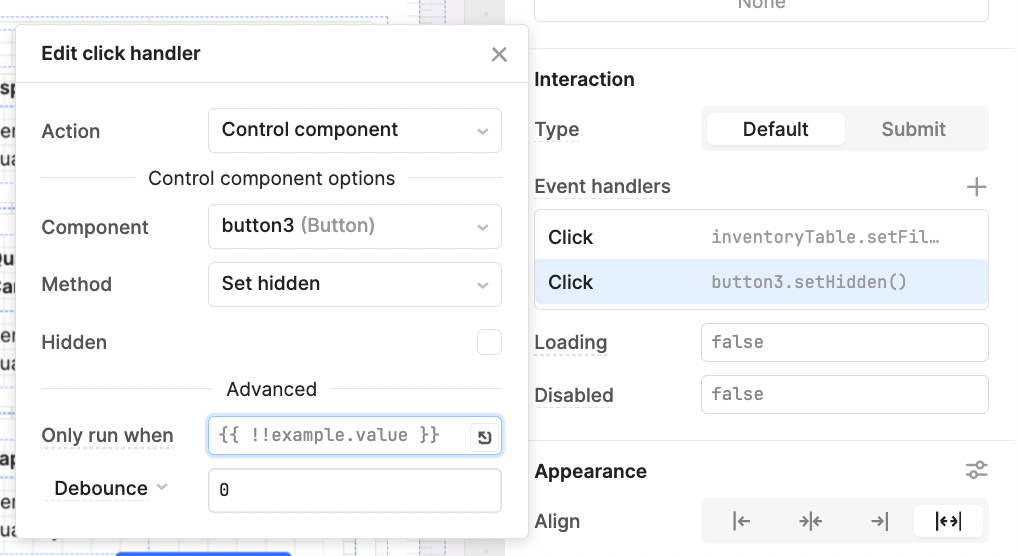
To clear any filters that have been set, we added a Clear filter button in the same way as previously in our Purchase Orders app. The button is set to hidden as default, and we added a script to each filter option to set the button to visible when clicked.
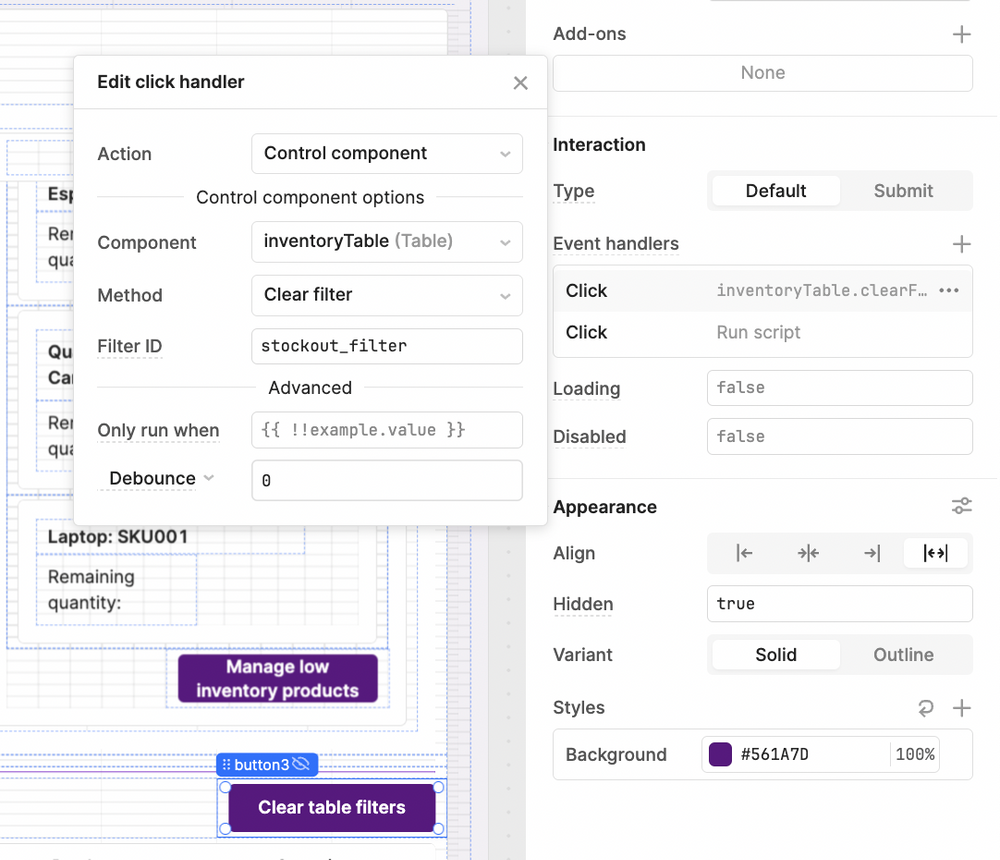
The second script event handler sets itself to hidden again:
button3.setHidden(true)And with that - you have a custom solution for purchase order and inventory tracking. These dashboards allow you to easily visualize, understand and manipulate your data, using a simple backend like Supabase.
Here\'s a final recap of the full app you built in just a few hours:
A summary of the internal application that has been built with Retool.
Don\'t forget, The Toolbox subscribers can download the JSON and import the finished app directly into their Retool environment. Sign up below to get access ⬇️
You can use this email to login to this blog and download the file below.
