


Retool offers plenty of useful tools and integrations for safely managing Enterprise deployments, versions, and releases. To ensure greater structure and reliability of your releases, we recommend - if you are on the Retool Enterprise plan - using Git to implement source control, as much as you would in traditional development environments.
Why using Git source control in Retool is a good idea:
- Safer, more structured deployments: Git-based workflows in Retool support rollbacks, allow for better traceability of who changed what and why, and branching allows you to experiment with larger changes without fear of losing work.
- Better collaboration between devs: pull requests are supported in Retool, which allows for code review and quality checks, and branching supports features and bug fixes without disrupting others’ work, which can be automatically merged.
- Avoid overwriting changes in Retool: though Retool technically offers a ‘multiplayer’ development option, some users experience issues with overwriting other dev’s changes and losing work, or publishing another developer’s work before it’s ready. Source control allows for simultaneous development without the risk of erasing work.
- Improved security: GitHub logs and audit trail of changes to apps, queries, and resources. Using Pull requests, teams can also thoroughly review changes before they go into production.
The best Git-based workflow in Retool
While the Retool docs support with set-up, many of our Enterprise clients struggle to understand the best way to manage source control within the Retool infrastructure, particularly if they aren’t already familiar with GitHub.
In most use cases, we recommend using GitHub as your source control provider, whilst using Retool Spaces with separate, protected Git branches for implementation.
This setup provides several key benefits:
- Environment isolation: Retool Spaces fully isolates your environments, so databases, APIs, and even users can be separated. This means your teams can have separate source control repositories and apps available to them. In this case, we suggest creating a ‘Development’ and ‘Production’ Space for each set of apps you are deploying.
- This is particularly important for creating a secure environment where your developers don’t need to worry about impacting prod data, and where production data is only exposed to necessary users.
- Simplified deployment: Pushing code from your development ‘Space’ to production is as simple as merging the development branch into main.
Setting up Git Source Control in Retool
Create a Git repository and deactivate Retool’s version control
First, create a Git repository and app by following Retool’s documentation. To do this, you’ll need to follow these four steps (you may need to be the Space ‘Owner’ to do this):
- Create Git Repository
- Create and Install a GitHub App
- Generate a private key
- Configure Repository Settings
Next, you’ll need to individually protect all of your apps.
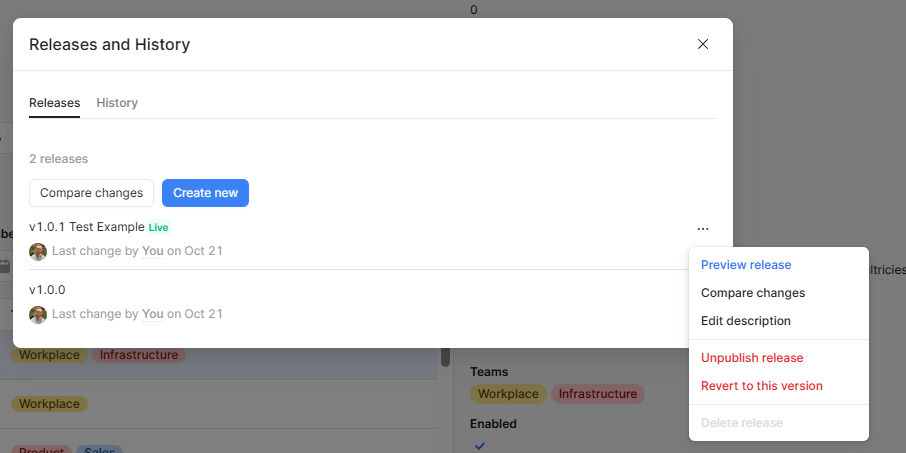
If you are using Retool’s native version control, you need to unpublish all applications, themes, and modules that you will be sharing across environments. Your app, while protected, won't read off the source-controlled files until you unpublish the release.
You can unpublish each application by going to the applications' Releases and History section and clicking ‘Unpublish’. If it says something like “1.0.1 (Live)”, open the Versions menu by clicking the tag and select Unpublish release on whichever version is live.
Set up configuration variables
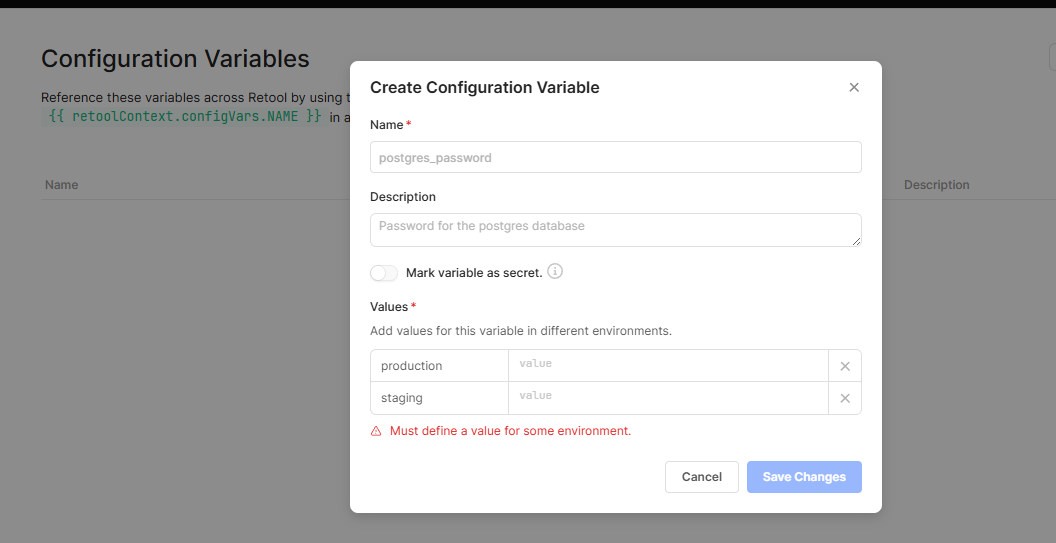
Next, to prevent exposing secure data in the GitHub repo, convert hardcoded values and those that differ between environments (e.g., API URLs, credentials) inside each resource or application to configuration variables. This allows you to protect sensitive data and access keys, manage staging and production environments more easily, and allows for easier updates with generic code.
You can do this in the Settings section of the Retool environment.
A couple of important things to remember:
- Configuration variables are specific to the Retool Space, meaning the same variable can have a different value in the Development Space than it does in the Production Space.
- You must name the variable in exactly the same way in each Space. Capitalization and spacing matter.
- All Spaces will use the production environment, so it is the only environment you need to set the variable value on.
- To reference variables in Retool, you use the syntax {{environment.variables.NAME }} in resources and {{retoolContext.configVars.NAME}} in apps and workflows.
Configure GitHub and Retool Spaces
Now that you have set up your configuration variables, you need to configure your Retool Spaces setup and connect these to your GitHub repository.
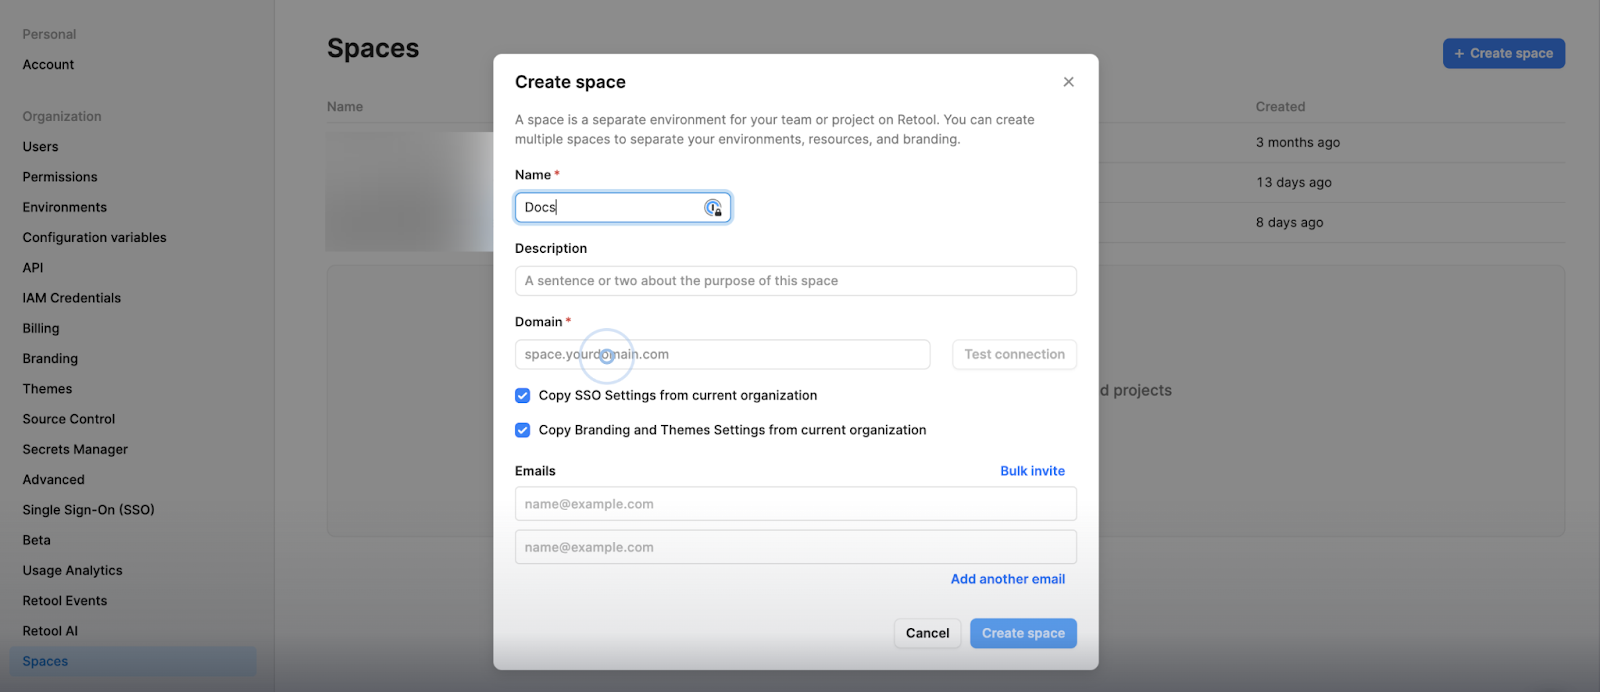
If you haven’t yet set up Spaces, follow the steps in the Retool Spaces docs to configure them.
For this article, we’re going to assume you currently only use one space, which will become your ‘Production’ space. This Production Space will house all the apps that your end users are actively using, including your production data. Your developers will no longer work in this Space when adding features or fixing bugs; they will instead work in the Development Space and push changes to the Production Space.
Once you have your Production Space set up, you need to connect this to your GitHub repo. In Retool, head to Settings > Source Control and select GitHub. Now, you will use the GitHub App values from the app you created earlier to fill in the Access Configuration section.
Make sure to point your ‘Production’ space to the main branch.

Now, Retool should auto-deploy your Space’s code to Git. However, if it does not, you can manually Deploy latest by selecting the button on the right under Deploy.

Once the Main branch has synced with Retool, head back to GitHub to create and protect a Development branch.
To do this, from the default Main branch in GitHub, navigate to your Repository > Branch and click New branch.

Next, head back to Retool to create your ‘Development’ Space. This will now act as a sandbox environment, where you can develop and add new features to your apps without affecting production.
From here, you can ensure that there are some basic protections added to the development branch. We recommend at least blocking it from being deleted, setting up automated code reviews and limiting who is allowed to merge into it.
This space will initially be empty, but don’t worry, we will shortly import the data from our Production space. You’ll be able to move between spaces you have access to from the top right of the Retool home screen, or by navigating to the Space’s URL directly.
Now, we need to head back to GitHub and configure Source Control for this Space in the same way as Production, but point it to the Development branch instead.
You can follow the same steps to configure this branch in the ‘Source Control’ settings in Retool, though this time you will use ‘development’ for the GitHub Branch rather than ‘main’.
One common mistake people make in this final step is clicking ‘copy to Space’ to duplicate their apps to both development and production. This can result in lots of duplicate apps across your environment, as they were already duplicated when creating the dev branch off main. You should only copy resources if they cannot be source-controlled.
⚠️ Edge Case: How to handle resources that cannot be source-controlled
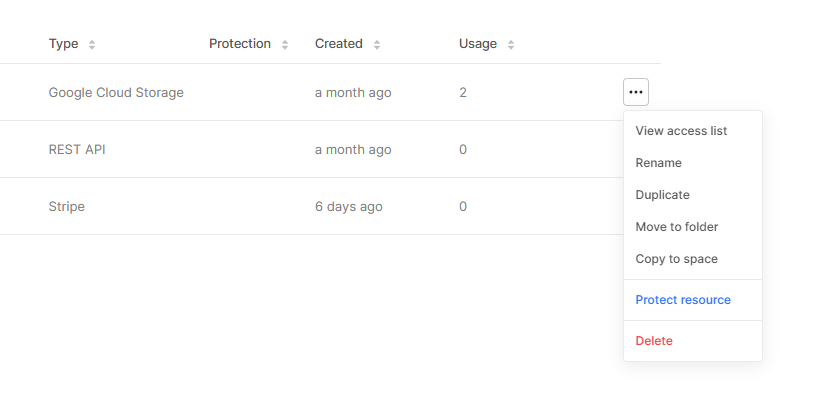
Whenever possible, you should protect resources rather than manually duplicating them. Manual duplication loses many of the benefits of source control.
Any resources that you were not able to protect due to differences between dev and production environments - such as completely different authentication processes - will need to be manually duplicated between spaces (here you can use the ‘Copy to Space’ option).
If not, create the resource in your development space and name it EXACTLY as it is named in the production space, because this means all queries and functionality will continue to work as usual.
How to use Source Control best when developing in Retool
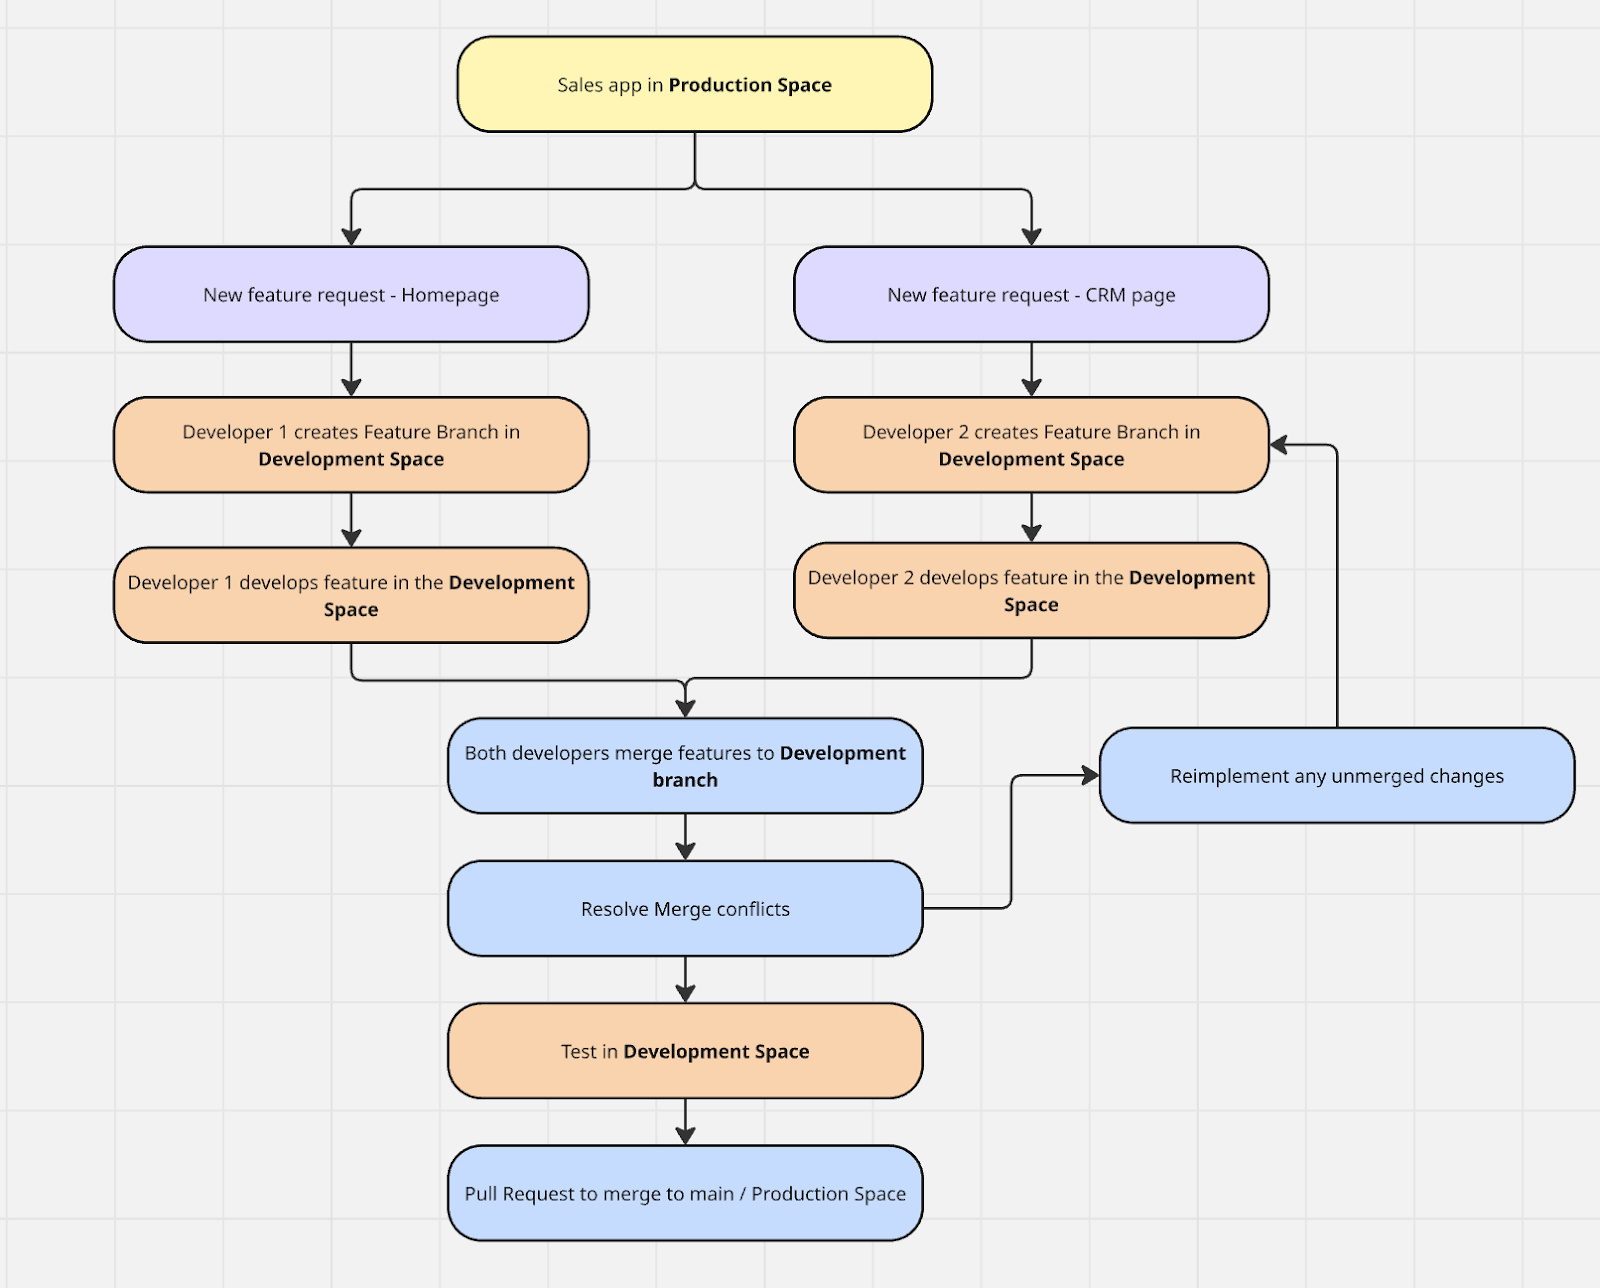
Now that you have source control set up in your Retool environment, this is the process we recommend for using it best in your daily development. Once you are ready to make changes to your staging app:
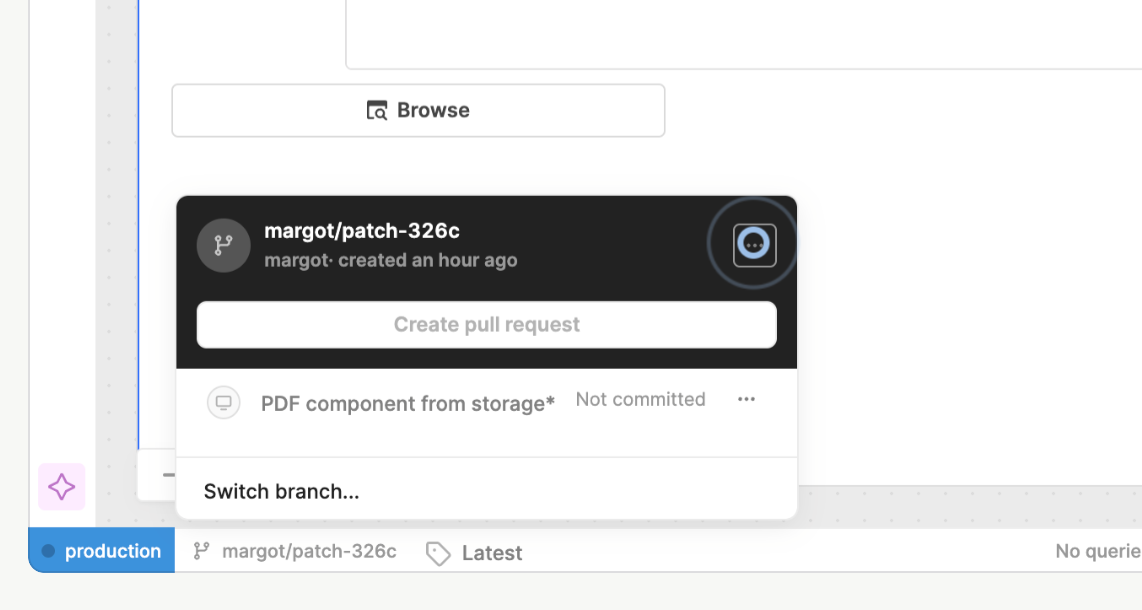
- The developer creates a new branch in the Development space by branching off the protected Development Branch.
You can do this in Retool by heading to the Development space, clicking the three dots to the right of the app you’d like to edit, and clicking Create new branch option.


If you don’t see the create new branch option, then the app has not been protected properly. You can learn more about configuring protection in the Retool Docs.
A couple of tips:
- Note that two different developers working at the same time on different features that won’t overlap should create distinct branches. Nevertheless, we recommend working on different pages in a multipage system to avoid merge conflicts.
- Likewise, if you are working on different features on distinct parts of the app, create a new branch for each new feature.
There is no true limit on the number of active branches, and branches are unaware of each other until merging. This means that many developers can work on many separate branches at the same time without being impacted by each other’s changes until merging.
- Next, develop the new feature as usual, using commits rather than draft releases as save points.
- To make it easier to cherry-pick the features you would like to push to production, go for small, well-named commits that describe each change you have made.
- After completing a feature or getting to a good point for you to test your work, merge the branch back into the Development Branch. This allows you to safely test the new feature in the Development environment, before pushing it to the ‘main’ branch in your Production Space.
A couple of tips:
- Feature branches should not be merged directly into main unless necessary. It should usually go feature branch > merge feature to development branch > merge development branch to main. Though this may be done in cases where you are pushing a bug fix or need to make an urgent change when other dev work is still unfinished.
- You can merge one feature branch into another one.
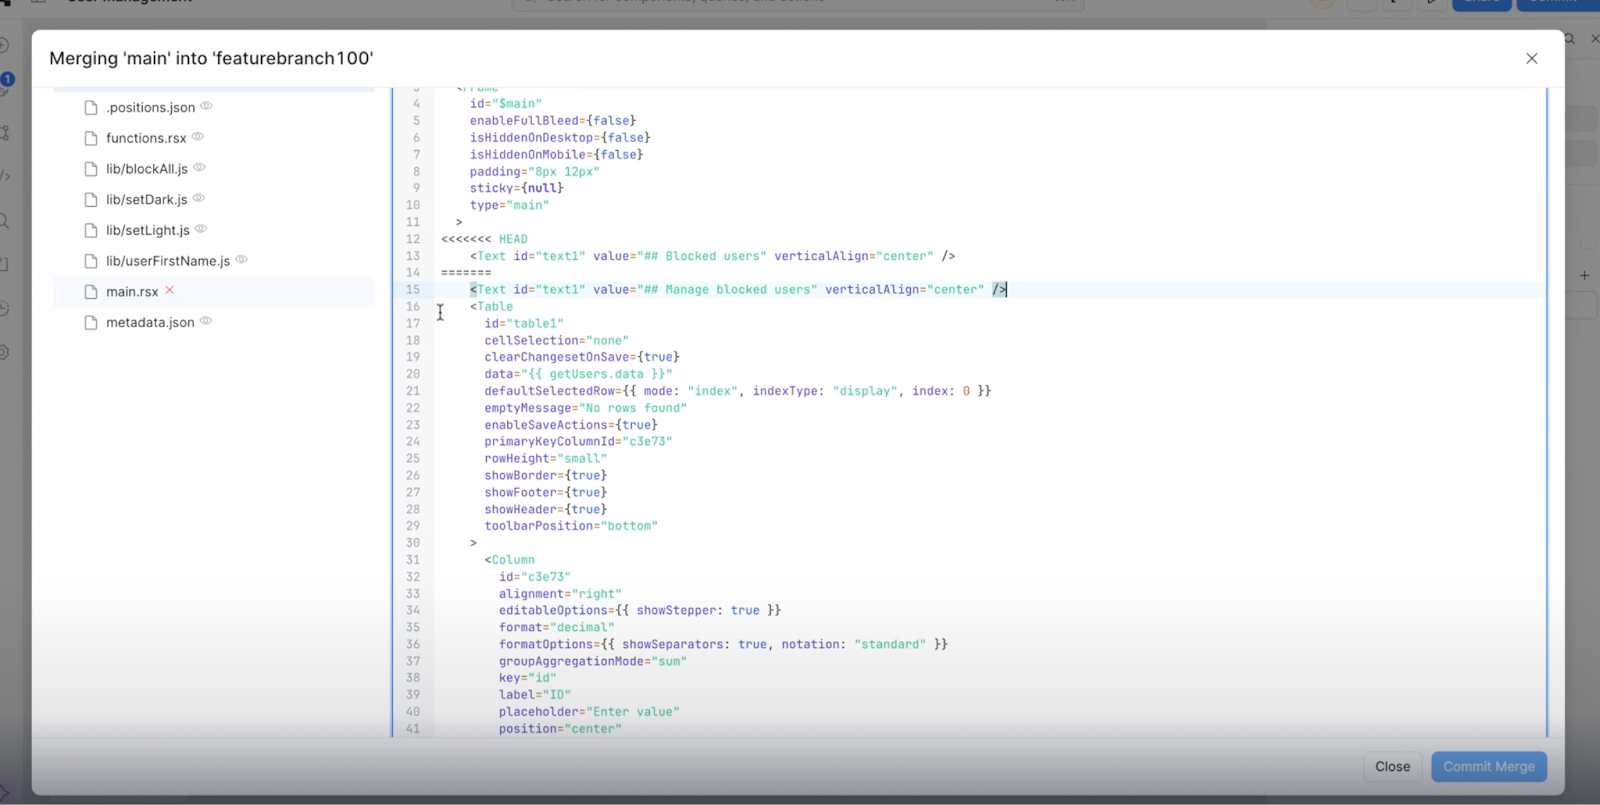
- Handle any conflicts and complete the merge. If Retool finds any conflicts, you can use the code editor to resolve them.
- Review the conflict and determine which branch’s changes to keep.
- For simple conflicts, you can do this using the GitHub GUI. For more complex conflicts, you must resolve them using the CLI. Once conflicts are resolved, merge the branch immediately, as Retool doesn’t pull changes from GitHub.
- We recommend always working on different pages within multipage to avoid these conflicts.
- Once conflicts are resolved, no further changes should be made to the branch via the Retool editor, as Retool doesn’t pull in changes made directly via the GitHub GUI/CLI.
- Occasionally, the conflicts are complex enough that it’s worth rebranching and reimplementing changes. You can avoid this by following the advice above for small, non-overlapping branches that are frequently merged in.
- The Retool Docs give some useful tips for avoiding merge conflicts.
Once you’re confident that the merge has been successful and you won’t need to roll back the change, delete the branch to avoid clutter.
- When you have thoroughly tested your app in Development and it’s ready for a production release, merge Development → Main by creating a Pull Request in GitHub between the two branches.
- This should be done frequently so that it is easier to review what commits you are merging.
- If necessary, you can pick and choose certain commits to avoid merging incomplete features to production.


Here’s how this might look in practice:
Be sure to check out the previous articles in our Retool for Enterprise series:
- Part 1: The Basics
- Accessing audit log data via SQL for on-prem deployments
- Advanced permissions in Retool: The Fundamentals
Want to learn more about internal tools and how to build them? Check out our sections on low-code tools like Notion and Airtable, or developer tools like Retool and Windmill.

