

Retool offers a native option for uploading and storing files within its environment. This works a little like an AWS S3 bucket and can be useful for integrating file storage into your business software and internal tools for no extra cost, though it does come with some limitations.
In this guide, we'll walk through the opportunities and limitations of Retool Storage, and how we recommend uploading, previewing, and removing files.
What is Retool Storage?
Here are the basics:
- Retool storage allows for document storage and predominantly supports saving images and PDFs.
- It’s only available for cloud-hosted Retool instances.
- Retool Storage includes up to 5 GB of storage per organization. Files can be up to 40 MB each. They do seem to have a hard limit here and you’d have to request more storage from the team rather than just pay for more.
- Files are only available to users by default, but can be made publicly available.
Benefits
- Retool Storage is free up to 5GB, which makes it a great solution for low-level storage requirements or simple add-ons to Retool applications that won’t cost a penny.
- Retool Storage works a lot like an AWS S3 bucket, but is easier to set up, cheaper, and easier to shut down too. Many people struggle to manage AWS buckets and accounts and find themselves overpaying for storage, so this can be a good option for ‘light’ document storage.
Limitations
- When uploading to Retool storage, the data saved against the file is quite limited: only name, type, sizeBytes, value, url. It’s not possible to save custom values such as the ID of the record you’d like to save it against (e.g. saving a profile picture against a user ID in your table). This means that in order to save additional data against a file, you need to save this in a separate DB, which can get disorganized quickly if not set up correctly. You would probably expect that this kind of connection would be a native experience so using Retool Storage might not be the fully-integrated time saver you would expect.
- Once uploaded, it can be confusing to retrieve the files again. When uploading multiple files, it’s not necessarily straightforward to pull these files back into the app to preview, you need to save they keys somewhere in your app or in your database to retrieve files again once uploaded.
- Permissioning is not as well developed for Retool Storage as for other aspects of the Retool environment, so it can be difficult to limit access for certain users to this storage, meaning almost anyone could upload, read and delete files. With S3, on the other hand, you can set up a connector with scoped access (like read-only) for certain users.
- Given the lack of organization around uploads, it works more like an S3 bucket where you can dump files into folders and retrieve all of them when needed. Organizing these files properly requires some pre-planning and additional scripts.
Overall, while Retool Storage works for simple use-cases, it does feel like an addition to the Retool ecosystem that would benefit from some TLC in order to be suitable for larger or more complex usecases, nor is it particularly enterprise-ready as a product. For this reason, we would recommend using Retool Storage more for smaller, side usecases (like storing logos, or non-essential product photos), rather than anything mission-critical.
For more mission-critical file storage or for storing larger files, we would probably still recommend using Amazon S3 or even consider using our Retool Database workaround for smaller files, which we explain below.
How to use Retool Storage
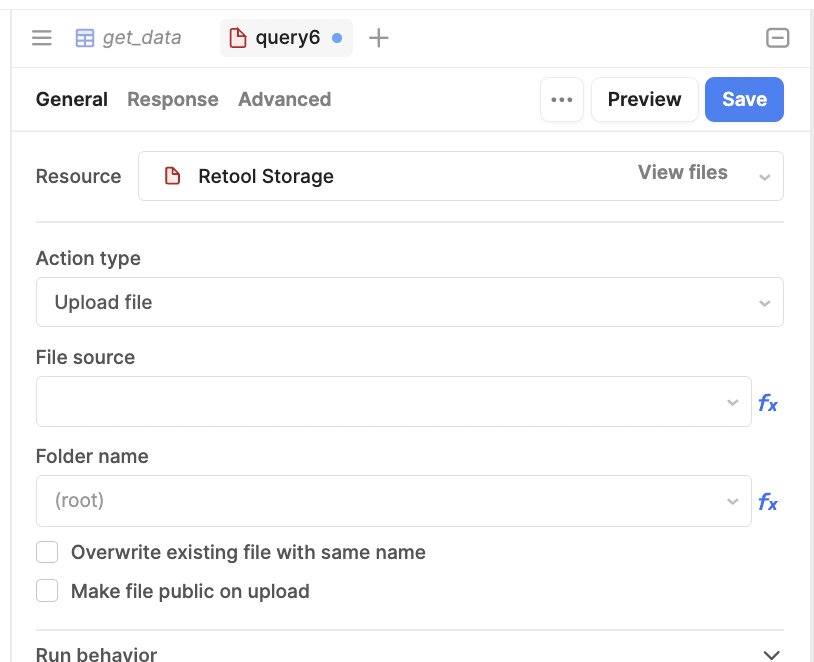
Retool Storage is relatively simple to work: all you need to do is connect a query to the Storage resource in your app, select an action and then connect it to your UI with event handlers.
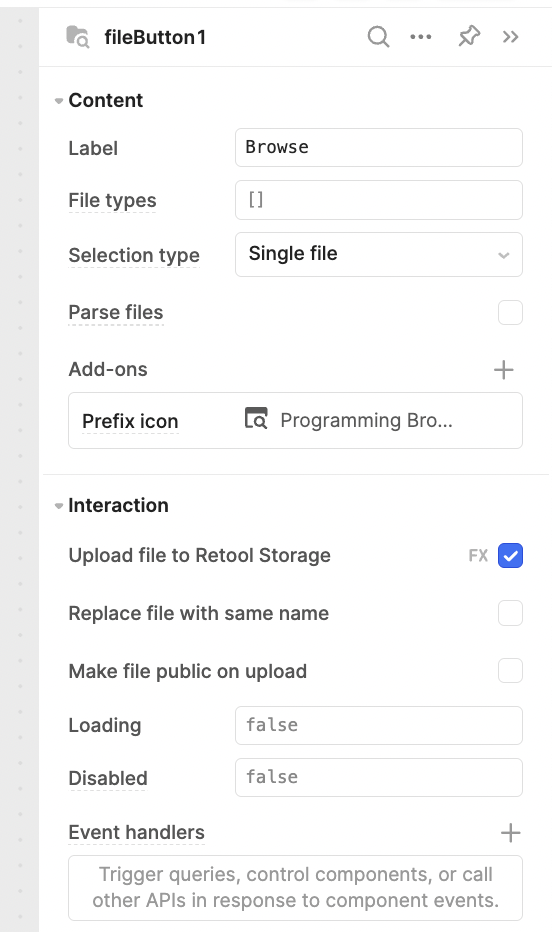
You can even use the File button, upload and input to connect directly to Retool storage without creating a query, by selecting the Upload file to Retool Storage option.
The GetAllFiles action type with retrieve metadata such as file names, IDs, sizes, types, URLs, and created and modified dates. Using this query, it’s very simple to create a list of all available files for a user to select, for instance with a dropdown or to present them in a Listview.
Uploading files is also simple, and they can easily be organized into folders too. This can be organized dynamically by toggling the fx option and using JS.
While the file is automatically uploaded into the Retool Storage without creating a separate query, there is no automatic behavior to pull the file back into the app and preview it if needed. One way to do this is using the fileID which is available in the fileButton component value. Note, this value will refresh on page load.

You can then retrieve the file ID from the file button once uploaded using {{fileButton1.value[0].fileId}}, or replace 0 with the index you need.

In order to permanently associate a file with a record in a table – which is a common pattern in Retool apps – you would need to add the file name or ID to a record in the database by creating a separate query. This can be done by triggering another query with an event handler in the fileButton to trigger a database update query with the file ID.

So, given the current limitations of Retool Storage and the relatively small max storage limit, we would suggest using it as an option predominantly to extend the free storage availability of Retool Database, which is currently set to 5GB max. Storing images and heavier files in Retool storage reduces the likelihood of maxing the RetoolDB limit, but the additional scripting needed to organize and filter files makes it less suitable for
If you’re looking to give it a go, Retool has a couple of detailed tutorials for creating a document storage CRUD using Retool Storage on their docs page.
How to save files against a record in Retool
Since the current state of Retool Storage means that you need to write a separate query to associate a saved file to a record, it might make more sense for some users to just use the JSON column type in their database to store the document or image instead.
This is useful for organising files that are specifically associated to a single record in your database, but be aware that it might max out your Retool DB storage limit quickly if storing heavier files.
Setting up your database
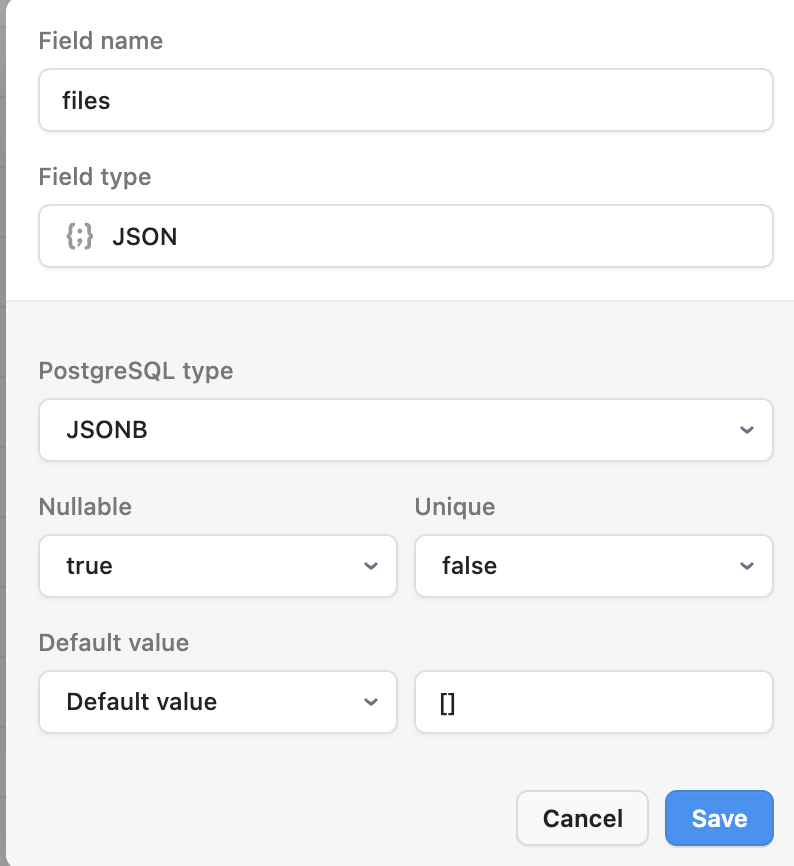
You’ll need to set up a column type in your Retool Database table to save these files. This will just be made of one column - a JSON field type - which will save all of the necessary data for your file, including the base64 data which encodes your file.
Before proceeding with the file upload process, you need to add a JSON field type column to your table. Set the default value to be an empty array by using the box brackets ‘[]’. This setup allows for seamless storage of uploaded files within your database since all data will be included in this JSON object.
You will define the JSON value from your app, but using this method you can save custom values against the document that might be useful, such as:
- Record ID - e.g. number (whatever you are saving the file against, e.g. a user)
- Date updated
- Tags
- Associated Retool user
- And more.
Setting up your app
Now that you have the JSON column type available in your table, you just need to connect this to your Retool app. In this walkthrough, we have a simple table with products, against which we’d like to save both an invoice and a product image.
Upload process
First, we need a component that allows for file upload. You can either use the file button, file input, or the file dropzone.
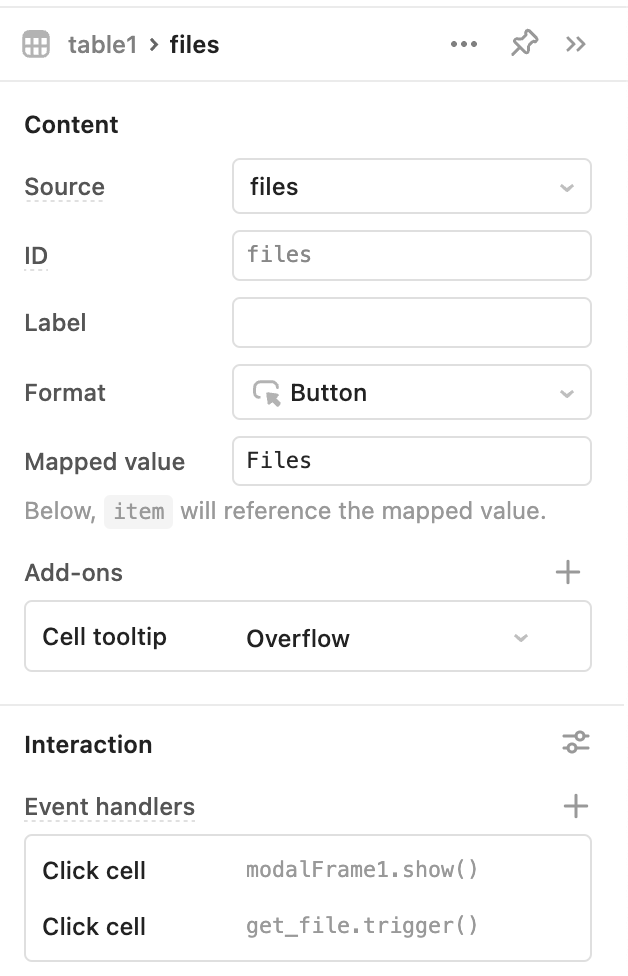
In our table component, we added a custom column with the button type which triggers an upload/view modal to open.
In this modal we have a tabbed container which switches between the two previews, and the file upload sections, where we have a file dropzone to select the files to upload.

The upload button triggers our ‘upload’ query, which saves the document data back to the database in our JSON object.
First, we set up the apend data object as a separate script, which we called ‘apend_file’. Here, we pull in any existing data, then retrieved the values from the app that we would like to save to our new file data, and formatted them as an object. This object value is the one that we will use to save the document data back to our database. If no file exists, it will create a new one. With this query, the apend_file query is set up to save multiple documents per record, and saving a document will simply add it to the JSON.
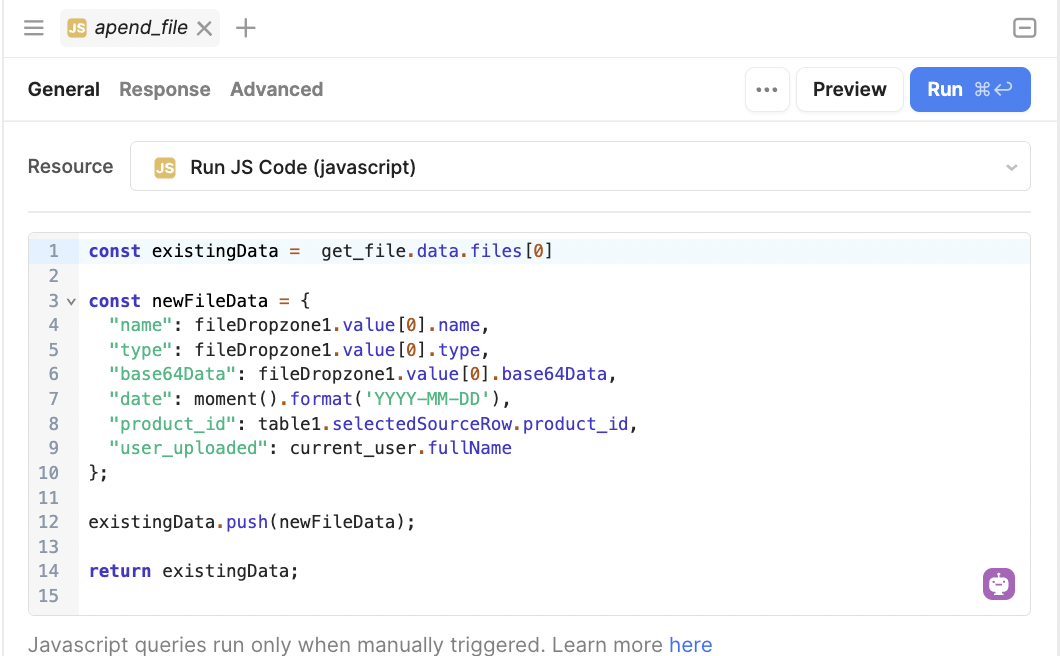
const existingData =  get_file.data.files[0]
const newFileData = {
"name": fileDropzone1.value[0].name,
"type": fileDropzone1.value[0].type,
"base64Data": fileDropzone1.value[0].base64Data,
"date": moment().format('YYYY-MM-DD'),
"product_id": table1.selectedSourceRow.product_id,
"user_uploaded": current_user.fullName
};
existingData.push(newFileData);
return existingData;
Setting up our apend query is now really simple, we just need to filter by the selected row ID, and pass in this data to the ‘files’ column.

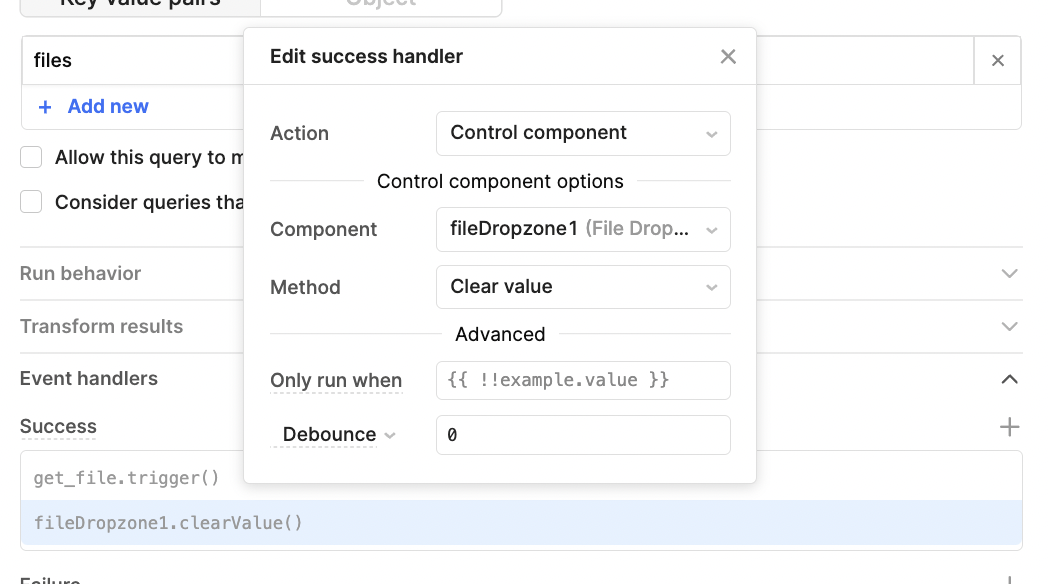
On success, we set up two event handlers: one to trigger the get files query to refresh the data, and then cleared the dropzone value.
Our get_file query is very basic, simply pulling in the ‘files’ JSON object by the selected row:
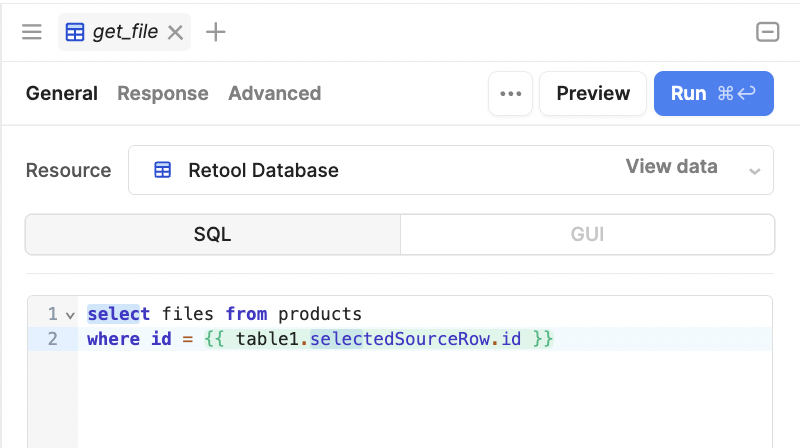
SELECT files FROM orders WHERE id = {{ table1.selectedSourceRow.id }}Connecting to the preview
Connecting to the preview is now really simple. Now, when a user clicks the ‘See files’ button in the table, we also set it up trigger the get_files query to run and refresh the data.
Now, inside our tabbed container we have one tab that allows users to preview PDF components (in this usecase, our invoices), and one with an image component to preview any images.
Users can select the available files from the dropdown. Our dropdown gives additional information about the files which would not be possible with the Retool Storage option, without additional scripts.

The data source filters the documents saved in the ‘files’ column by the ‘image/jpeg’ type. The image file object is then connected to the value of the dropdown (select) component.

The PDF works in the same way, but instead filters the data by type: application/pdf.
Delete files
Finally, we need the ability to delete files when needed. For this we added a button to the tabbed container that runs a script and then triggers the delete_file query.
await delete_file.trigger({additionalScope:{passed_name:select1.selectedItem.name}})This query filters the selected item out of the JSON (in case there are multiple files) and removes it removes it from the JSON.

{{get_data.data.files[0].filter(obj => obj.name != passed_name) }}
If you would like to learn more about Retool, you can read more on our blog.
More in the What is... series:


