


Many smaller businesses are building their core apps in Retool, yet are still storing automation logic they may have previously built in Zapier or on other automation platforms. It might not make sense to port all complex automations over to Retool Workflows, especially if those Zaps are utilized elsewhere in the business, so how can you trigger your Zaps from your Retool apps?
In this article, we’ll show you how you can trigger a Zapier webhook from a Retool app, including:
Note: Typically, we don’t recommend building Zaps for your automations, whilst also building apps and automations in Retool, as this can create two sources of truth and make maintenance harder. We would only recommend this infrastructure if you are either maintaining all automations on Zapier or if you aren’t ready to migrate an automation in Retool and need a solution to avoid duplicating automation logic across the platforms.
Set up your Zap
Create and configure a new Zap
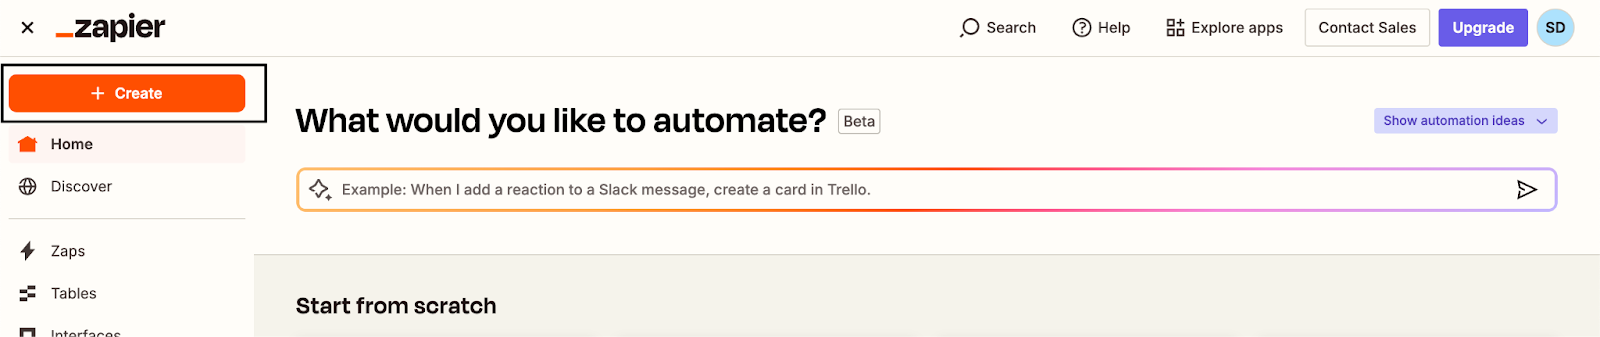
For the purposes of this example, let’s create a new Zap to connect to Retool. The first step is to click the Create button in the top left corner and choose Zaps.
This will take you to the editor page below, where we can begin creating our Zap:
First things first, name the Zap something memorable. Make sure to give it a name that will make it easy to find; this is essential when you want to return to maintain or troubleshoot your workflow. We used something nice and clear like: “Send order refund message from Retool”.
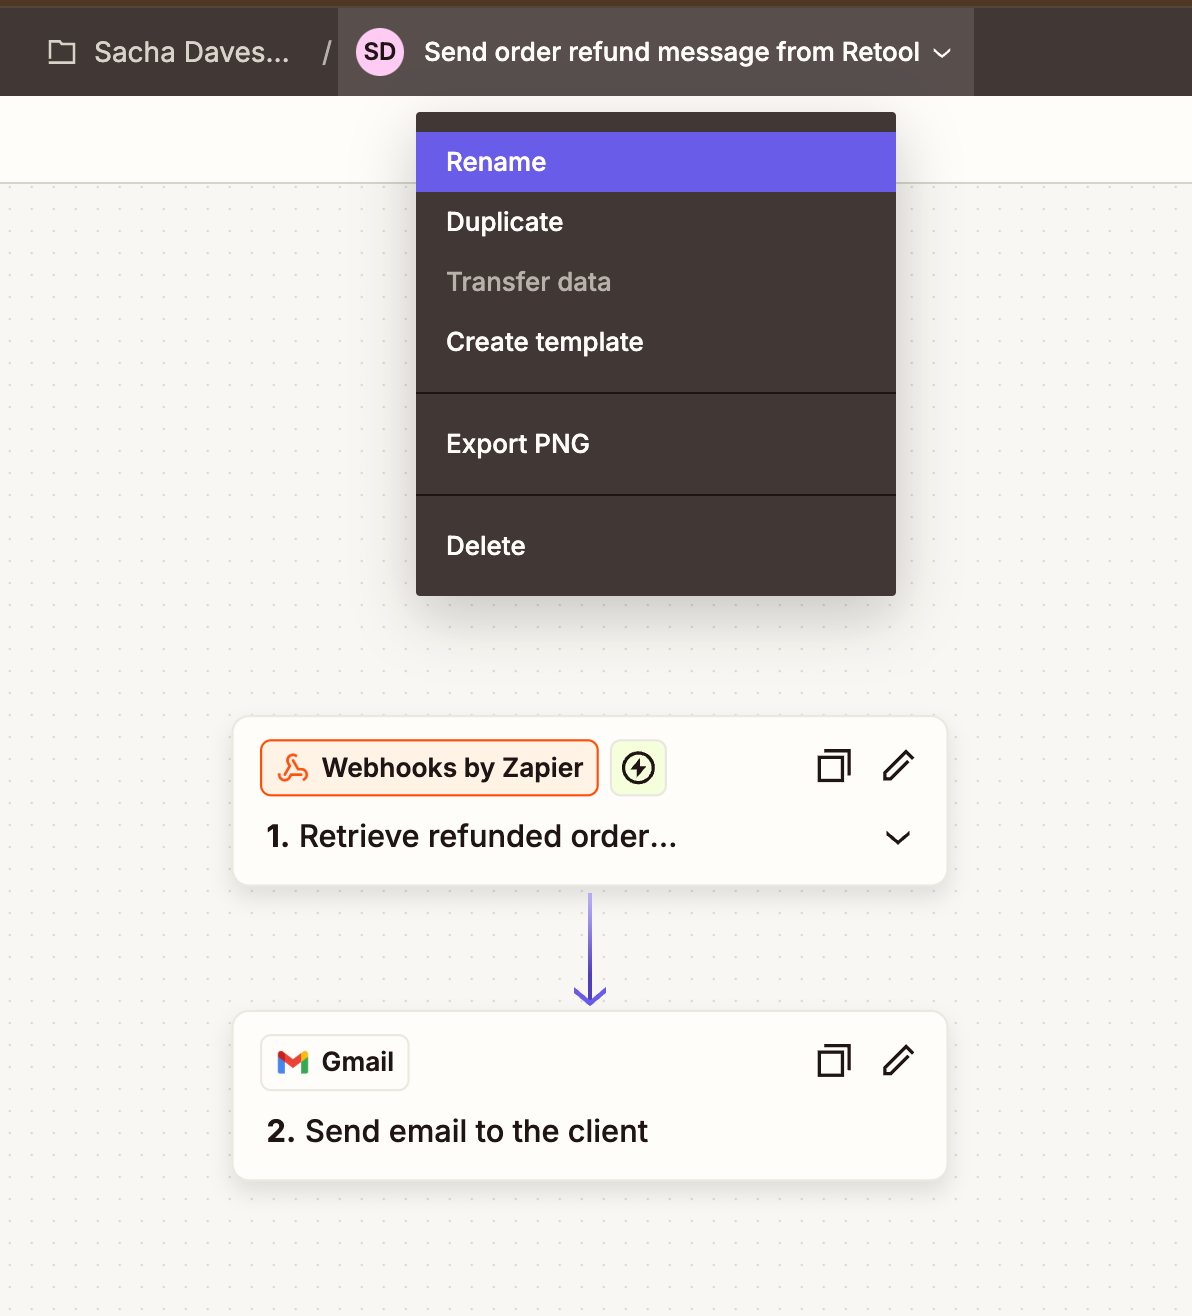
Next, let’s set up the Retool trigger by choosing Webhooks. This will generate a URL that Retool will trigger when it needs to tell Zapier it can expect new data.
If you want to know more about how webhooks work, you can read more here.
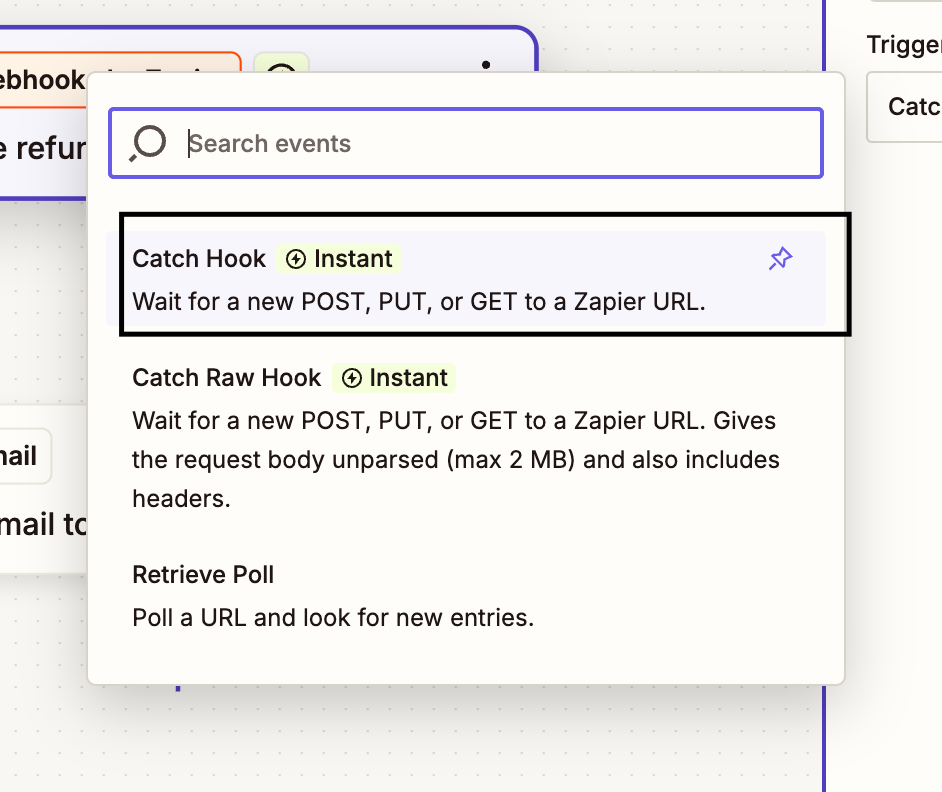
Choose the event Catch Hook:
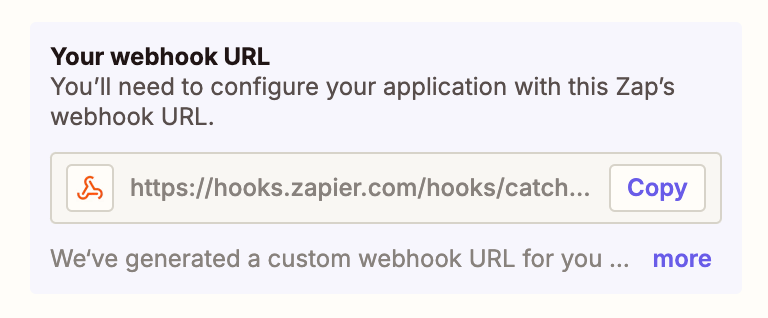
Ignore the Configure step and go to Test. Here you can see the URL that has been generated for your Zap to be triggered and receive data.
We will use this later in Retool.
Triggering the Zap from Retool
So that we can use our Retool data in our Zap, we need to set up a POST query in Retool that sends our data to the webhook. Let's go to our application and set up the query to trigger our Zap.
In this app, we have a simple orders table and we want to create an action to refund a customer. We already have our Stripe refund integration set up, but we just want to use this Zap to send a notification to the customer.
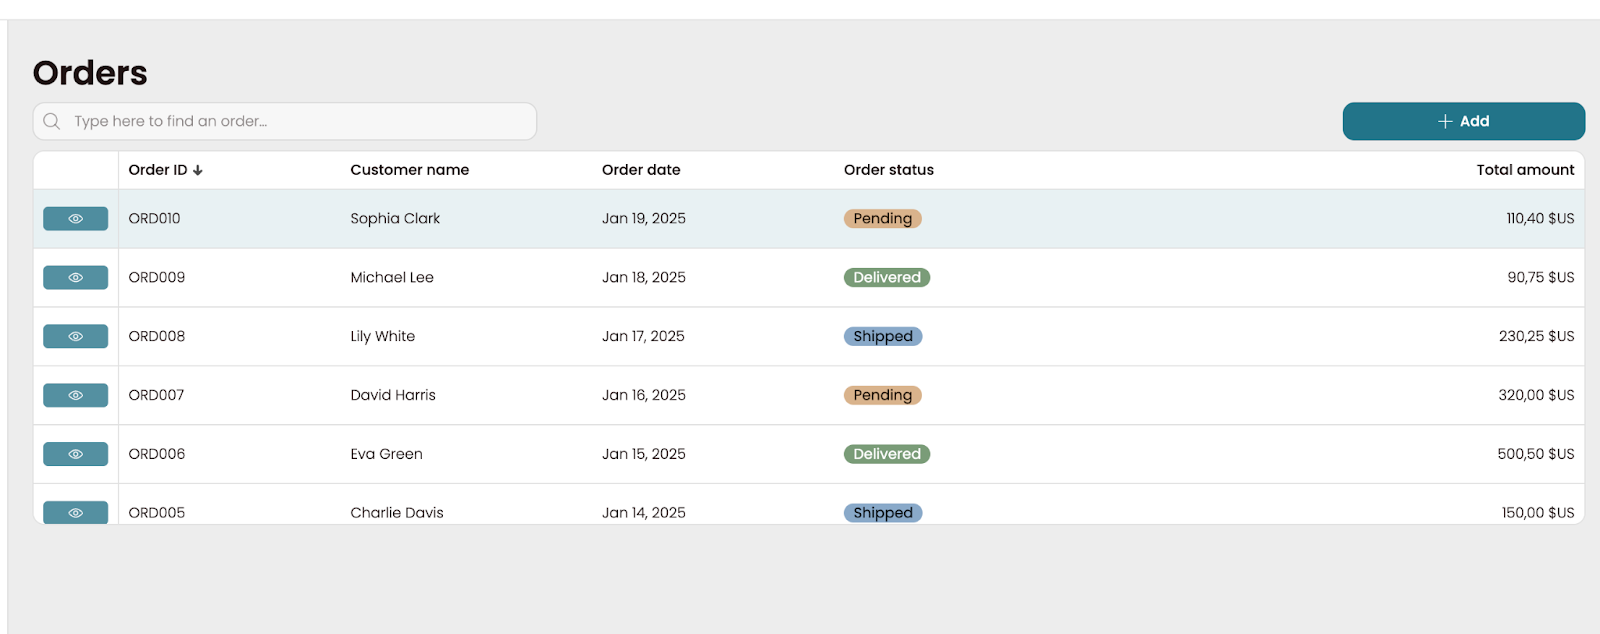
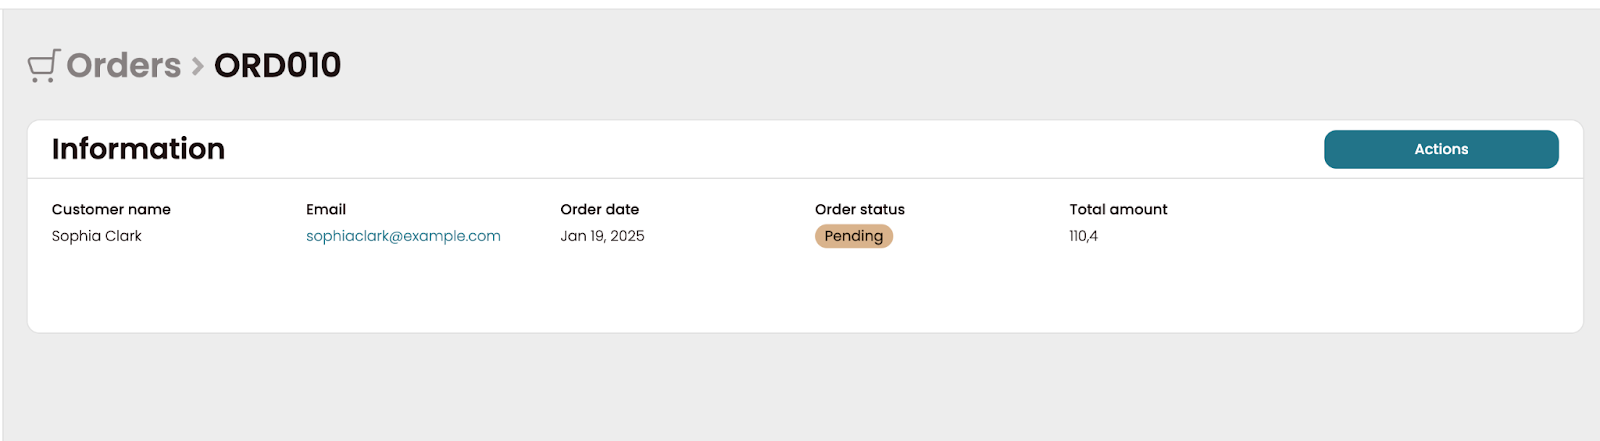
By clicking on the View button in the left column, we can go to the details page of each record.
From here, we’ve set up a Refund action in the button dropdown. Let's take a closer look.
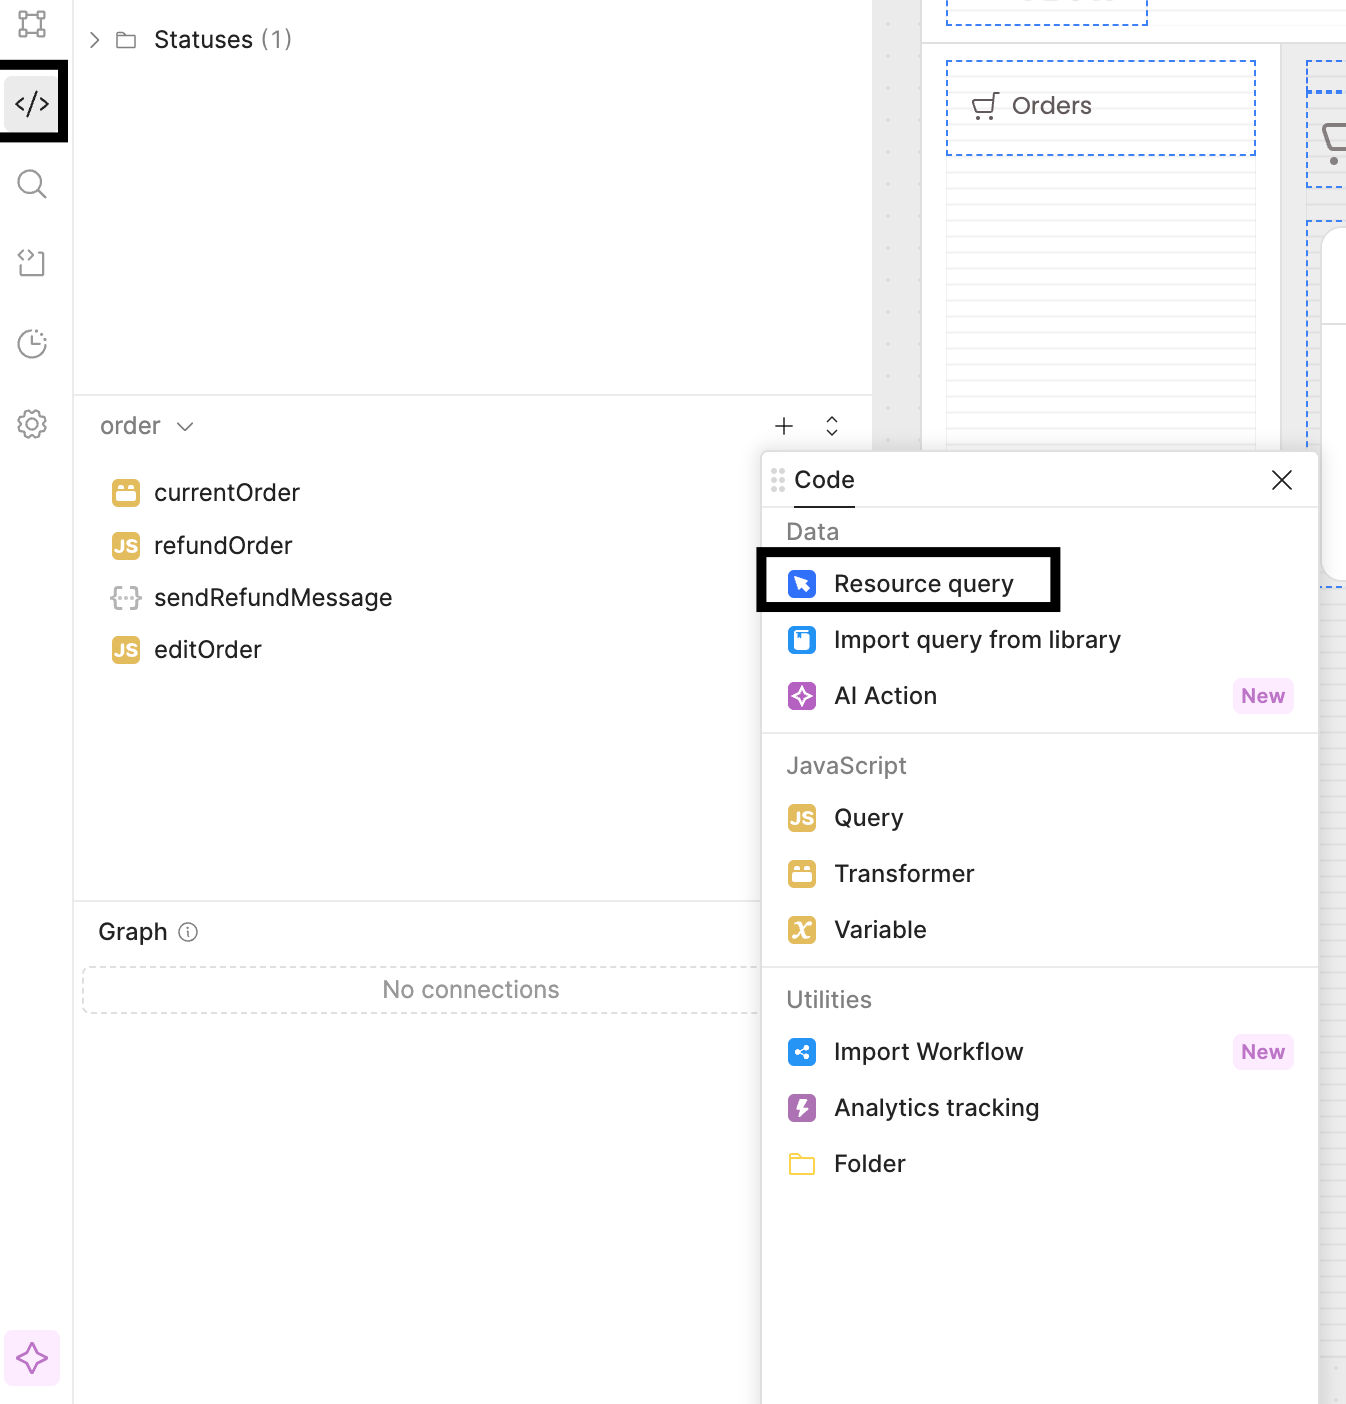
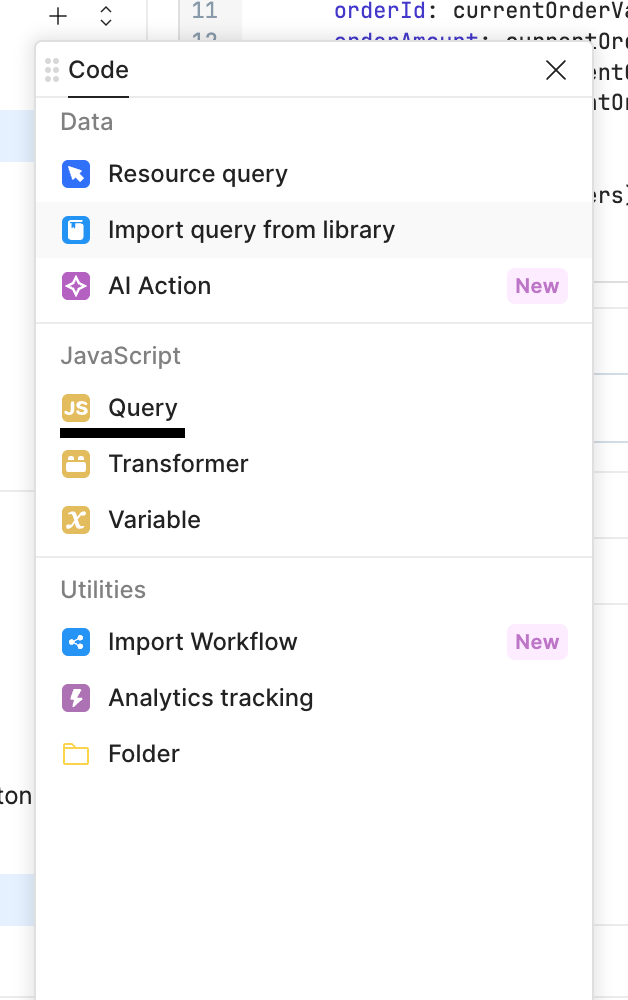
Next, we need a query that will trigger the Send Email Zap. Click on the Code tab on the left-hand side and create a new Resource query.
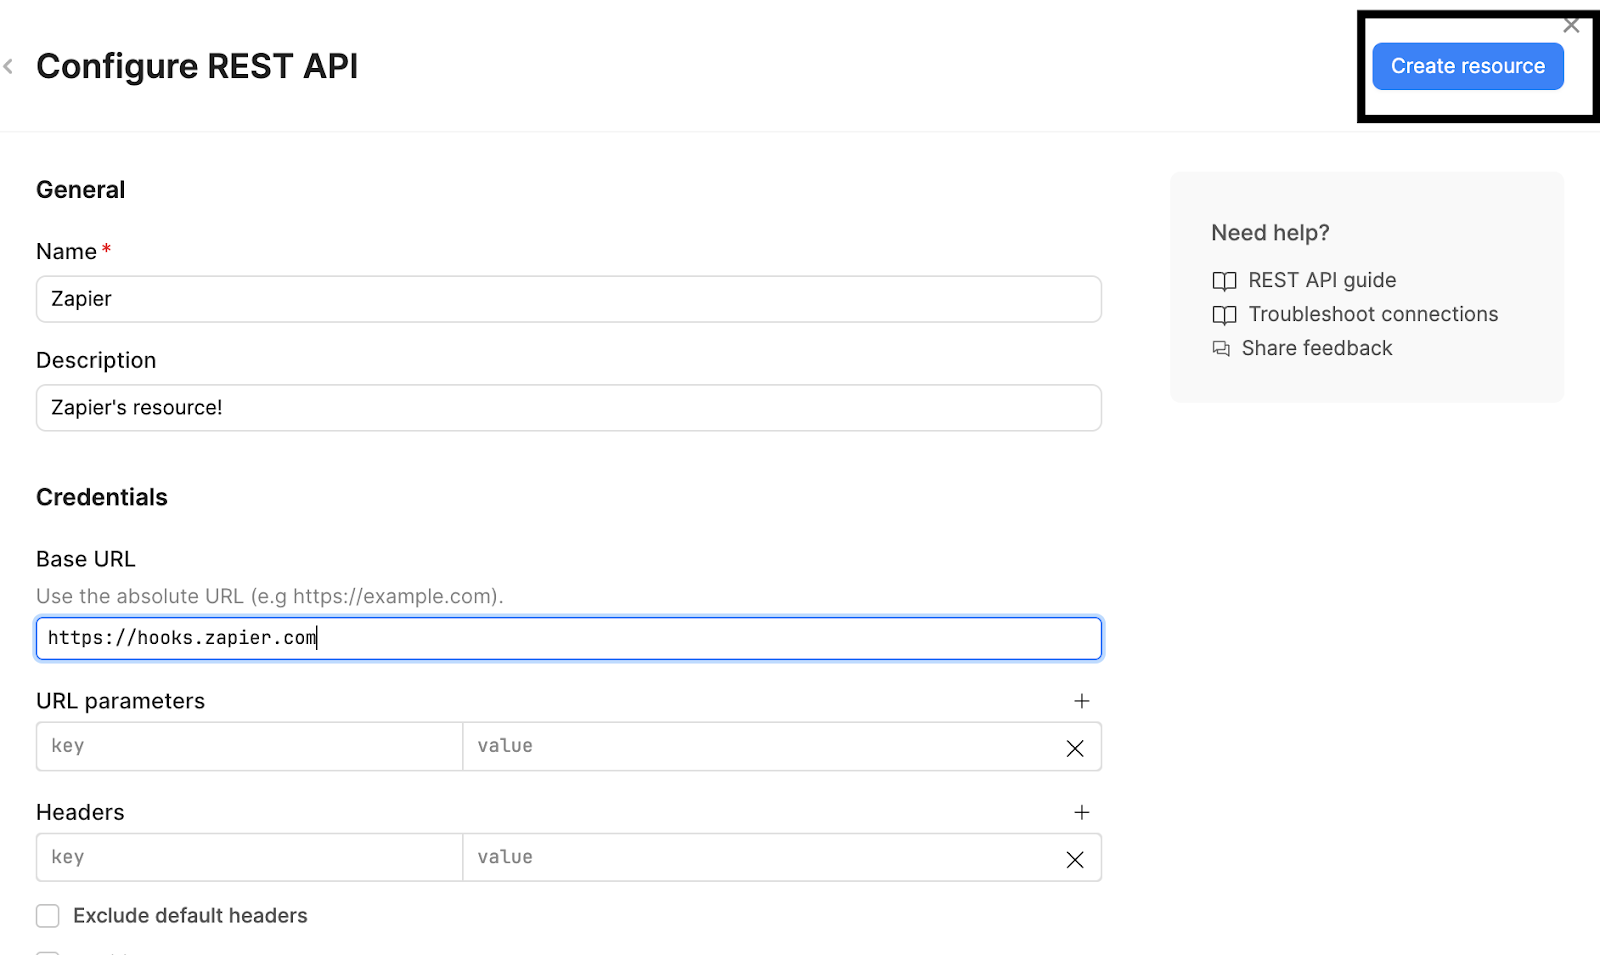
Now choose REST API. Retool will then prompt you to create a Resource, so let's quickly set up a Zapier resource that you'll be able to reuse for your other Zaps.
Insert a Name, a description, and the base URL (https://hooks.zapier.com), and then click on Create resource.
Next, let's go back to our new query in the app and complete it with these steps:
- Rename the query something clear and recognizable. Here we used “sendRefundMessage”.
- Set the query to POST and add the rest of the webhook URL you copied from Zapier as the endpoint. This will look something like: hooks/catch/…/…
- For the query payload (under Body), change the type to JSON and add the parameters from your data that you will need to use in your Zap. In this case we added: “orderId”, “orderAmount”, “customerEmail”, “customerName”.
- On the right column of the body, we also added these same parameters between JavaScript escape hatches ({{}}) and then added the same values to the additional scope below. This allows us to trigger the query later by passing parameters.

Now that our sendRefundMessage query is set up, let’s pair this query with some JS logic to pass in our Order payload from our Retool application. The goal with this JS is to update our order by changing its status to refunded, and, once done, trigger the query to send an email to the client via Zapier.
To create the JS query, head back to the Code section on the left-hand panel in Retool and create a new JavaScript Query.
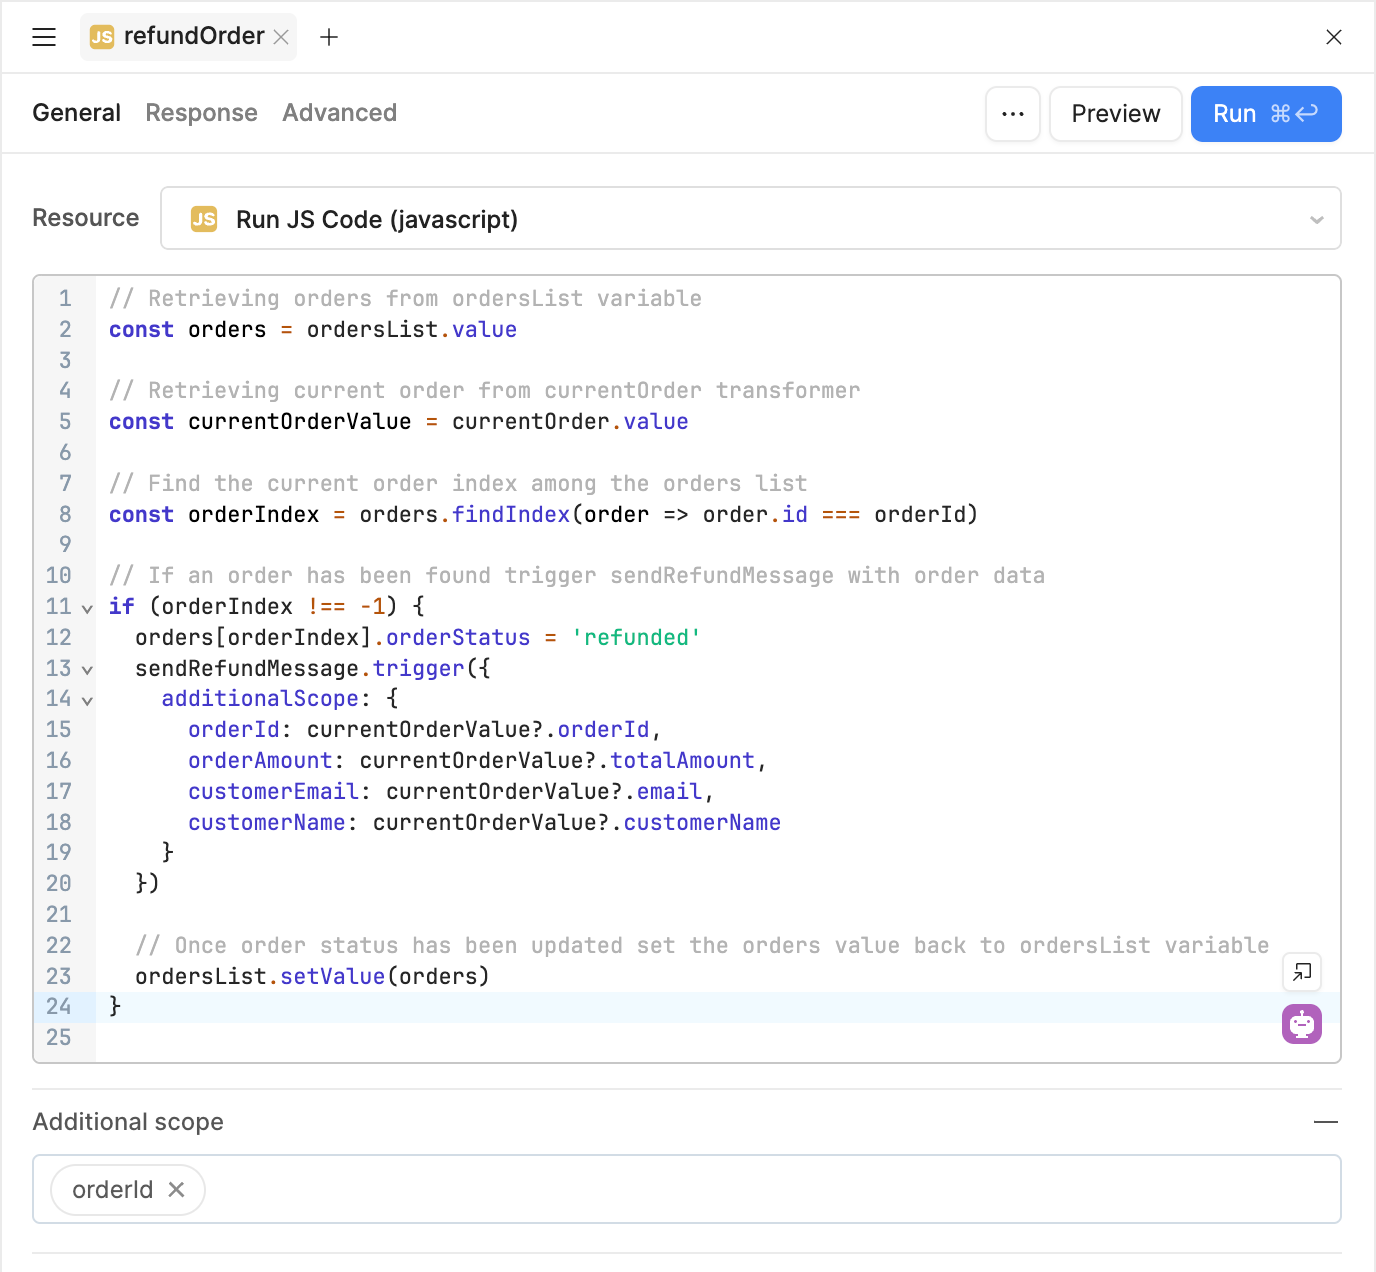
Below is the code we used with comments for explanation. In this JavaScript query, we’ve passed in some additional scope from our application called orderId. orderId represents the Order ID of the selected row in our table. In Retool, additional scope is a great way of passing context from your app into the query.
You can also see here that inside the actual JS of the query, we call the sendRefundMessage.trigger() method. This means that for every time refundOrder is called, we will also trigger sendRefundMessage, passing in our four parameters: orderId, orderAmount, customerEmail, and customerName and sending this data to Zapier.
Note: For the purposes of this example, we stored the orders locally in a variable, but you would typically connect this to your database.
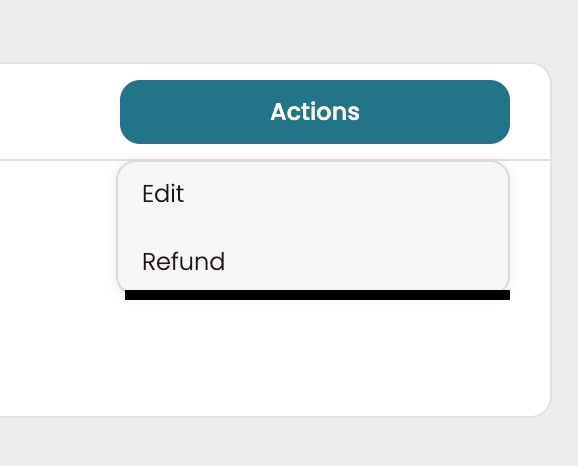
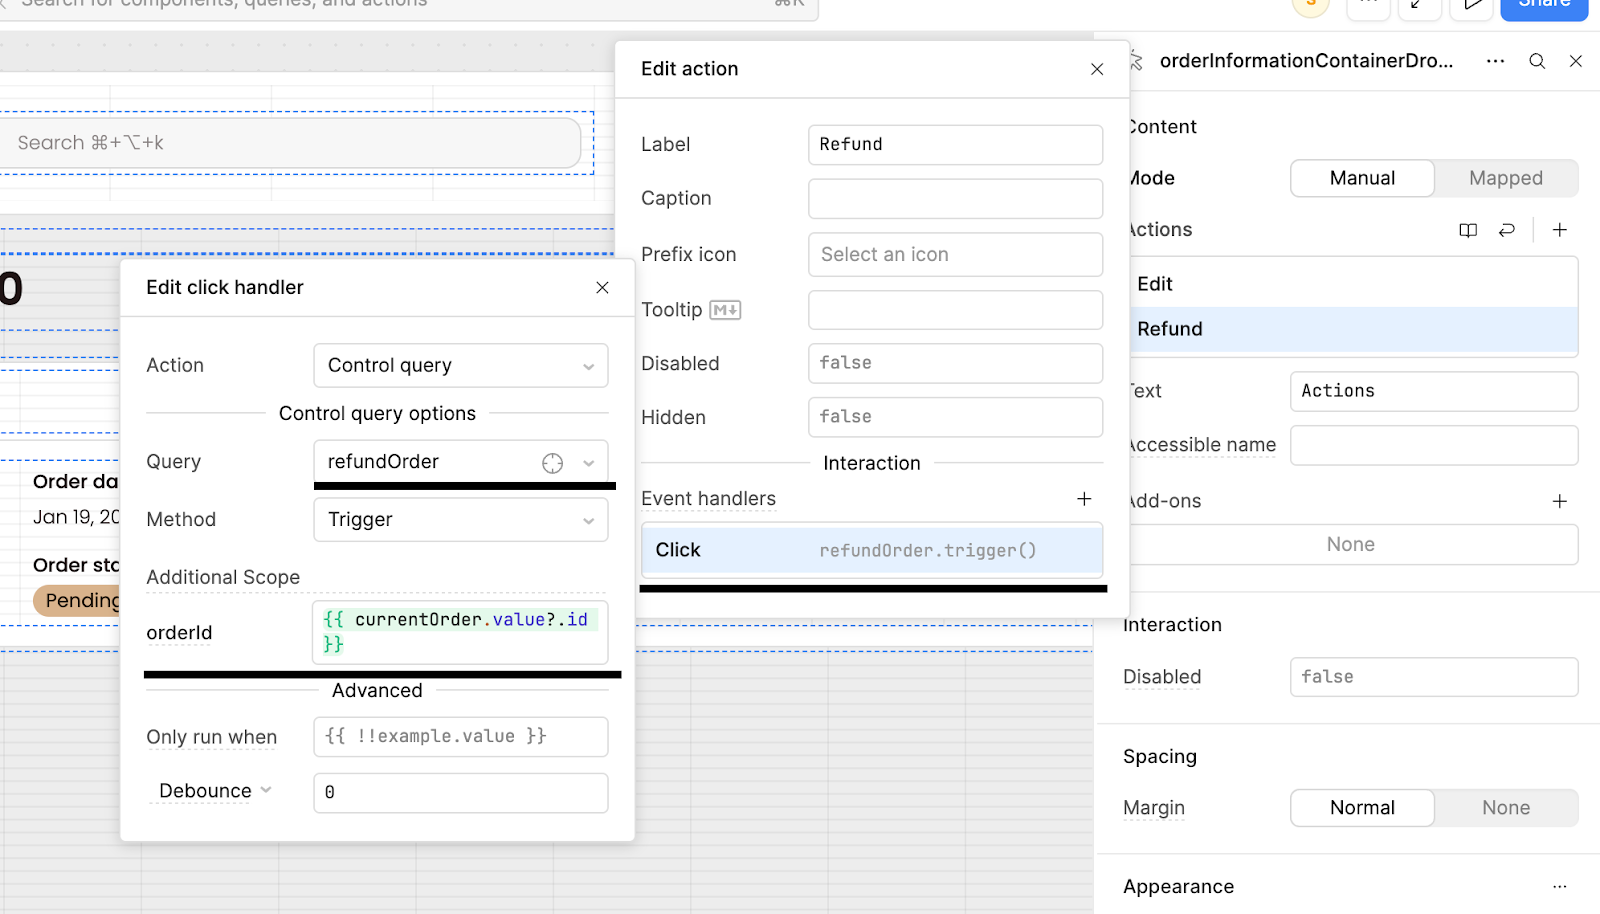
Now let’s go back and create the button that will trigger this code. In this case, we opted for a Dropdown button. A dropdown button is a great way to encapsulate multiple actions for a selected record whilst using minimal screen ‘real estate’. On the right-hand side, in the component inspector, we added the action Refund.
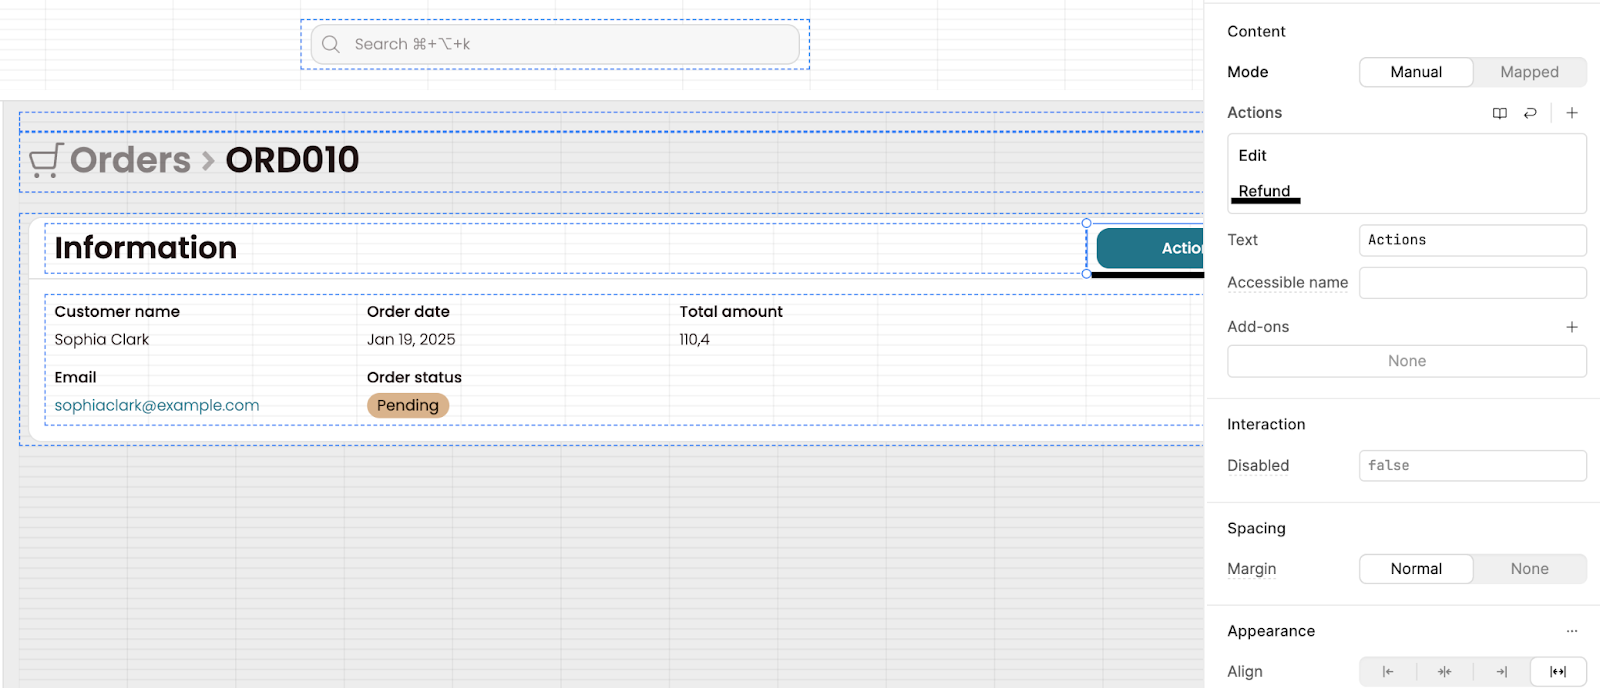
Select the Refund action and choose Control query. Set up a click handler to trigger the refundOrder JS query, and pass the orderId value as additional scope. As an additional security step, in this event handler, you could also set it so that the button only works when the order status of the selected order is not refunded.
The orderId value here is {{ currentOrder.value?.id }}
Now that is set up, let’s go ahead and test it. To do this, you can go to an Order page and click on Actions and Refund. In our example, we’ll see the order status change in the table and, then, our data should be available to retrieve in Zapier in order to set up our email notification workflow.
Use Zapier to send an email from Retool
Now that we’ve set up the webhook, let’s head back to Zapier and use the data we just sent from Retool in an email example.
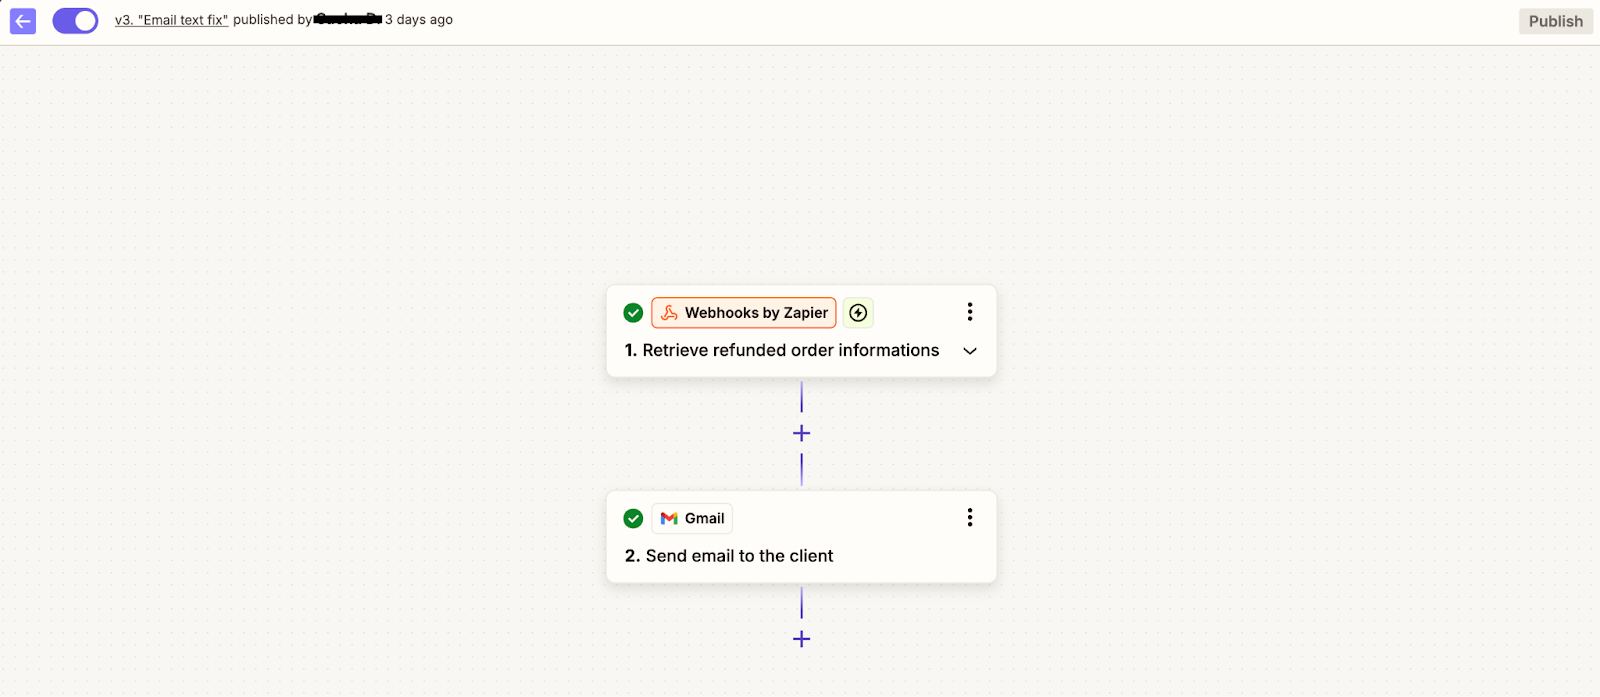
Open your Zap and click on the first step, ‘Retrieve refunded order information’, then click Trigger. Go to the Test tab and click on Find new records.
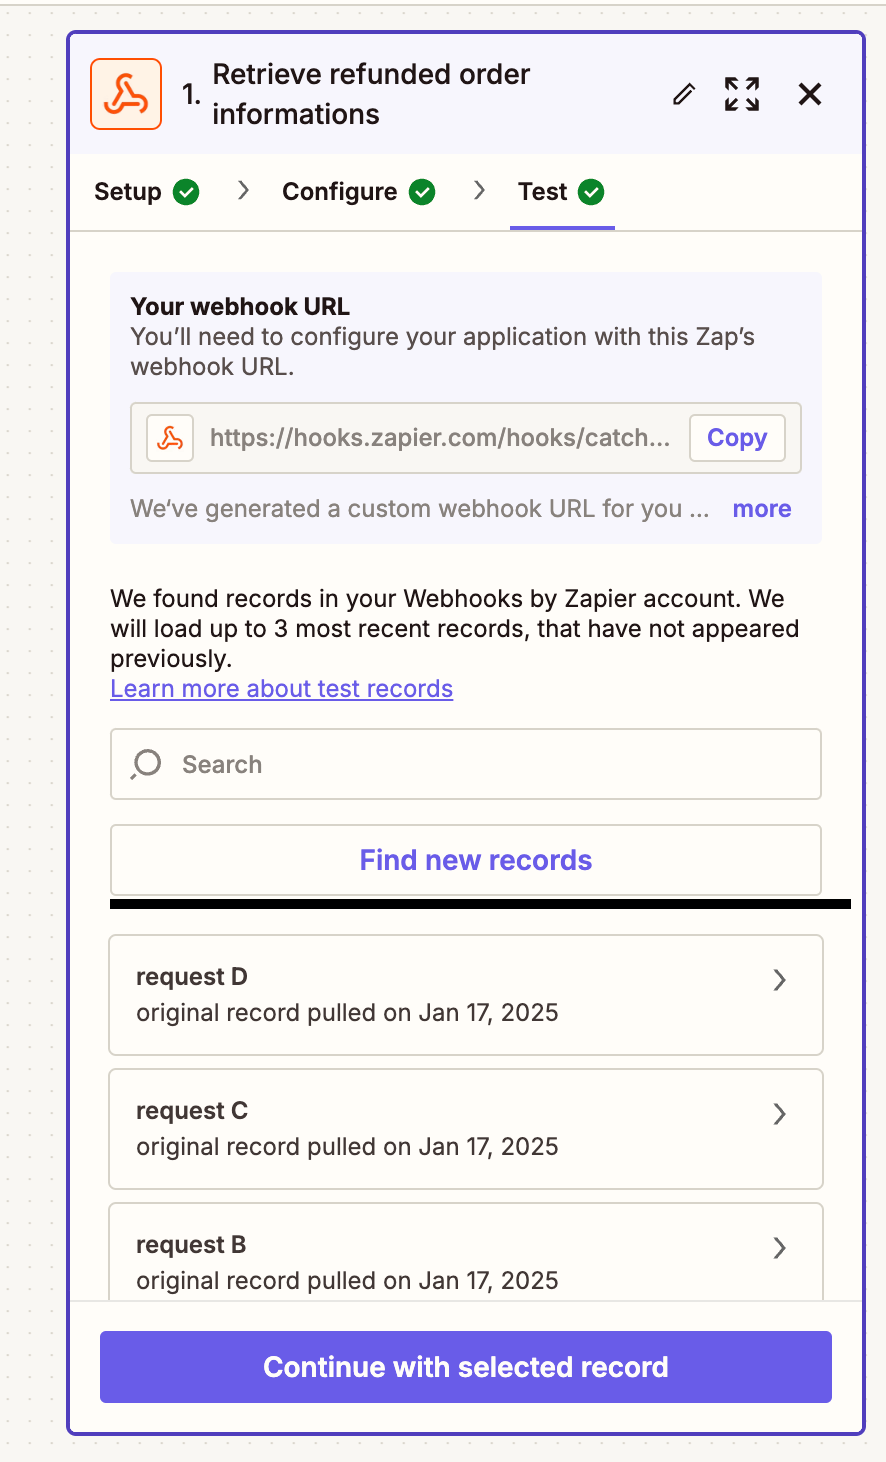
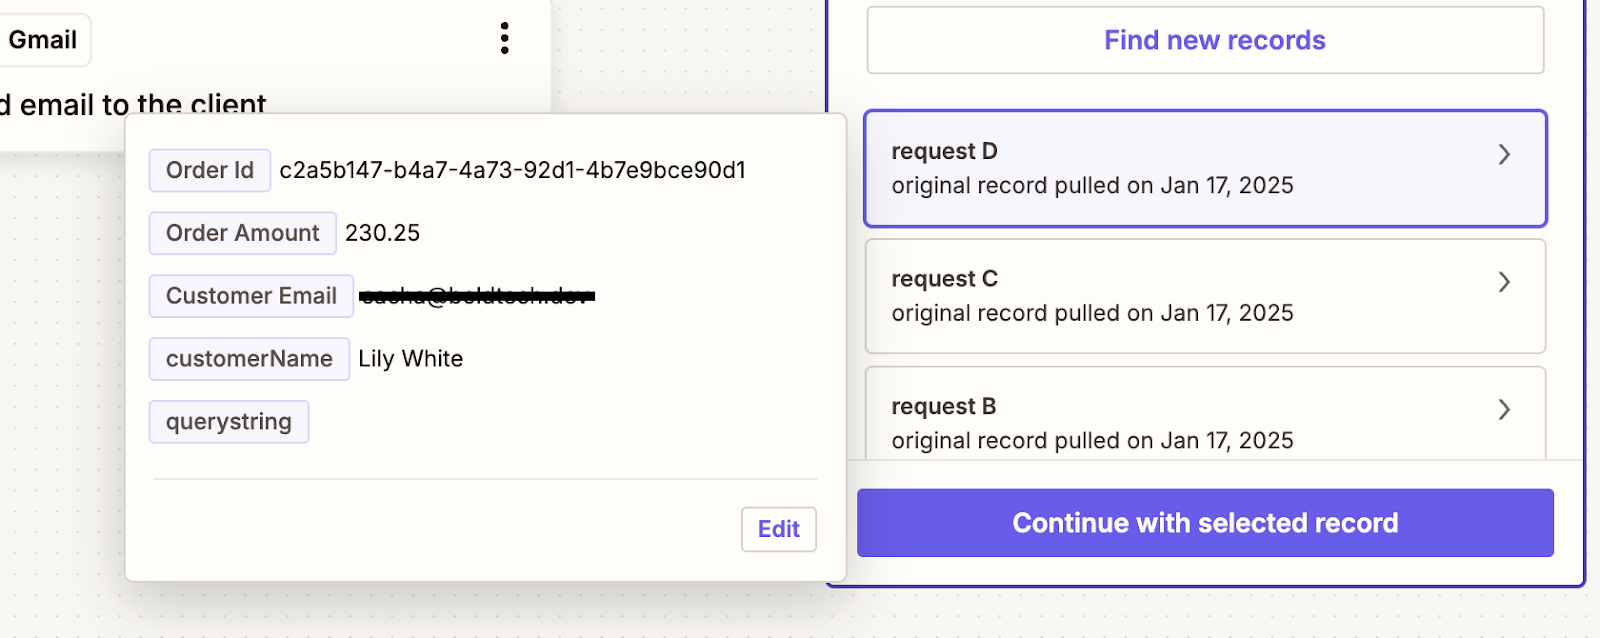
You should see something like this, where the most recent request has passed that last set of data from our Retool app:
To show you how we connect this Retool data to a Zap, let’s set up a Gmail step.
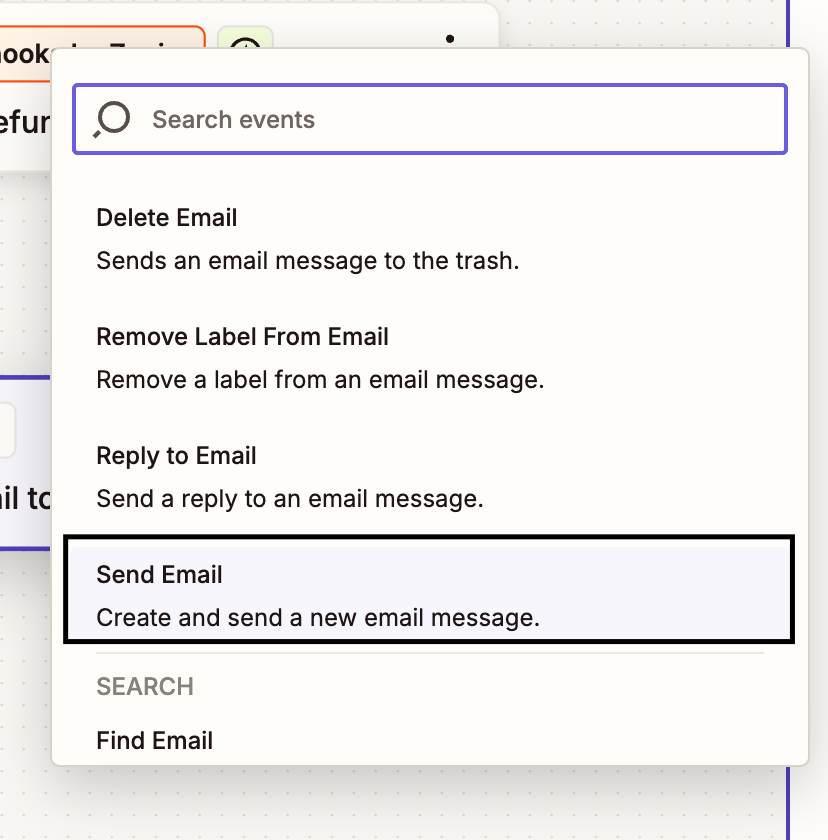
Click on the second step of your Zap (the first ‘Action’) and select the application Gmail.
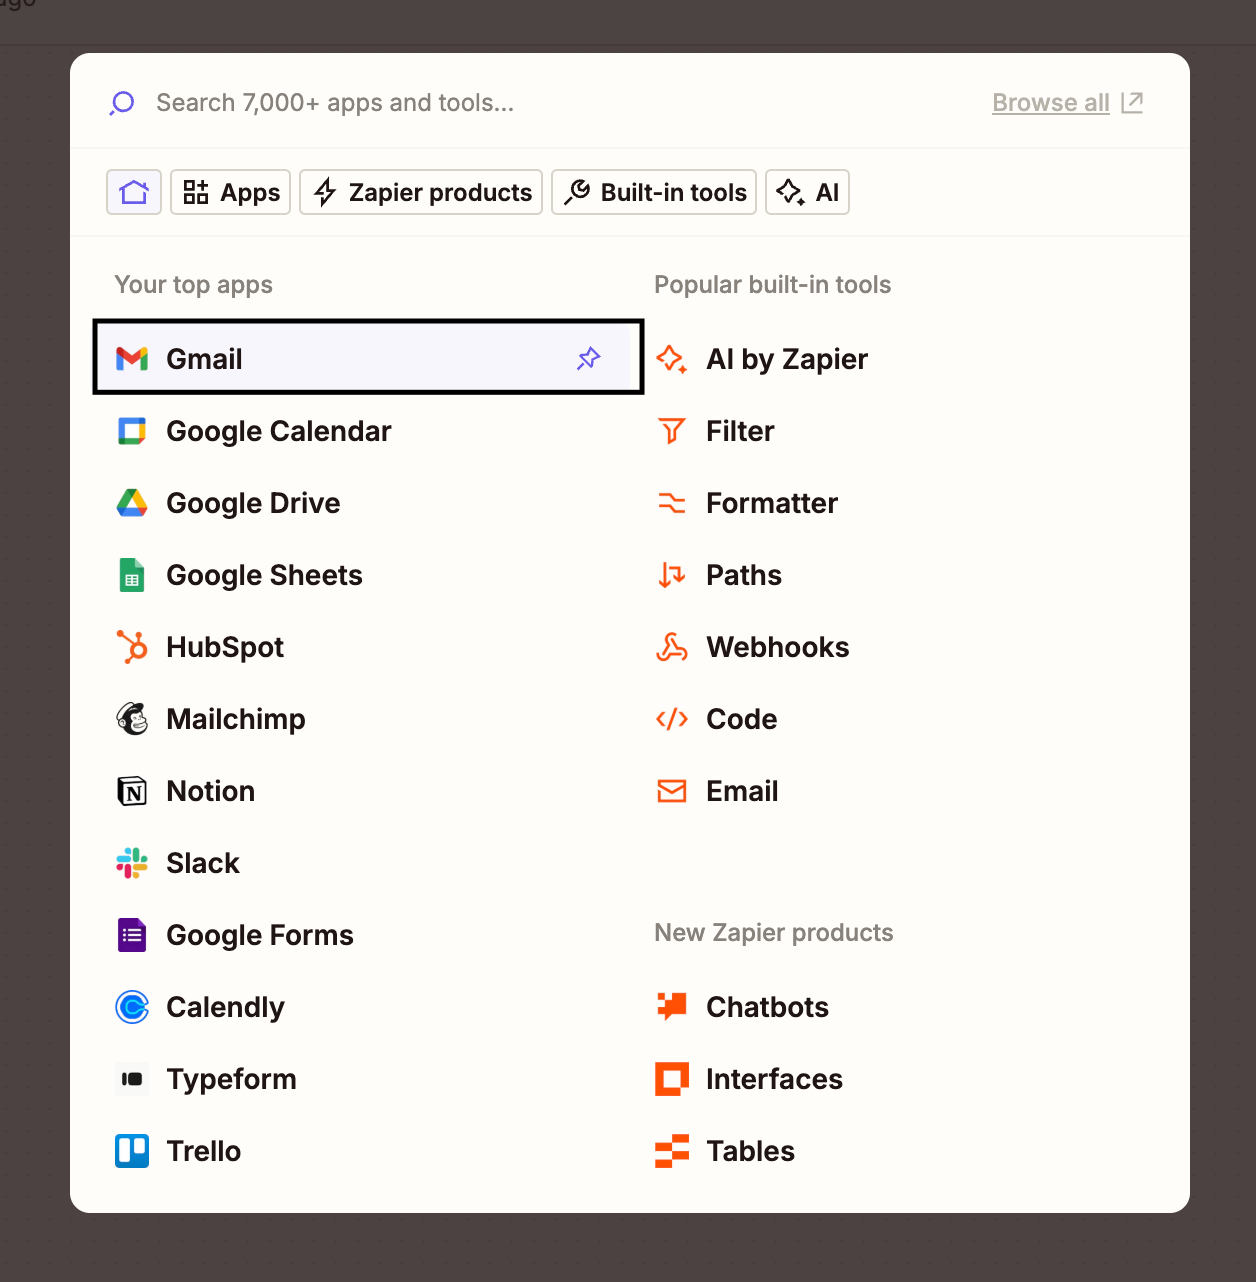
Then select the event Send Email.
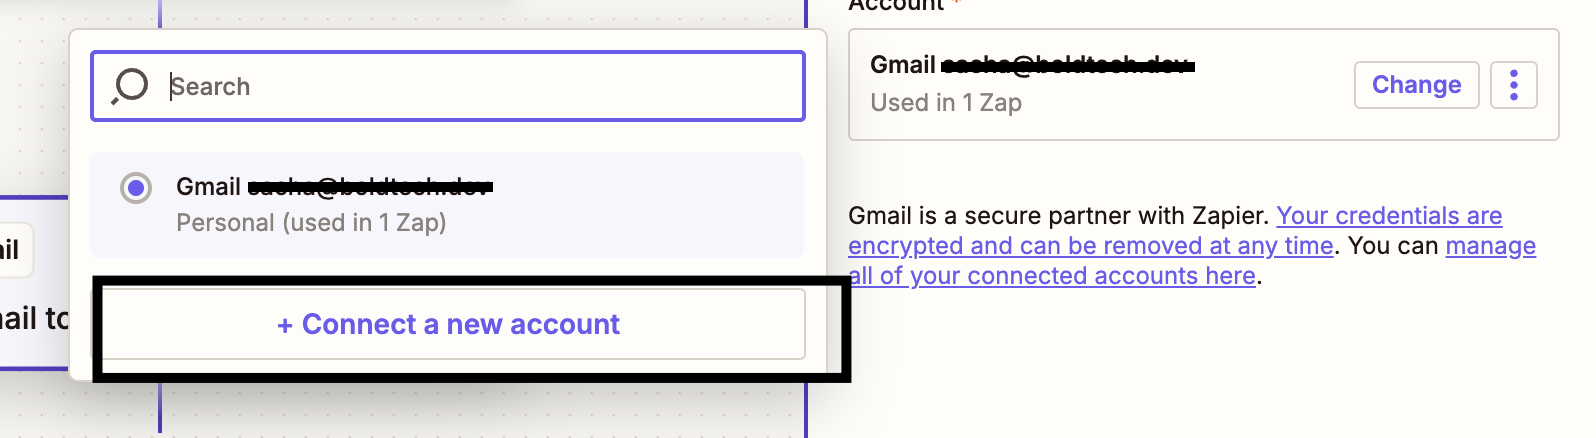
Now you can click on Connect a new account to choose which account you will use to send emails. This will take you through the usual Google login and authentication flow.
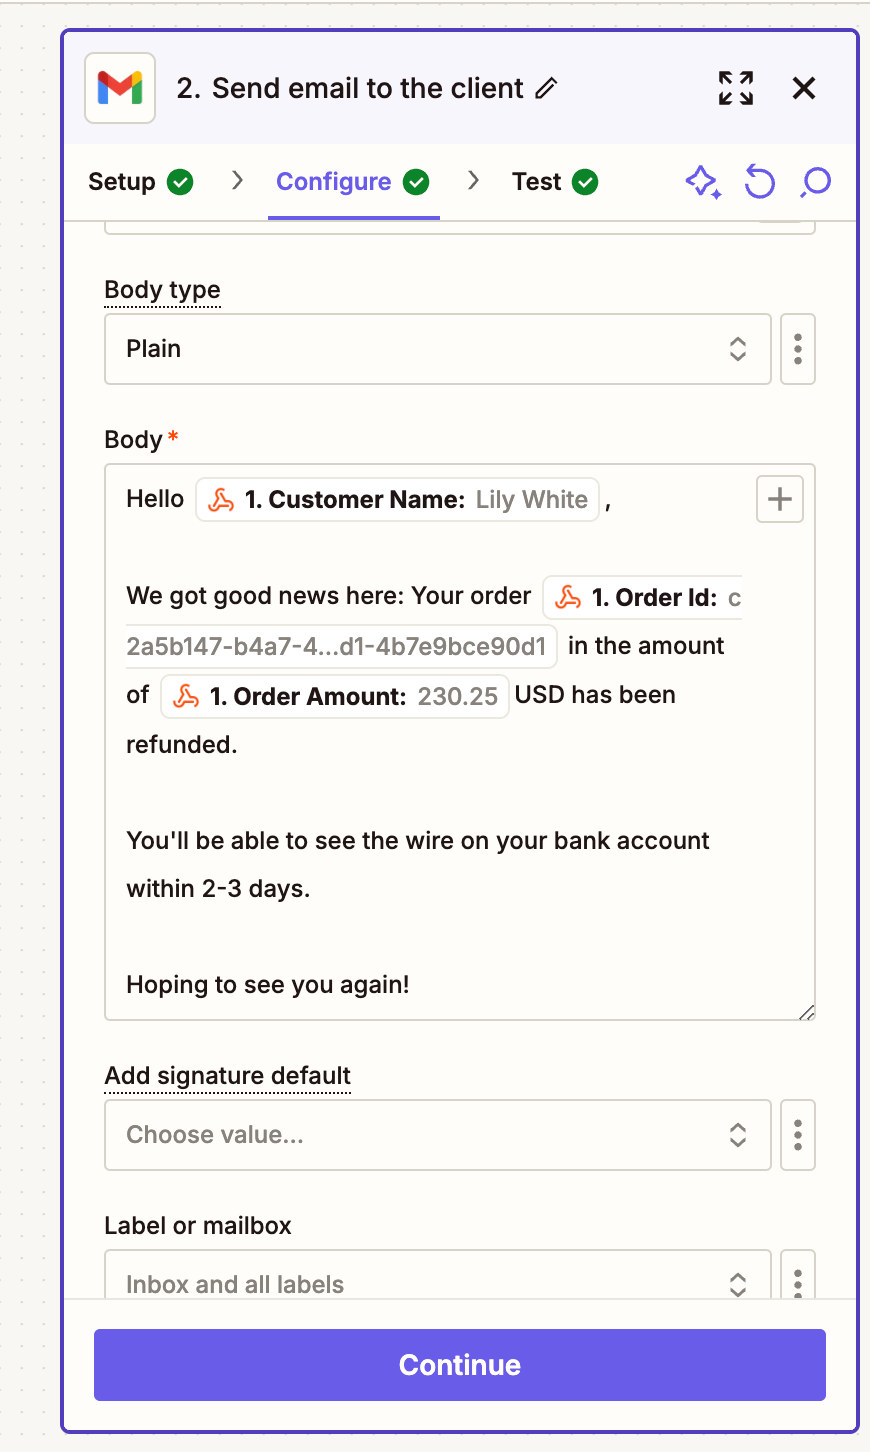
Once done, click Continue. Next you will land on the configuration tab of the Gmail Send Email action. Here, you can configure each parameter of your email.
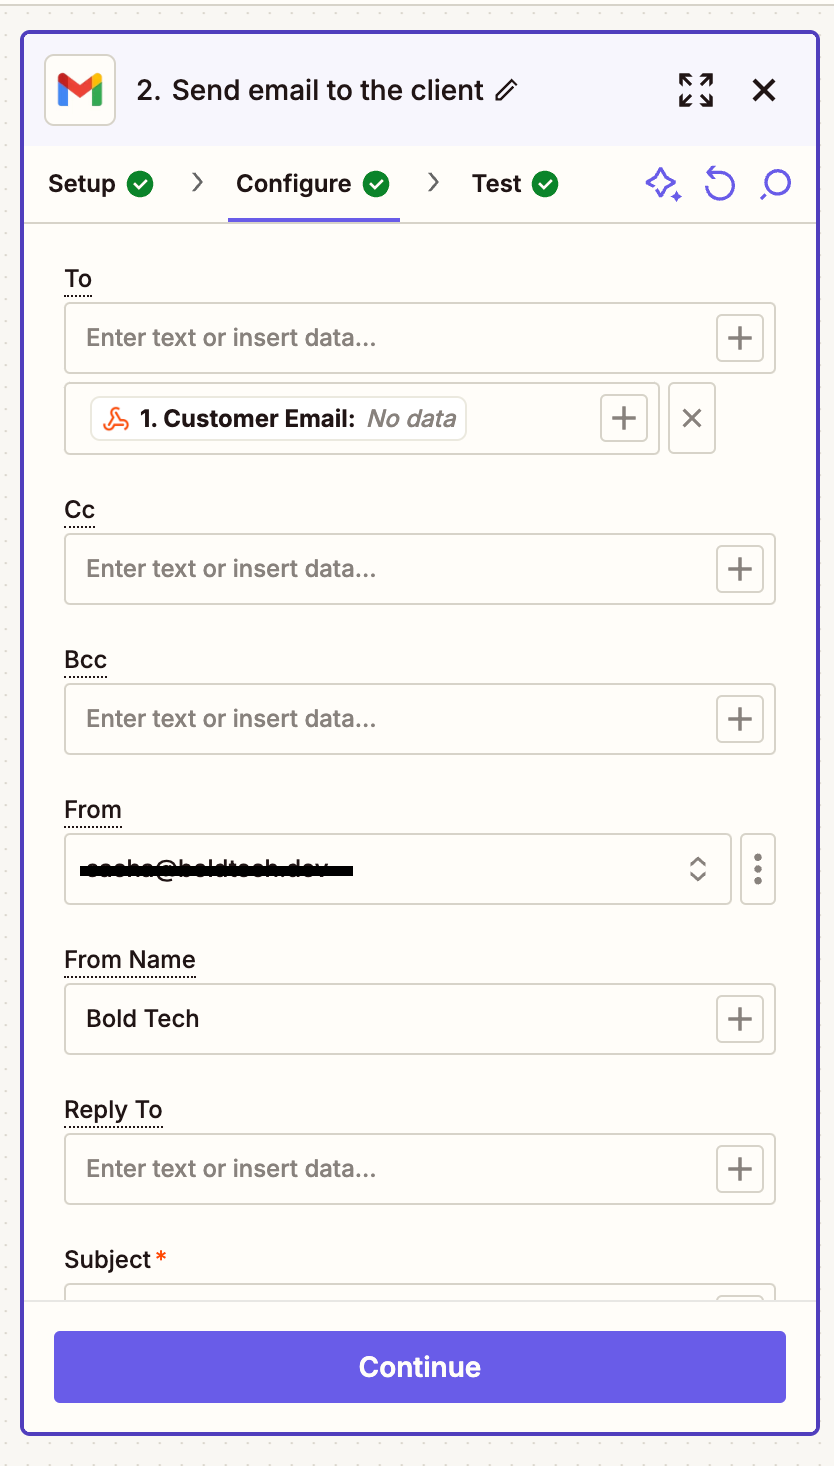
Do you see the Plus + buttons in each field? These allow you to select data from previous actions, including the Zap trigger that just pulled in our order data from Retool.
Let's insert the data we need from the order record: Customer Email, Sender Email, Sender Name, Order Amount, Order Id, Email subject.
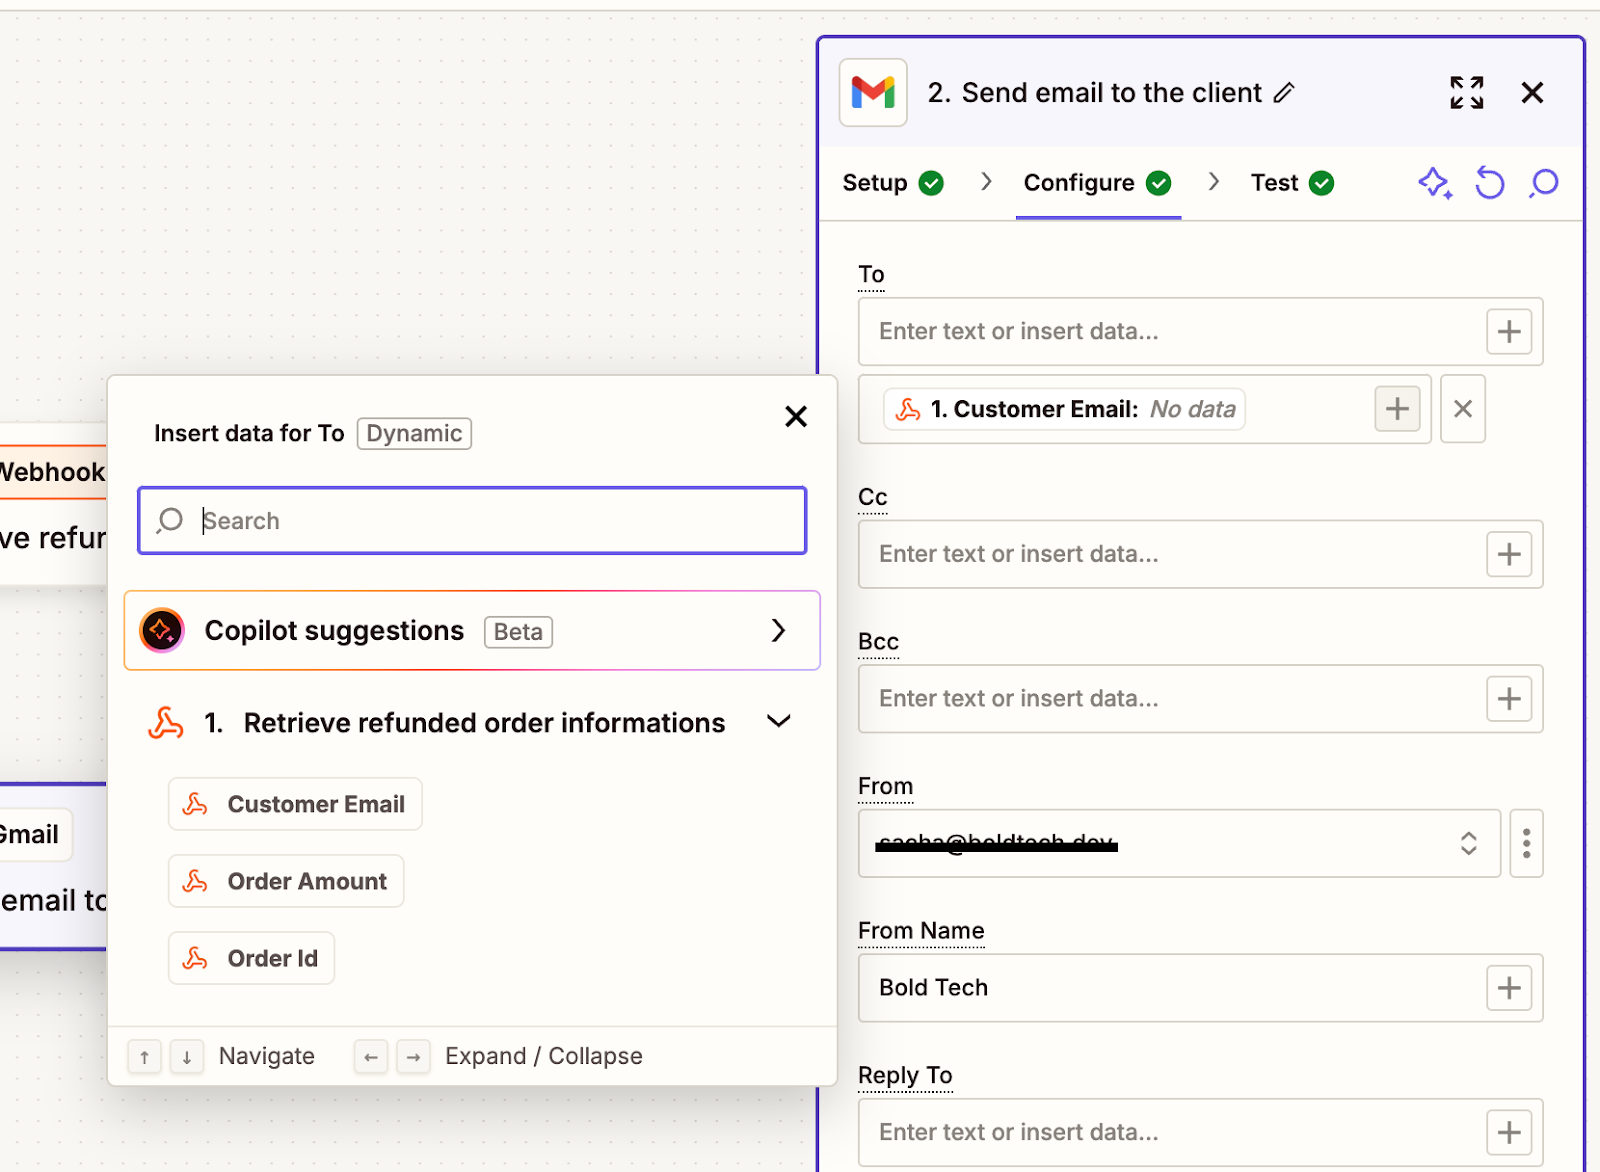
In the Body of your email, you can write your email format and use the + icon to pull in the values from our webhook.
As simply as that, now you can enable and publish your Zap! Make sure to test the workflow with some sample data and make sure it works as intended.
Now, you can keep your pre-existing automation logic in Zapier and trigger these Zaps directly from actions on your Retool apps.
For more Zapier and Retool tutorials, head to our Tutorials section, or you can check out all content on Zapier and Retool on our blog.

